
")
Growing ginger indoors is one of those projects that feels almost too simple once you have done it once. The first time I tried it, I was standing in a small health food store holding a knobby piece of ginger and wondering if this was really going to work. I had just paid a few dollars for organic ginger, and when I broke it down into sections, I realized I could start an indoor ginger plant for about twenty cents.
I chose a health food store intentionally. Ginger is one of those roots that is often treated to prevent sprouting, and conventional ginger can also carry residues from how it is grown and processed. Organic ginger costs a little more upfront, but I liked knowing I was not bringing unnecessary chemicals or heavy metals into my home or soil. When you are growing something indoors, that peace of mind matters.
Quickly Find Ginger Growing Tips
What surprised me most was how forgiving ginger turned out to be. It does not rush, it does not demand constant attention, and it rewards patience. This is not a plant that explodes with growth overnight, but if you enjoy slow, steady progress, ginger fits beautifully into an indoor gardening routine.
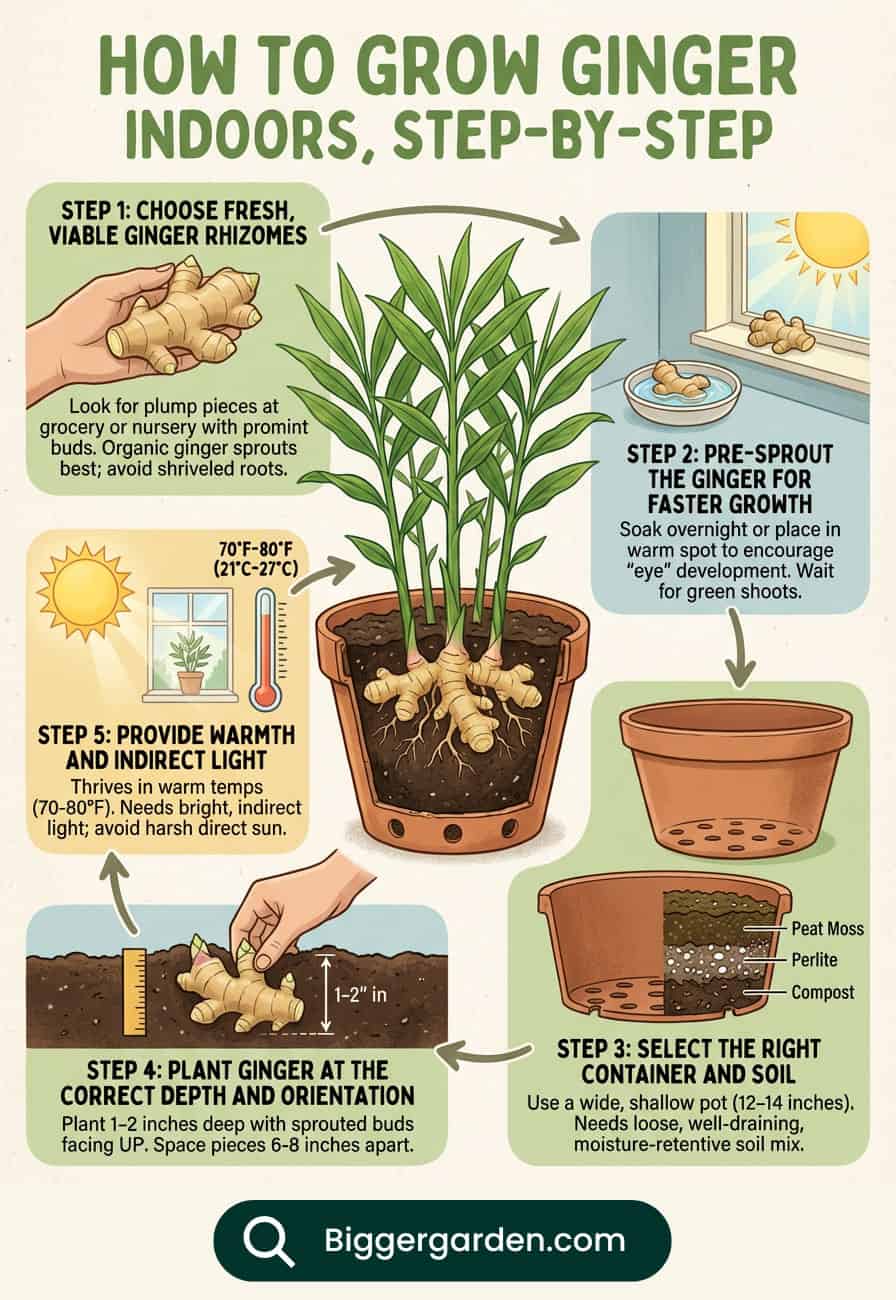
Step 1: Choose Fresh, Organic Ginger With Healthy Eyes
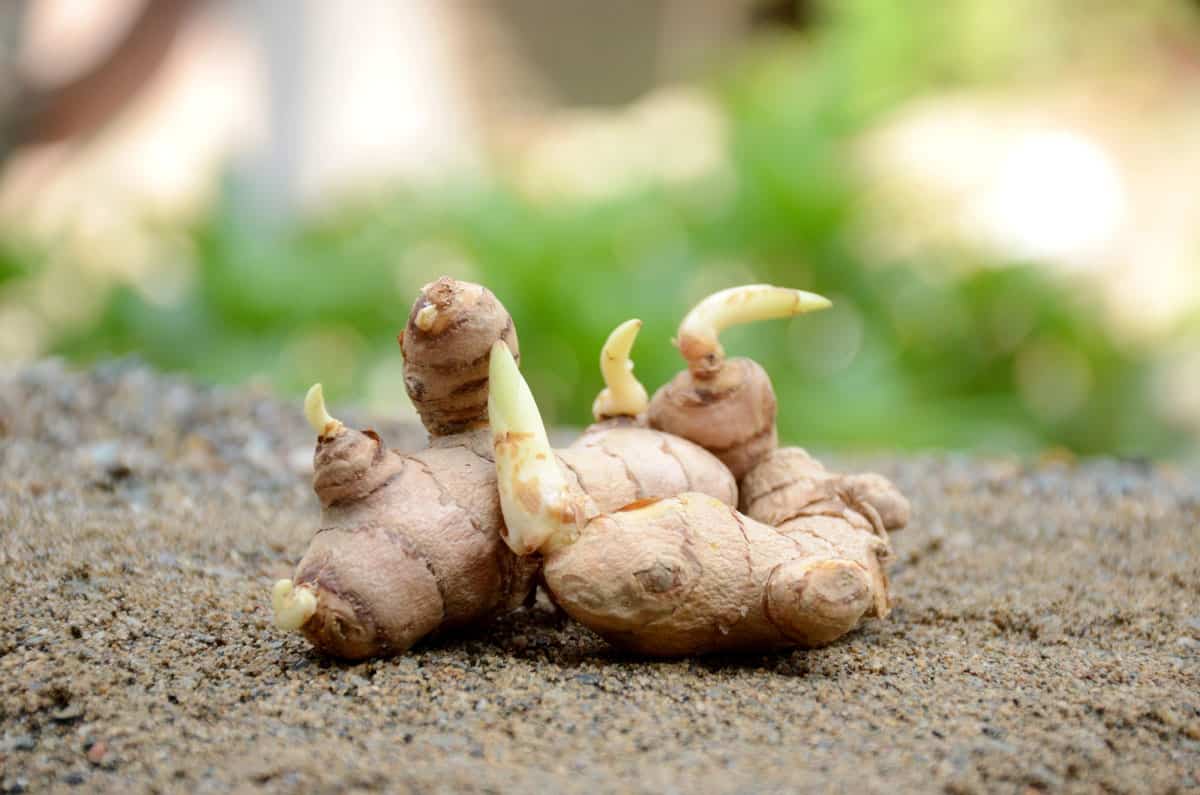
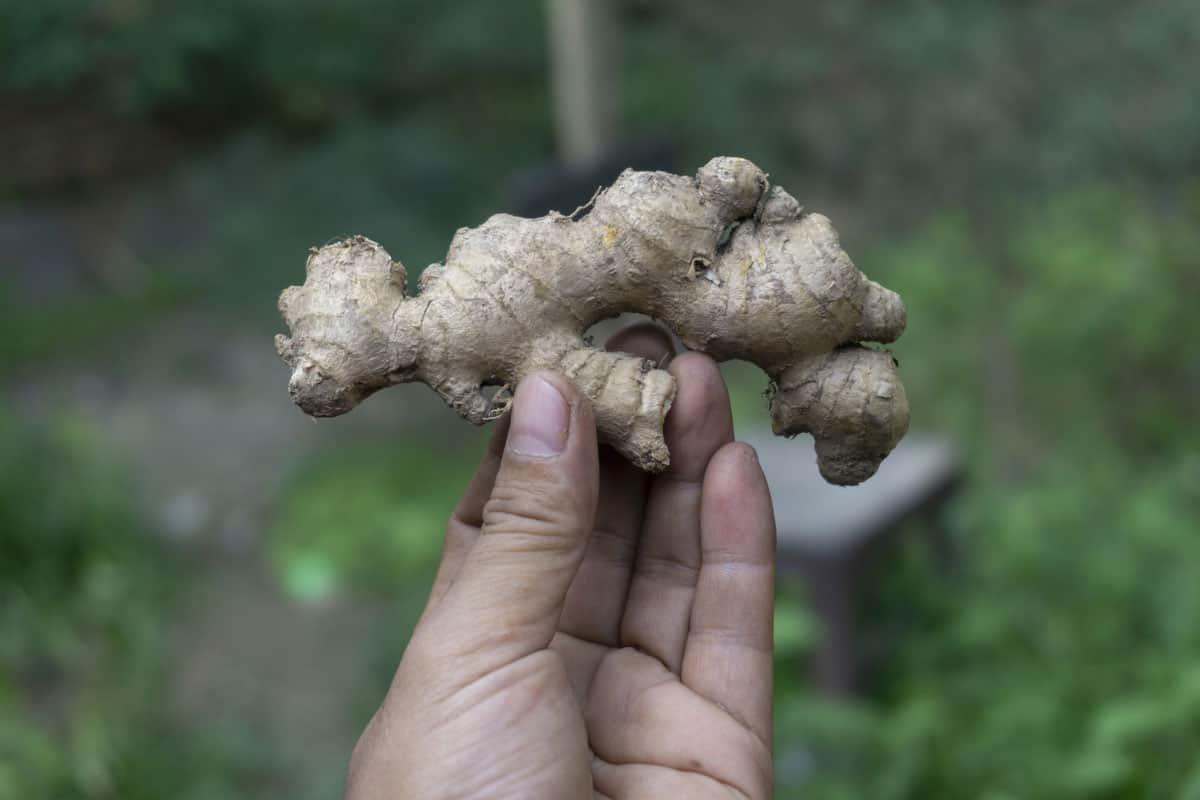
Everything starts with the ginger itself. When I am shopping, I look for pieces that feel firm, heavy for their size, and free from mold or shriveled skin. The most important detail is the eyes, which are small bumps or nubs along the surface. These are the points where new shoots will emerge.

Organic ginger almost always performs better for indoor growing. Many conventional grocery store roots are treated to suppress sprouting, which works against what you are trying to do. Organic ginger is more likely to wake up once planted. Even better, one large piece can be broken into several smaller sections, which is how I ended up planting my first ginger plant for roughly twenty cents.
I usually break the ginger apart with my hands rather than cutting it. Each piece should have at least one healthy eye. If a section looks dry or damaged, I skip it. Ginger does not need to look perfect, but it does need to feel alive.
Step 2: Pre-Sprout the Ginger Before Planting
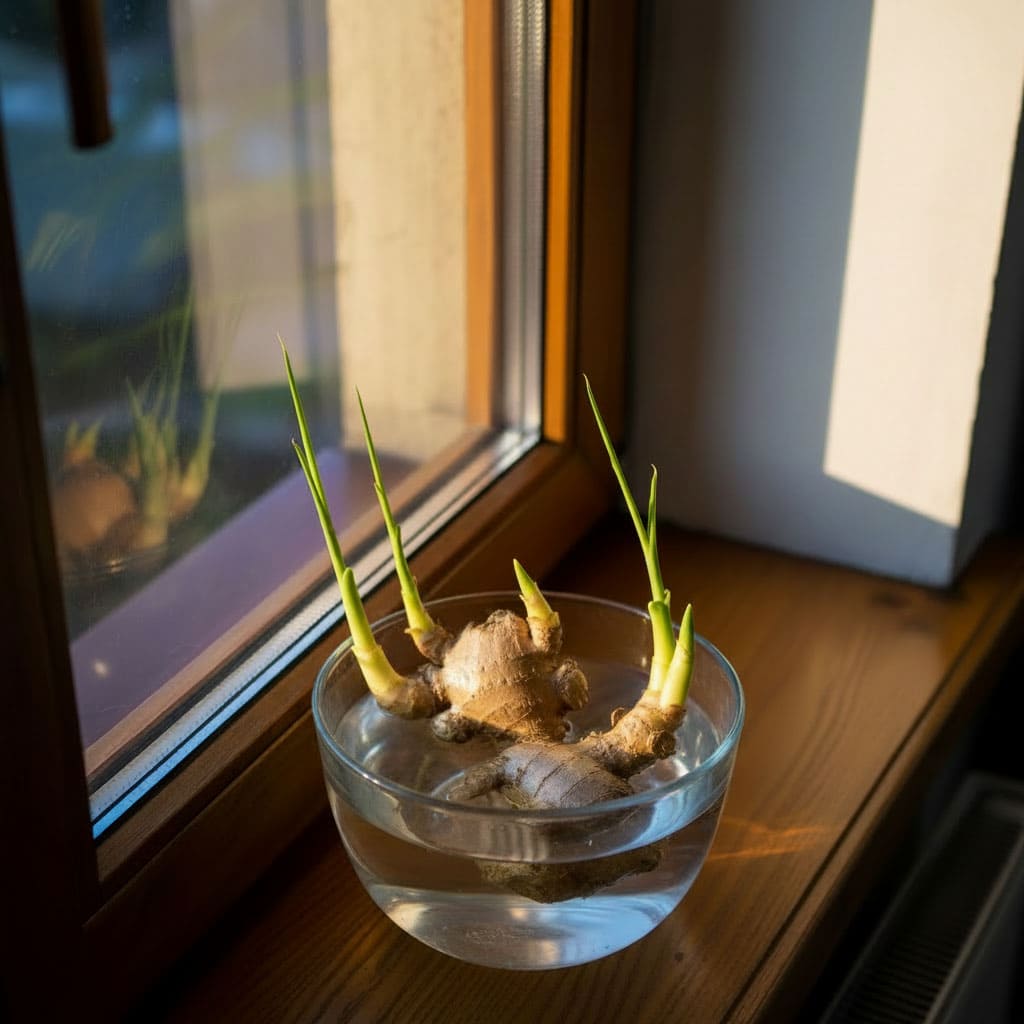
This step is optional, but I always do it because it speeds things up and reduces guesswork. After separating the ginger, I let the pieces sit in a warm, dry place for a few days. Sometimes I place them on a plate near a window where they get light but no direct sun.
During this rest period, the eyes begin to swell and sometimes even show small green tips. This tells me the ginger is ready. If you skip this step, the ginger will still sprout in soil, but it can take longer, and you might spend weeks wondering if anything is happening.
Pre-sprouting also helps prevent rot. Fresh ginger straight into damp soil can sometimes struggle, especially indoors where airflow is limited. Giving it time to dry slightly and wake up makes a noticeable difference.
Step 3: Pick a Wide Pot and the Right Soil
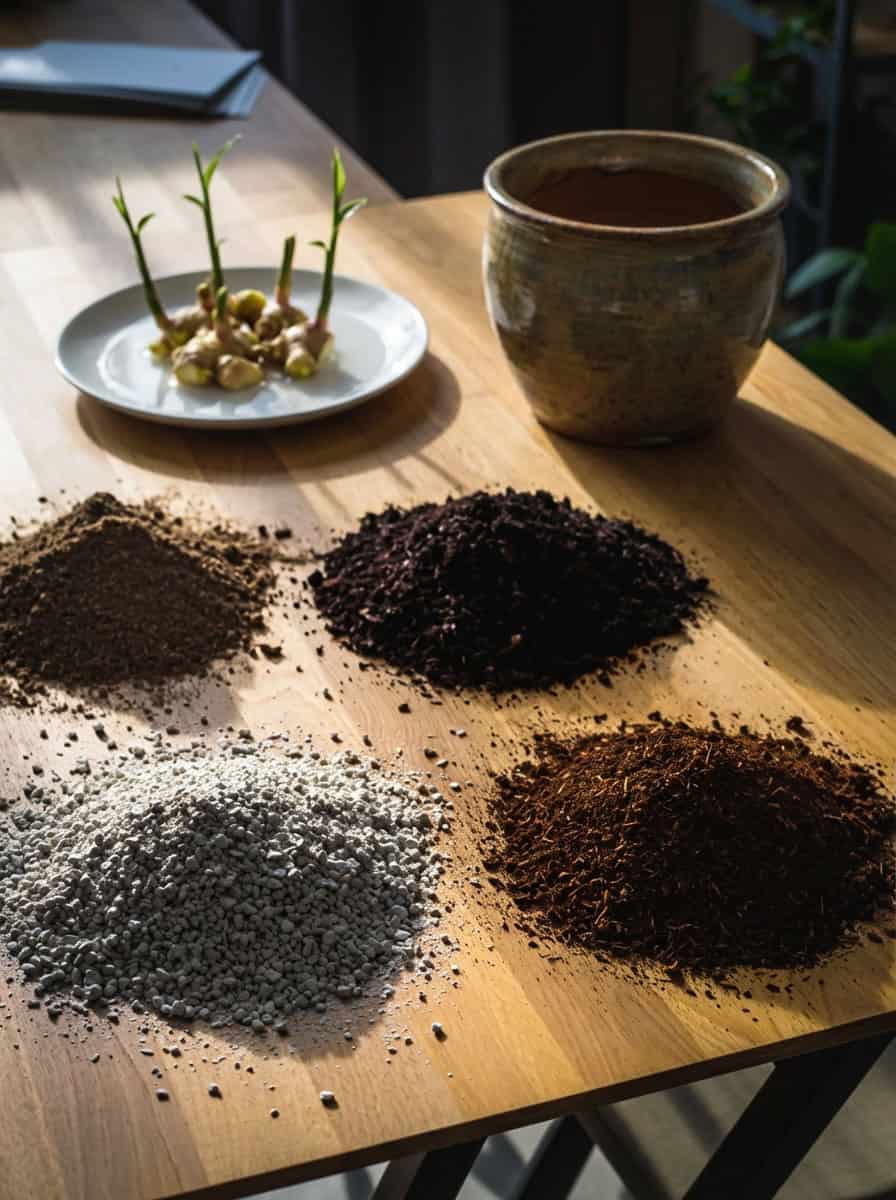
Ginger grows horizontally, not straight down. Because of that, a wide, shallow pot works better than a deep one. I usually choose something at least twelve inches wide with good drainage holes. Drainage matters more than pot depth.
For soil, I use a loose potting mix with added compost. Ginger likes moisture, but it hates sitting in soggy soil. If the soil compacts or stays wet for too long, growth slows and rot becomes a real risk. A mix that drains well while still holding some moisture creates the balance ginger prefers.
I also avoid heavy garden soil indoors. It tends to compact, and pests can become an issue. A clean, high quality potting mix gives ginger the best possible start.
Step 4: Plant Ginger Shallow and With Intention
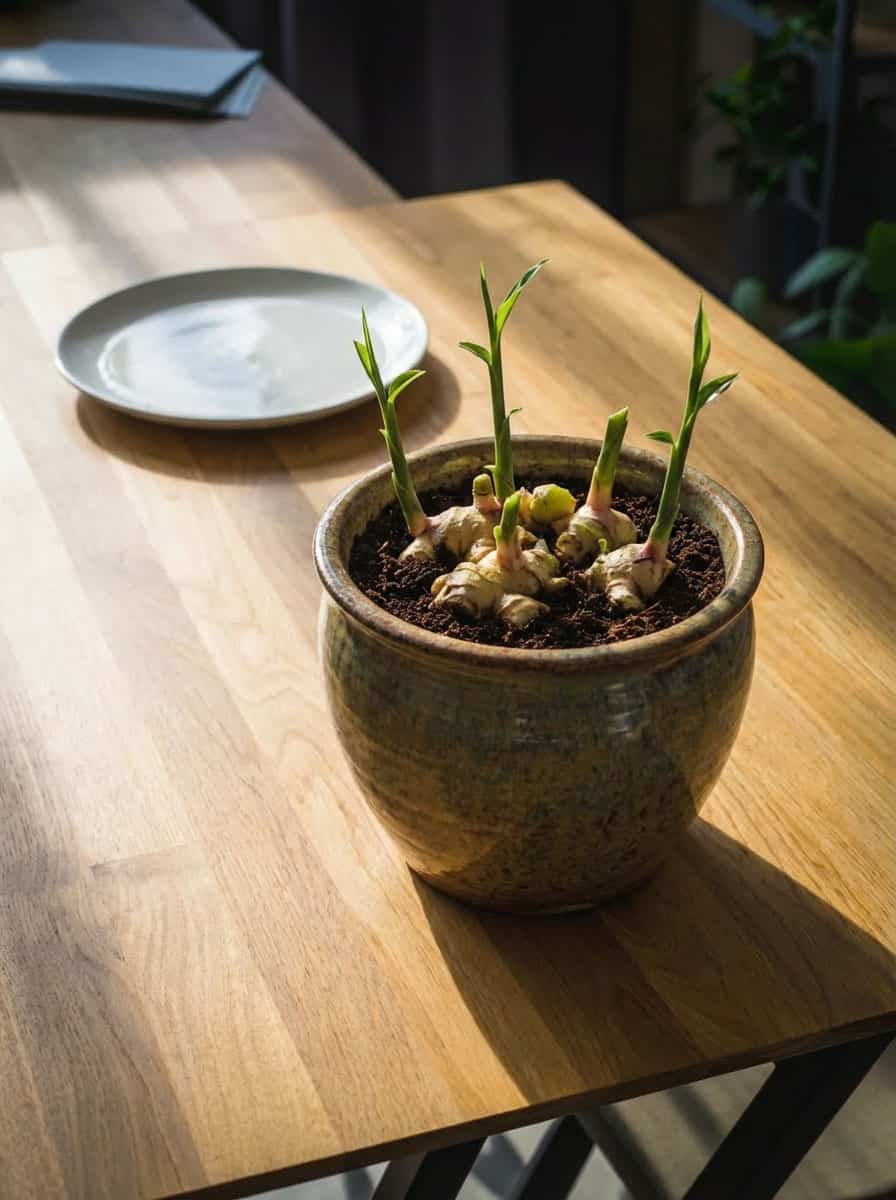
Planting ginger is straightforward, but depth matters. I place the ginger pieces just below the surface of the soil, usually about one inch deep. The eyes face upward, but ginger will find its way even if placement is not perfect.
I space pieces a few inches apart to give them room to spread. Once planted, I lightly cover them with soil and water gently. At this stage, I am not trying to soak the pot. I want the soil evenly moist, not wet.
Then I wait. Ginger is not fast, and that is part of the process. It can take a few weeks before you see shoots break the surface. During this time, I keep the pot warm and resist the urge to overwater.
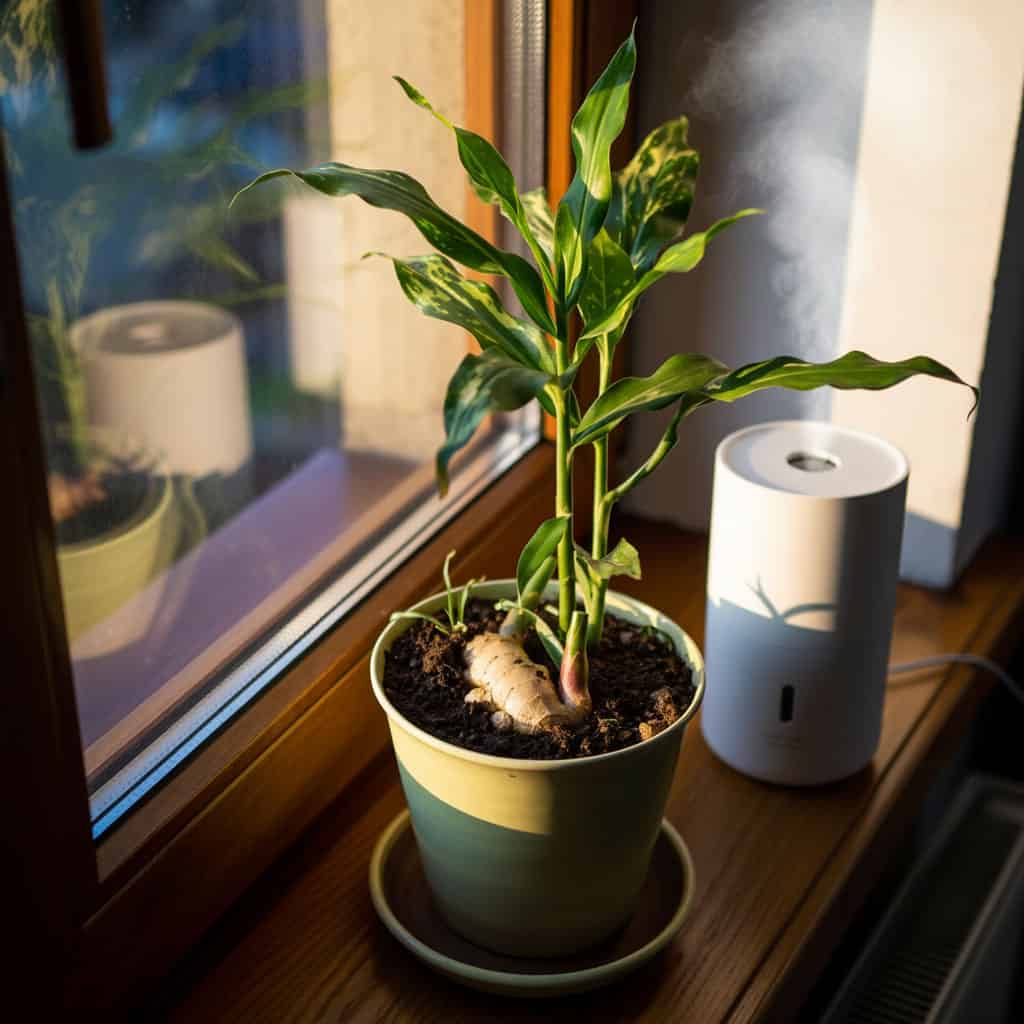
Step 5: Give Ginger Warmth and Indirect Light
Ginger is a tropical plant, and warmth is non negotiable. I keep my indoor ginger where temperatures stay consistently warm, ideally above twenty degrees Celsius. Cold rooms slow growth dramatically.
Light matters too, but not in the way many people expect. Ginger prefers bright, indirect light rather than full sun. A sunny window filtered through a curtain works well. Too much direct sun can stress the leaves, especially indoors where heat builds up quickly.
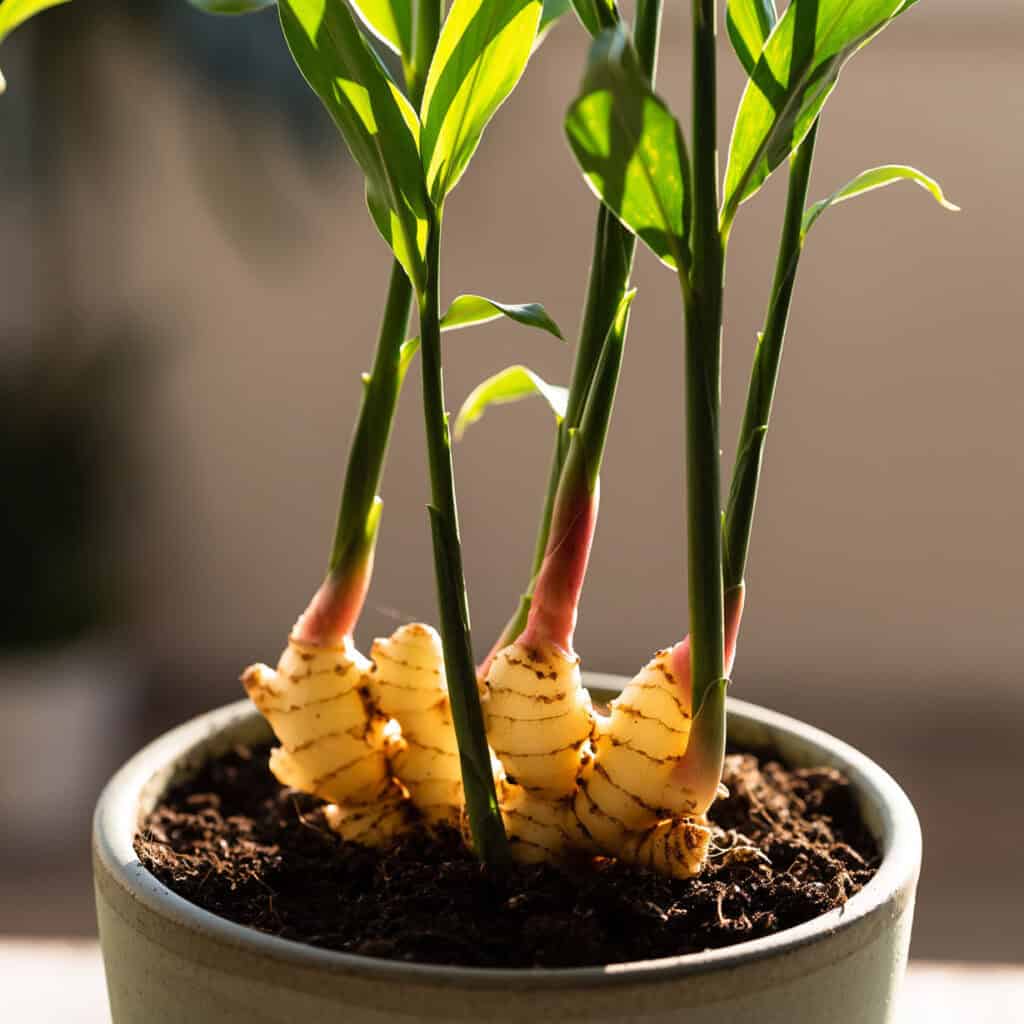
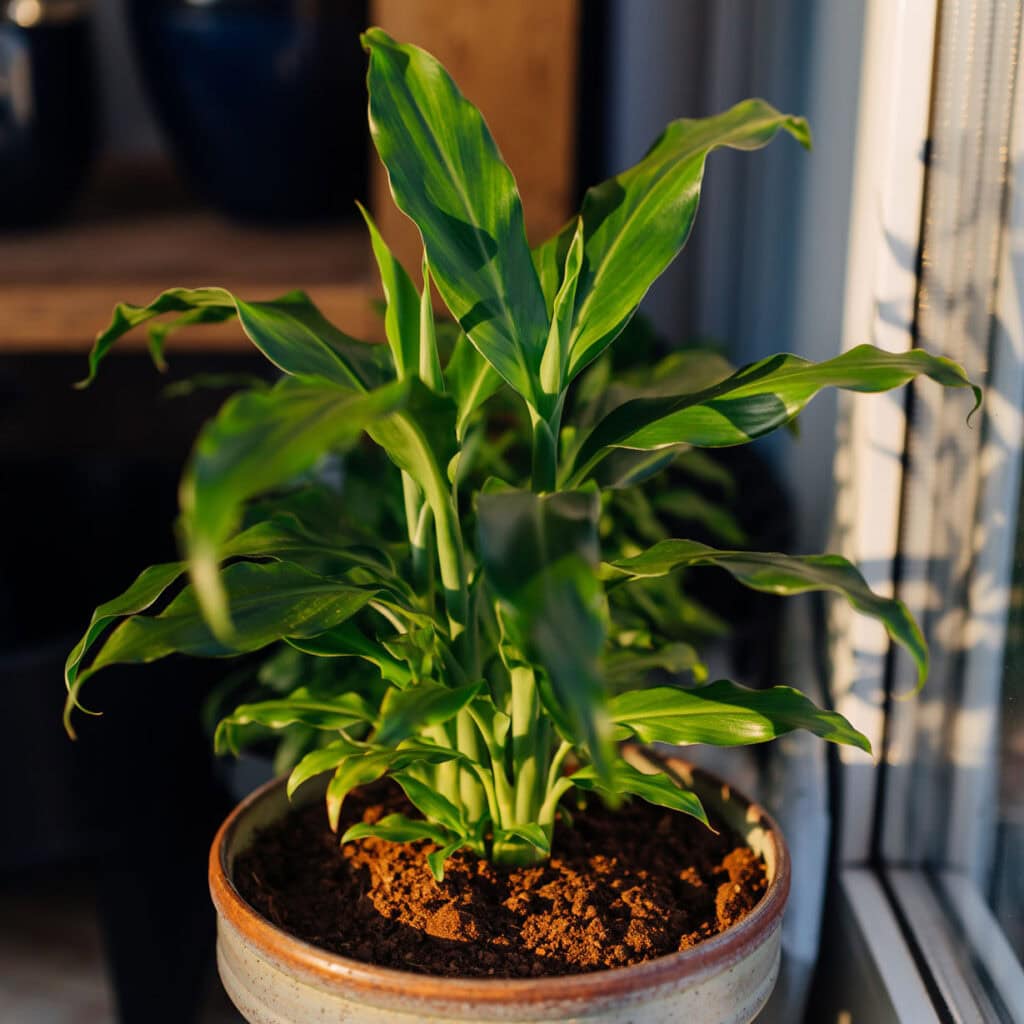
Once shoots appear, growth becomes more visible. Tall, grassy leaves emerge, and the plant starts to look more like a houseplant than a root experiment. This is when ginger begins to feel rewarding.
Step 6: Water Gently and Support Humidity
Watering ginger indoors requires restraint. I water when the top inch of soil feels dry, then stop. Overwatering is the most common mistake I see people make. Ginger prefers consistent moisture, not saturation.
Humidity helps too. In dry homes, especially during winter, ginger benefits from a little extra moisture in the air. Sometimes I mist the leaves lightly, or I place the pot near other plants to create a small humid pocket.
Here are a few simple watering and humidity reminders I follow:
- Water when the soil surface feels dry, not on a schedule
- Always let excess water drain fully
- Avoid letting the pot sit in standing water
- Increase humidity during dry seasons with light misting
Small adjustments like these keep ginger growing steadily rather than struggling.
Step 7: Feed Lightly During Active Growth
Ginger does not need heavy feeding. Once leaves are well established, I feed lightly every few weeks using a diluted organic fertilizer. Something balanced works well, but I lean toward compost tea or gentle liquid feeds rather than strong synthetic options.
Overfeeding can lead to leafy growth at the expense of the root, which is the part you want to harvest. Slow and steady nourishment encourages the rhizome to develop underground.
If the leaves look healthy and green, I take that as a sign things are on track. Ginger communicates clearly if something is off. Yellowing leaves often point to overwatering or nutrient imbalance rather than a need for more fertilizer.
Step 8: Harvest Ginger Without Killing the Plant
Harvesting is where patience pays off. Ginger can be harvested early as baby ginger after a few months, or you can let it grow longer for more mature roots. I usually wait at least eight to ten months for a fuller harvest.
To harvest, I gently dig around the edge of the pot and remove a section of the rhizome. As long as part of the plant remains intact, it will continue growing. This approach lets you enjoy fresh ginger without starting over.
When the leaves begin to yellow and die back naturally, that is a sign the plant is entering dormancy. At that point, you can harvest the entire root if you want. Fresh homegrown ginger has a softness and aroma that store bought ginger rarely matches.
Final Thoughts
Growing ginger indoors has become one of my favorite low effort projects. It starts with something as simple as a twenty cent piece of ginger and turns into months of quiet, steady growth. There is something grounding about watching a plant develop slowly, especially one that ends up back in your kitchen.
Choosing organic ginger, paying attention to warmth and moisture, and letting the plant move at its own pace makes all the difference. Ginger does not demand perfection. It rewards consistency and patience.
If you have ever looked at a piece of ginger and wondered if it could grow, the answer is yes. With a little care and the right setup, it grows surprisingly well indoors, and it reminds you that even the most ordinary ingredients still carry life inside them.