

Your guide to the Best Sourdough Discard Pizza Dough Recipe! If you’ve never had sourdough pizza, you are in for a treat. It’s tender, flavorful, and chewy with big air bubbles. Though you need to plan ahead, the better-than-pizza-parlor pies are more than worth it. Top it with your favorite toppings, and pizza night will never be the same!
This post was originally published on October 28, 2020. It was updated with new recipe information and photos on June 1, 2025.
Sourdough pizza dough: I was blind, but now I see! Though I was initially a slow convert to the church of sourdough, I am now singing its praises. What I thought was complicated and involved is actually straightforward and (dare I say!) simple. Especially when it comes to this easy sourdough pizza crust.
I say easy because the process, at least for me, is a lot easier than sourdough bread. As long as you have a mature sourdough starter, a warm kitchen/house, and patience, you will be successful!
Since sourdough pizza (and sourdough everything) takes a long time, I recommend getting started on your pizza crust at least a day before you want to bake it. However, if it is your first time, I recommend possibly longer to give you wiggle room for any unscheduled hiccups.
Alexandra Cooks inspired this recipe. Though I initially learned from her, I’ve adapted and whittled down the process to include the steps that made the most sense for me and wrote my recipe accordingly. I also recorded a video (below) to show you the simple process step-by-step process.
For more creative vegan pizza recipes, check out my vegan black bean crust pizza and vegan cauliflower crust pizza.
Okay, let’s get baking now, shall we?!
Sourdough Pizza Video
If you’ve never made pizza dough with sourdough, I recommend you check out this video before starting!
In just about 10 minutes, I share everything you need to know (plus you get to hear toddler Baby J chat with me as I cook. So cute if I do say so myself!):
Keys to Excellent Sourdough Pizza Crust
If you’re intimidated by making sourdough starter pizza crust, let me help! Anyone can make sourdough by following these simple tips:
- Plan Ahead. Though the steps are beginner-baking friendly, the recipe does take some time. I recommend starting the pizza dough at least a day in advance. See my example baking schedule below for reference!
- Don’t Rush the Process. For the fullest flavored sourdough discard pizza crust, leave it plenty of time to rise. Thankfully, the active steps are very easy, and the rest of the recipe is hands-off; the sourdough works its magic while it (and you!) rest.
- Refrigerate the dough for an extended period. Store for 6 hours up to 3 days. For longer storage (2-3 days), I recommend moving the dough balls to covered containers.
- Bring the dough to room temperature before baking. Warmer, room-temperature dough shapes more easily and retains more bubbles as it bakes. Let it warm up for 30-60 minutes before shaping and assembling your pizzas.
- Measure the ingredients by weight. If you don’t have a food scale, I recommend purchasing one. This is the most accurate measuring method and will ensure consistently delicious pizza every time! However, if you’re in a pinch, I do offer estimates for cup measurements.
Sourdough Pizza Dough Baking Schedule
The process of making homemade sourdough discard pizza dough can feel overwhelming. Here’s a recommended schedule for doing so:
- The Afternoon Before – Make the dough by mixing the water, starter, salt, and flour. Place it in a covered mixing bowl and let rest for 30 minutes.
- The Evening Before – Fold and stretch the dough 4 times, doing a set of folding and stretching every 30 minutes for 2 hours. Cover the bowl of dough and let it rest at room temperature overnight.
- The Morning Of – Cut the dough into 4 balls. Shape, place on a floured, towel-lined baking sheet, and refrigerate for at least 6 hours.
- The Afternoon Of – Remove the dough from the refrigerator. Let it sit at room temperature for 30-60 minutes.
- The Evening Of – Bake the pizzas and enjoy!
If desired, you can refrigerate the dough for up to 3 days, so you can start this process earlier, too.
Working with Sourdough Starter
If you already have a sourdough starter, this pizza dough is a perfect way to enjoy and use your discard! If you don’t have one, you can still make this pizza by making sourdough starter, asking a friend to share some, or purchasing a premade starter.
If you make one, I recommend giving yourself at least a week. You can create a starter faster in a warmer kitchen, but it may take up to 2 weeks if your kitchen is cool.
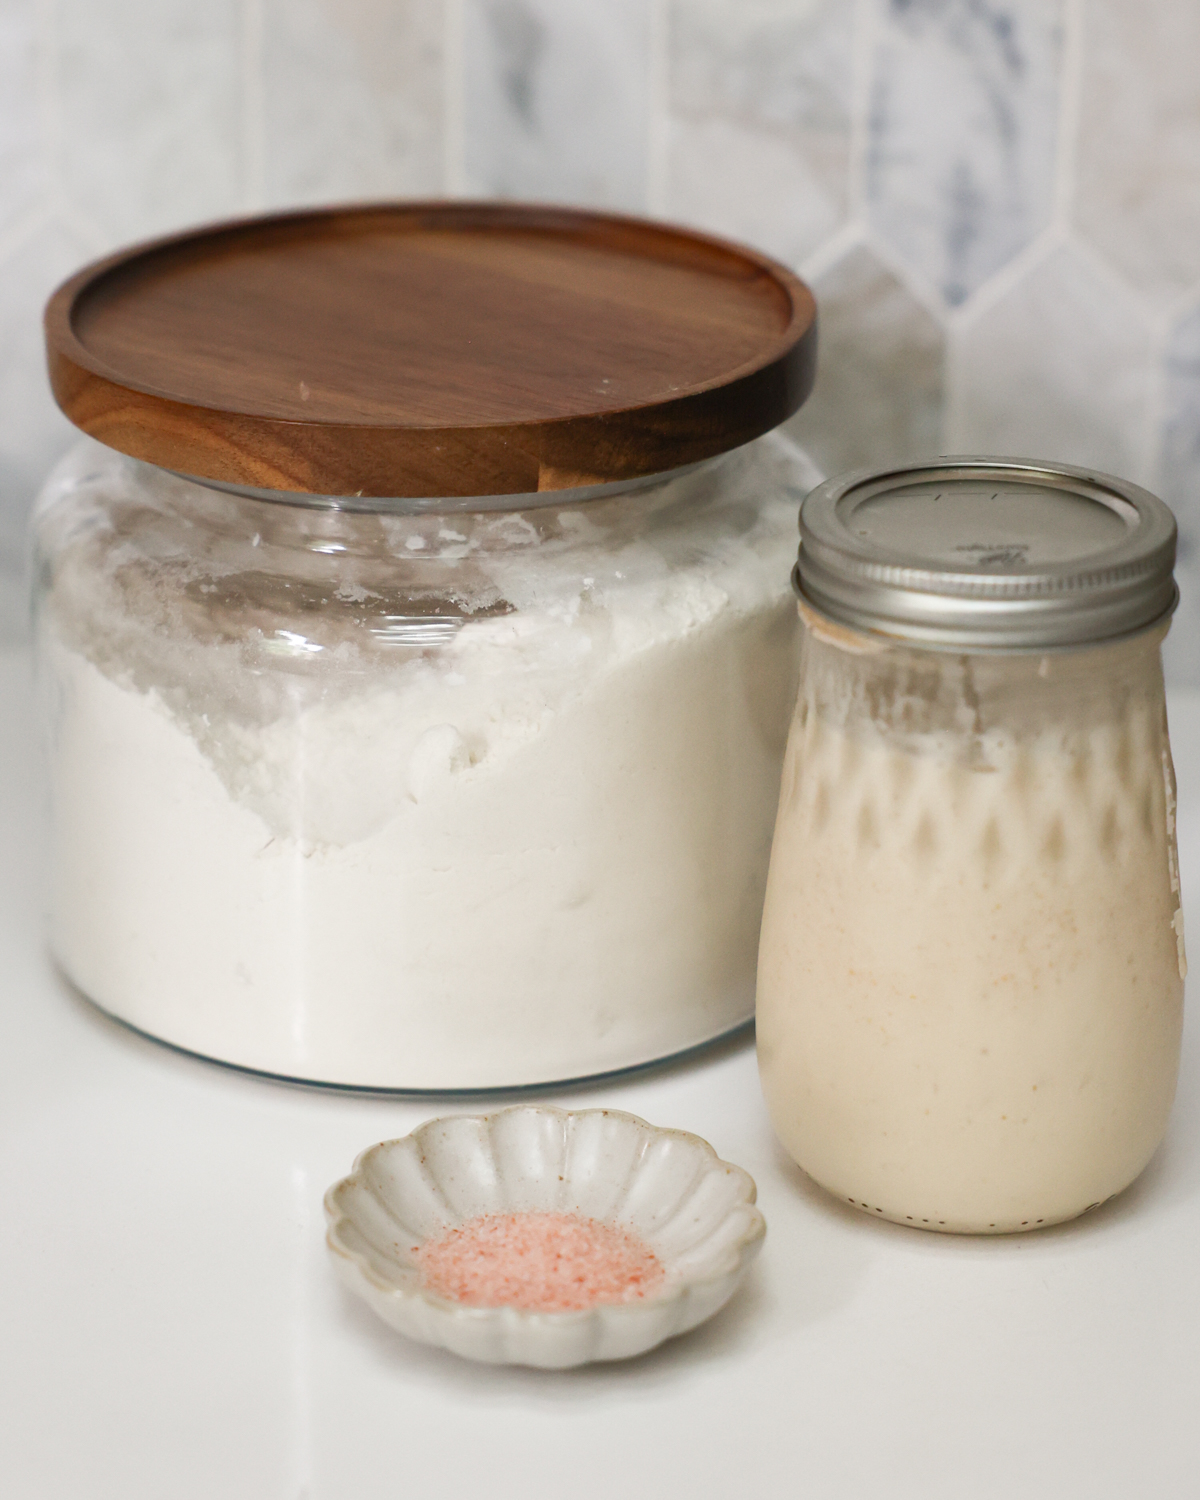
Other Ingredients
All-Purpose Flour: Though you can make this recipe with bread flour, all-purpose does the job just fine without needing a special trip to the grocery store.
Salt: Fine kosher or sea salt is best.
Water: Use filtered or distilled water for the purest taste, though tap water can work if it is high-quality and drinkable.
Pizza Toppings
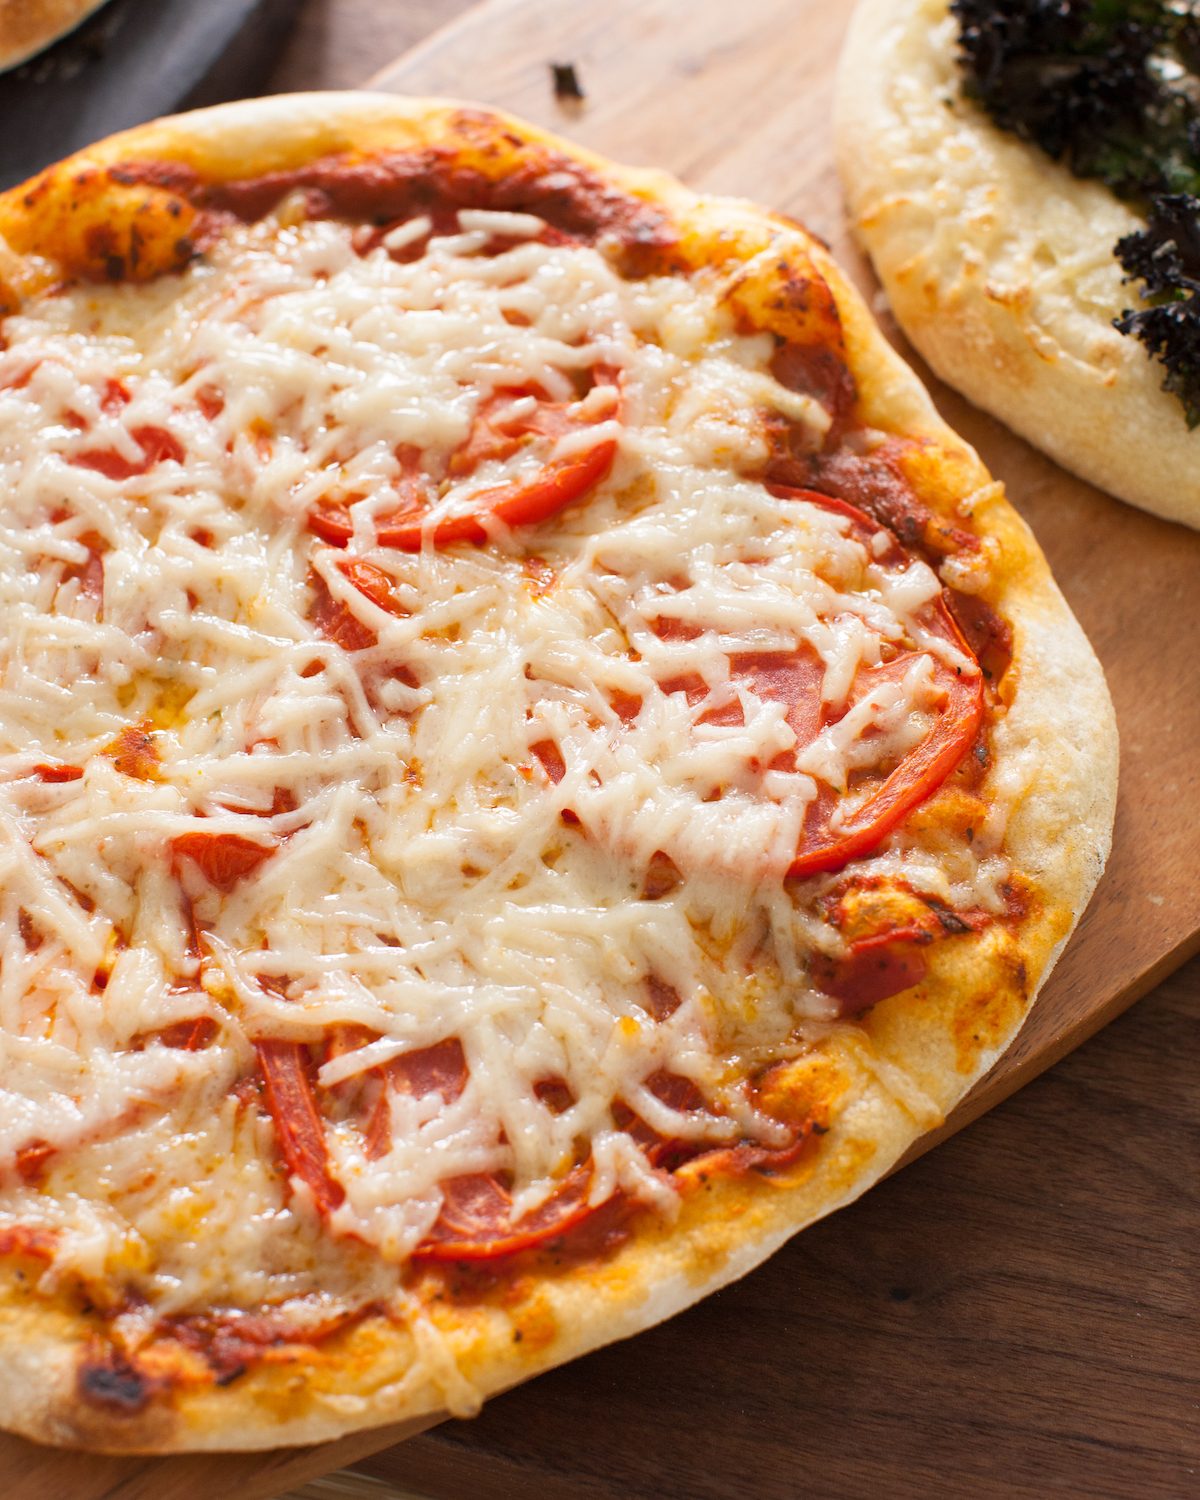
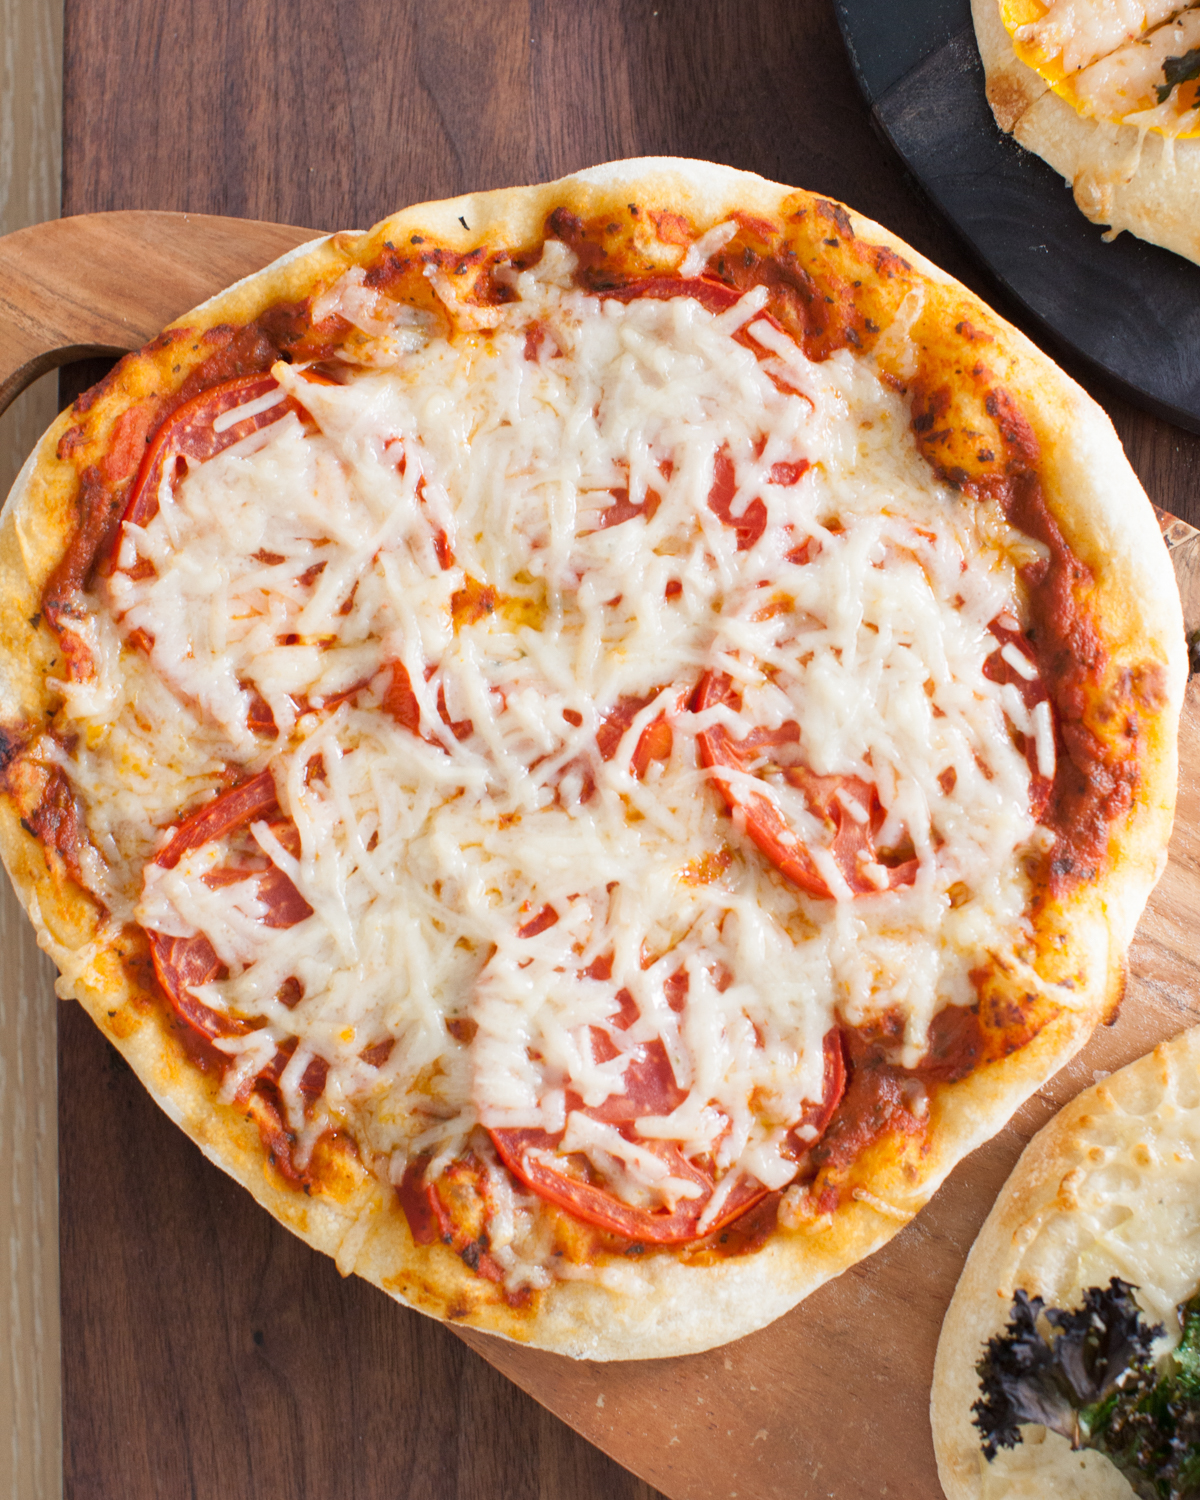
Classic Cheese: Seasoned tomato sauce or high-quality marinara add jammy tomato flavor. I use vegan mozzarella to keep this recipe vegan-friendly. If using vegan cheese, you can use store-bought or make your own. Top with fresh basil for an authentic finish.
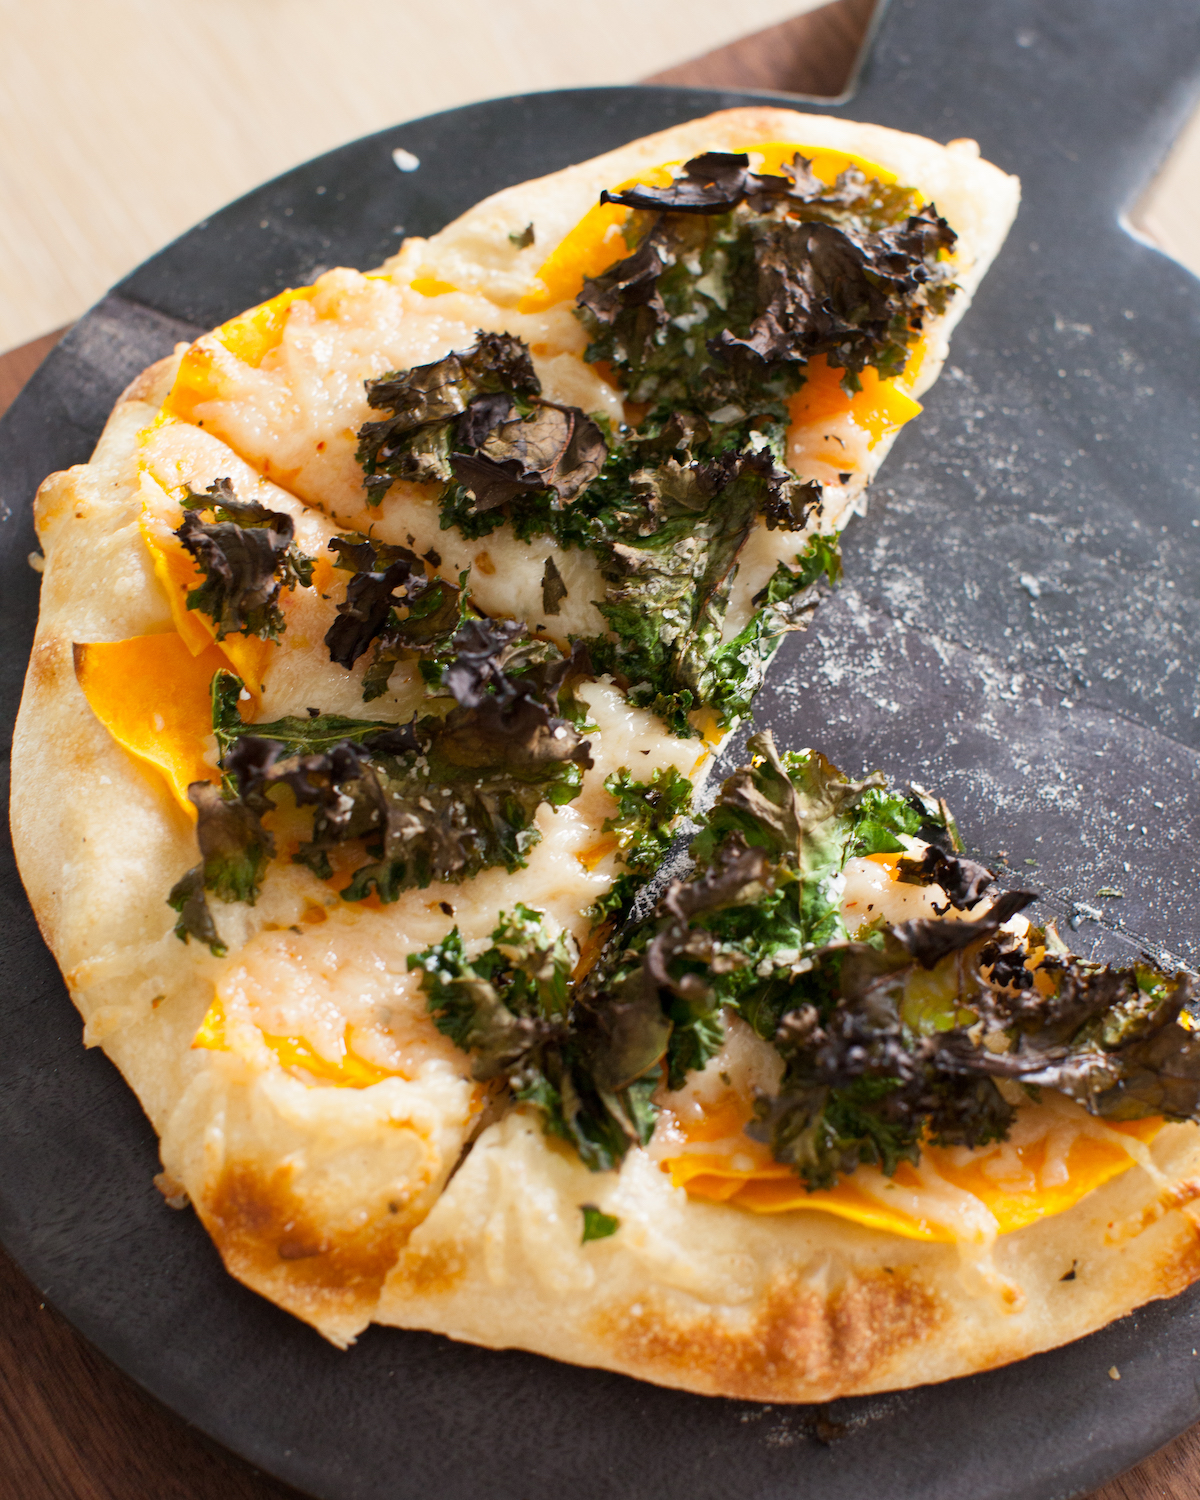
Potato and Kale: Top with thinly sliced Yukon potato or butternut squash, curly or dino kale, garlic, and mozzarella cheese for a specialty pie everyone will love! Use vegan mozzarella cheese to keep it vegan if desired. You can also add vegan sausages for an extra hearty twist!

How to Make Sourdough Pizza Crust
Grab your sourdough discard and learn how to make this sourdough pizza dough recipe with me! Though it requires a few steps, the process is relaxing, and the pizza is so tasty!
Mix the Dough
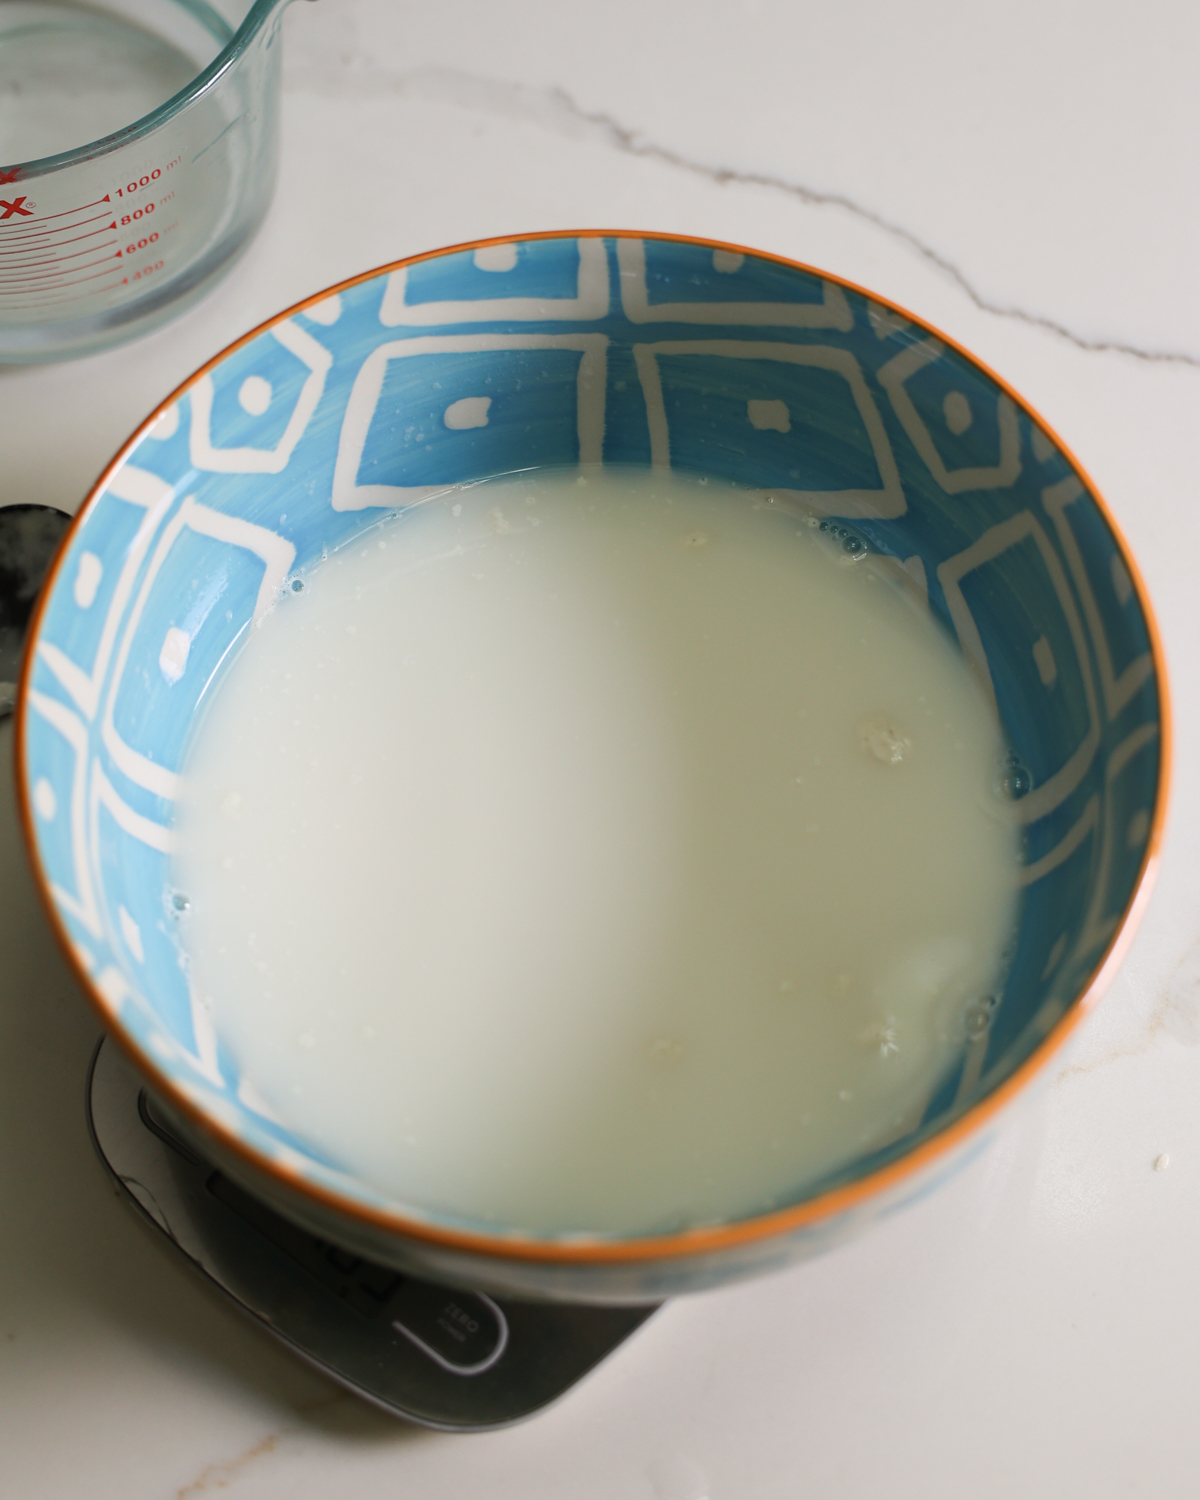
- Combine Liquids. In a large mixing bowl, combine the water, starter, and salt and stir to break up and partially dissolve.
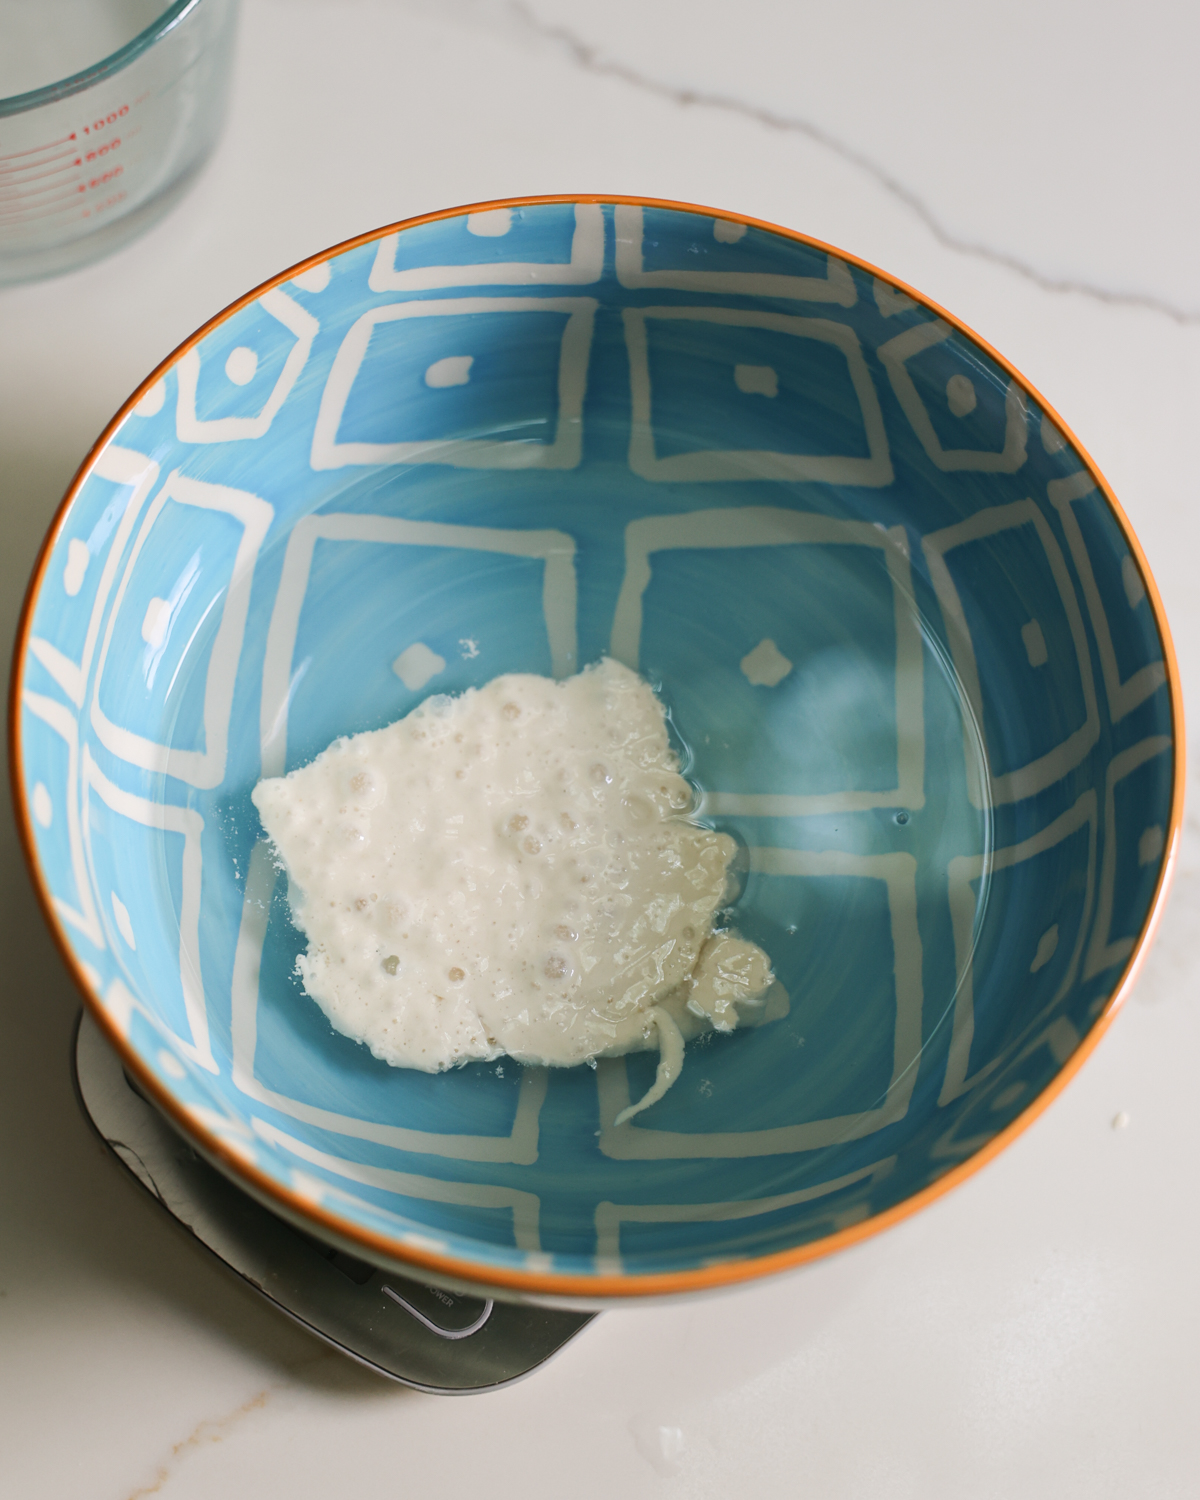
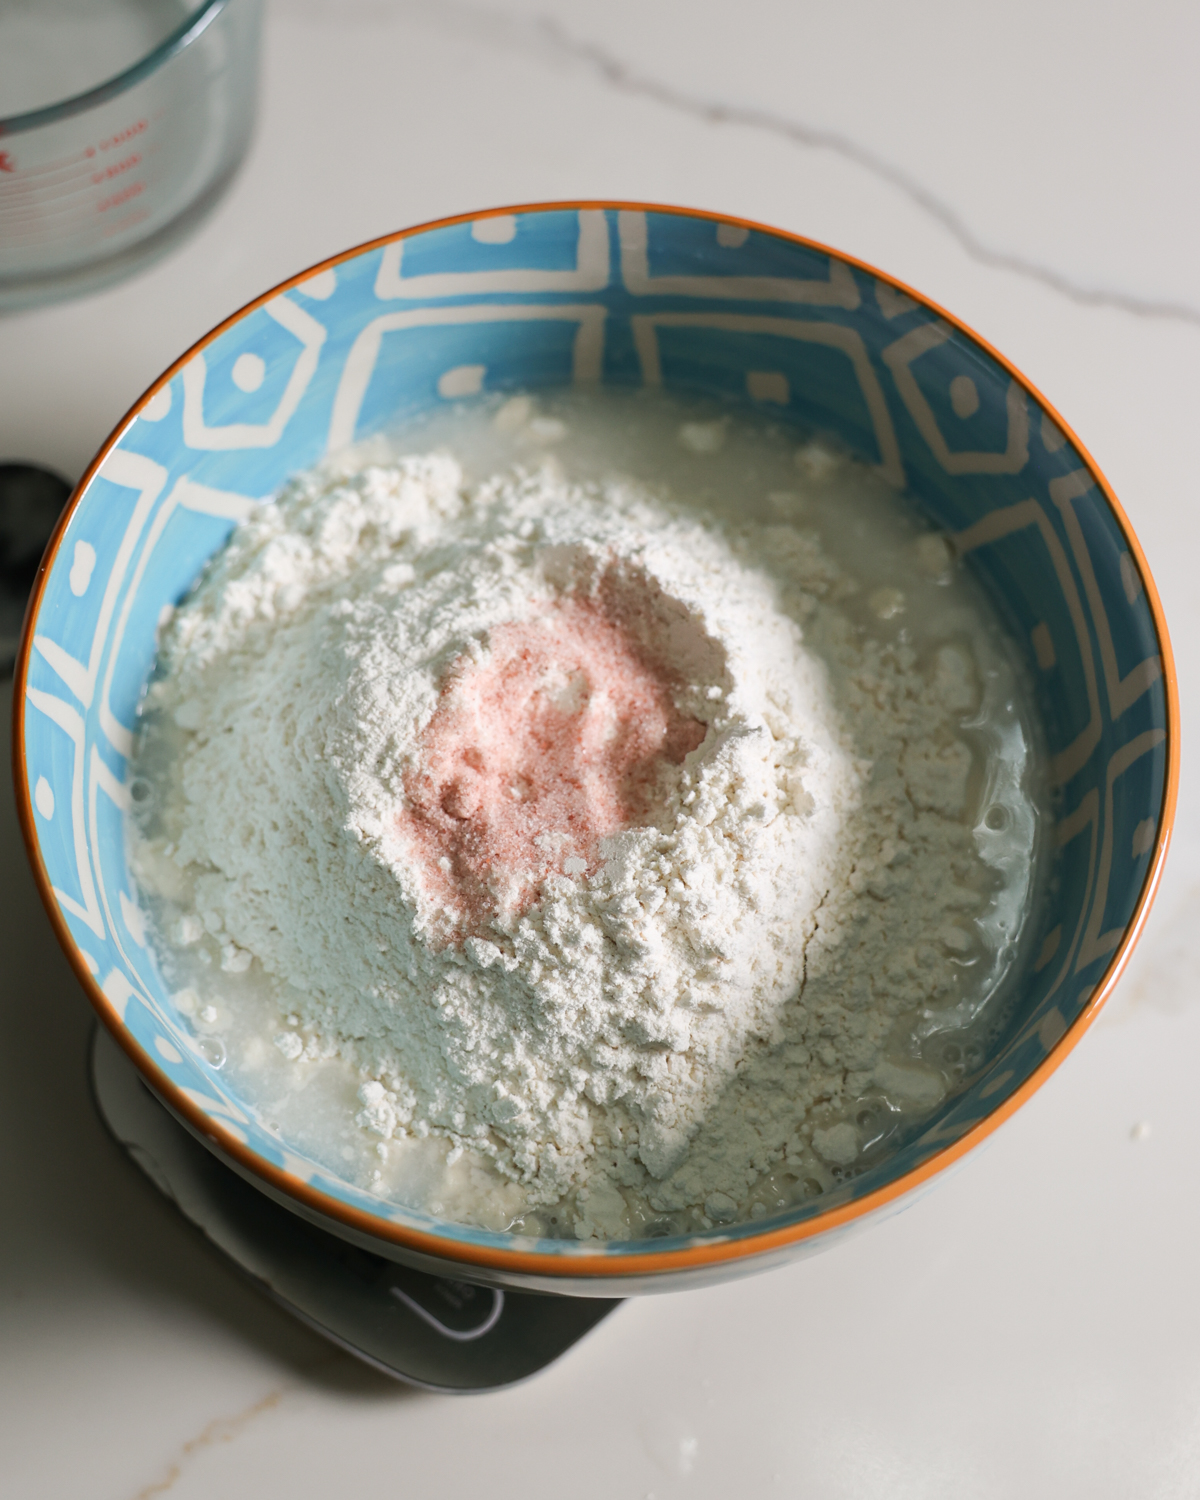
- Add Flour. Add the flour and stir until combined. If desired, you can use your hands to stir and combine the dough. It will be extremely sticky.
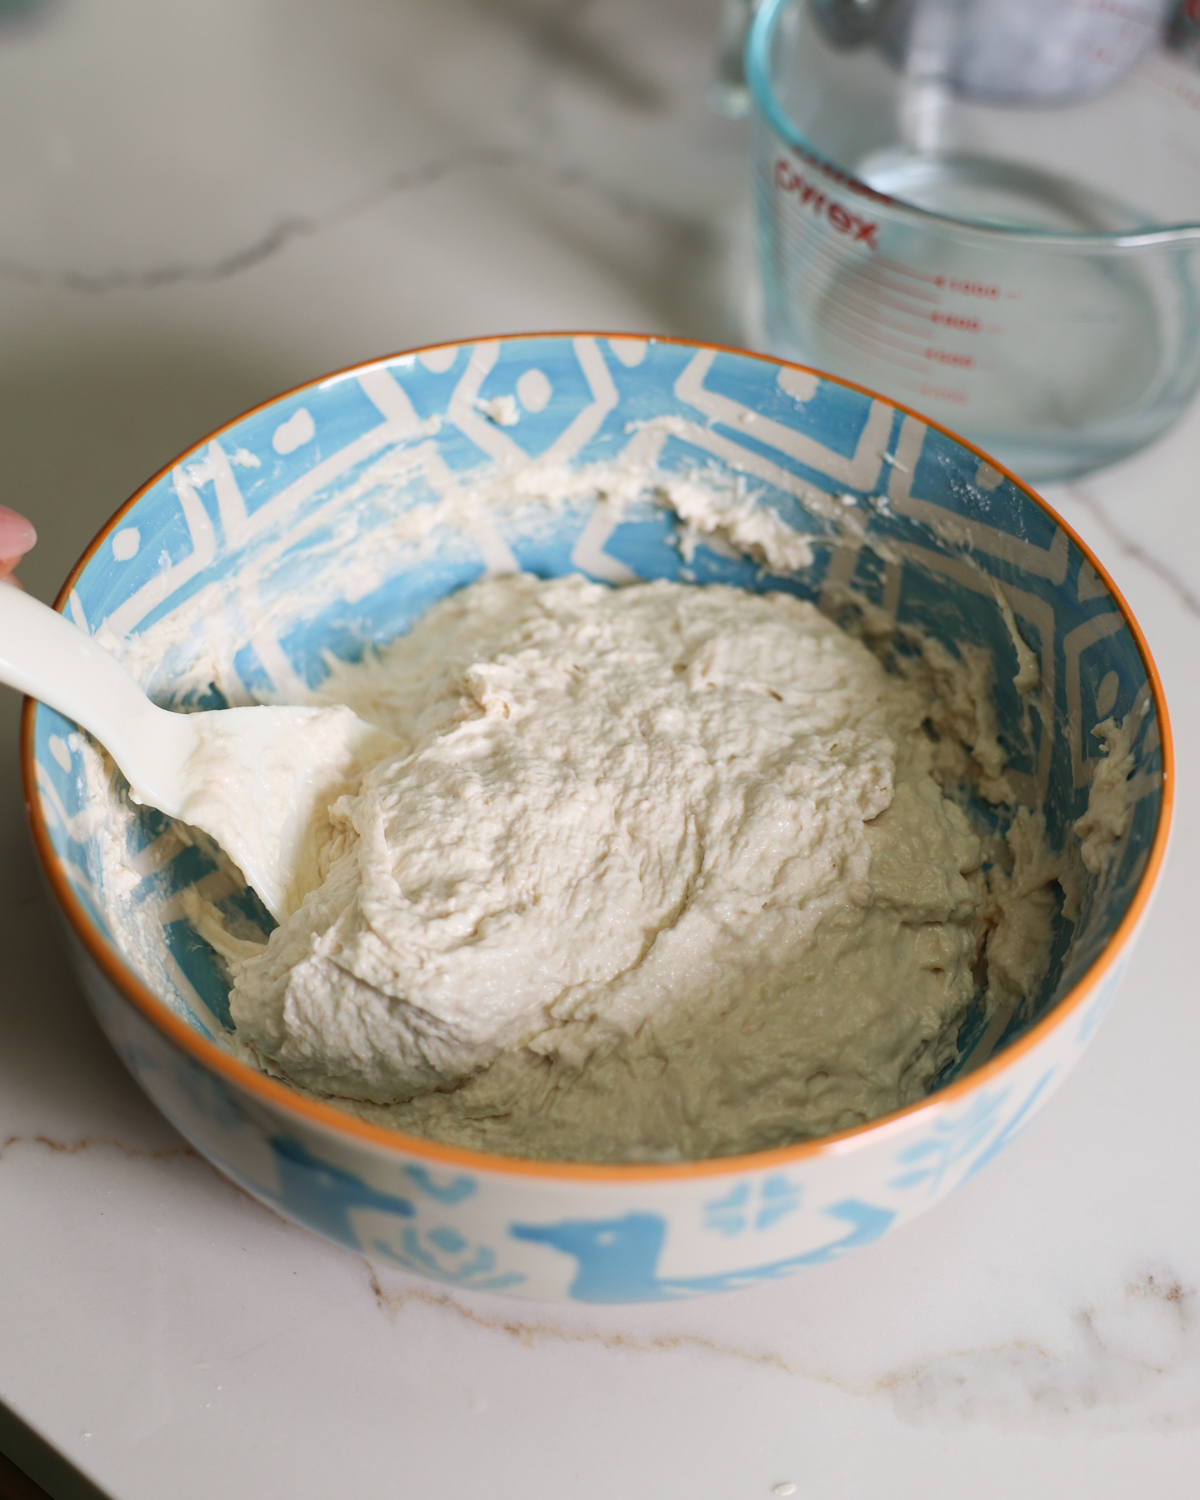
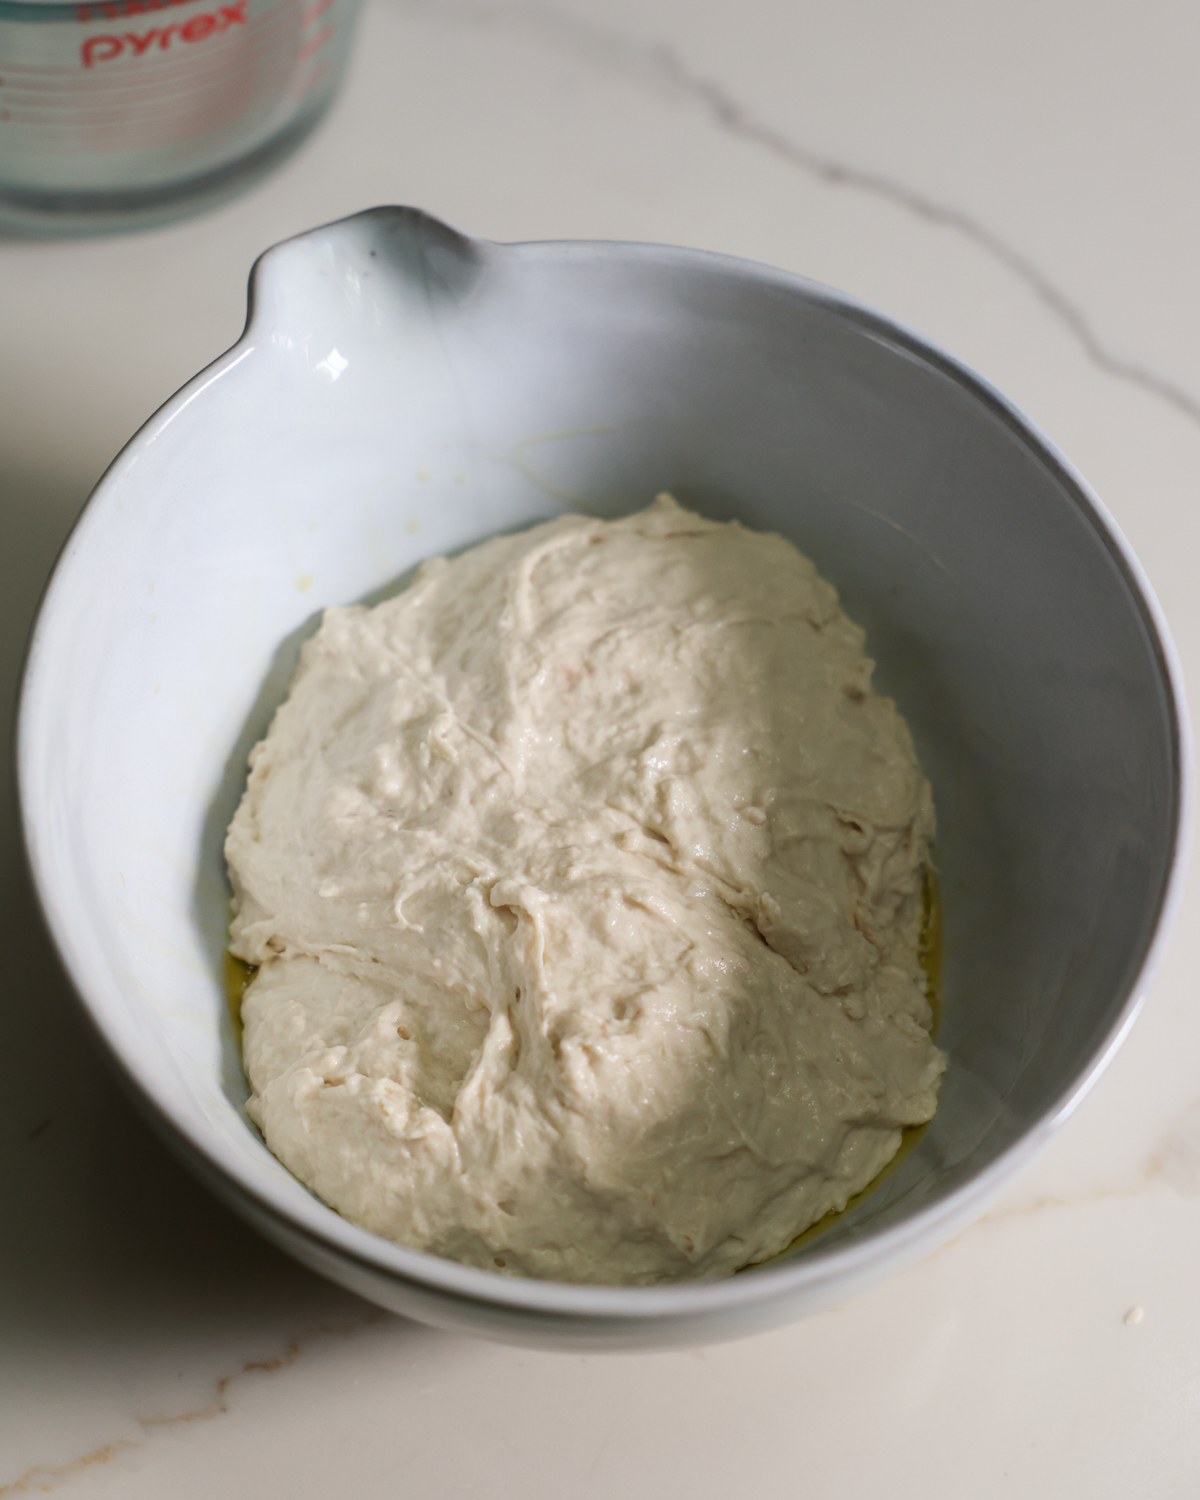
- Let Rest. Transfer the dough to a greased bowl, cover it with a kitchen towel, and let it rest at room temperature for 30 minutes.

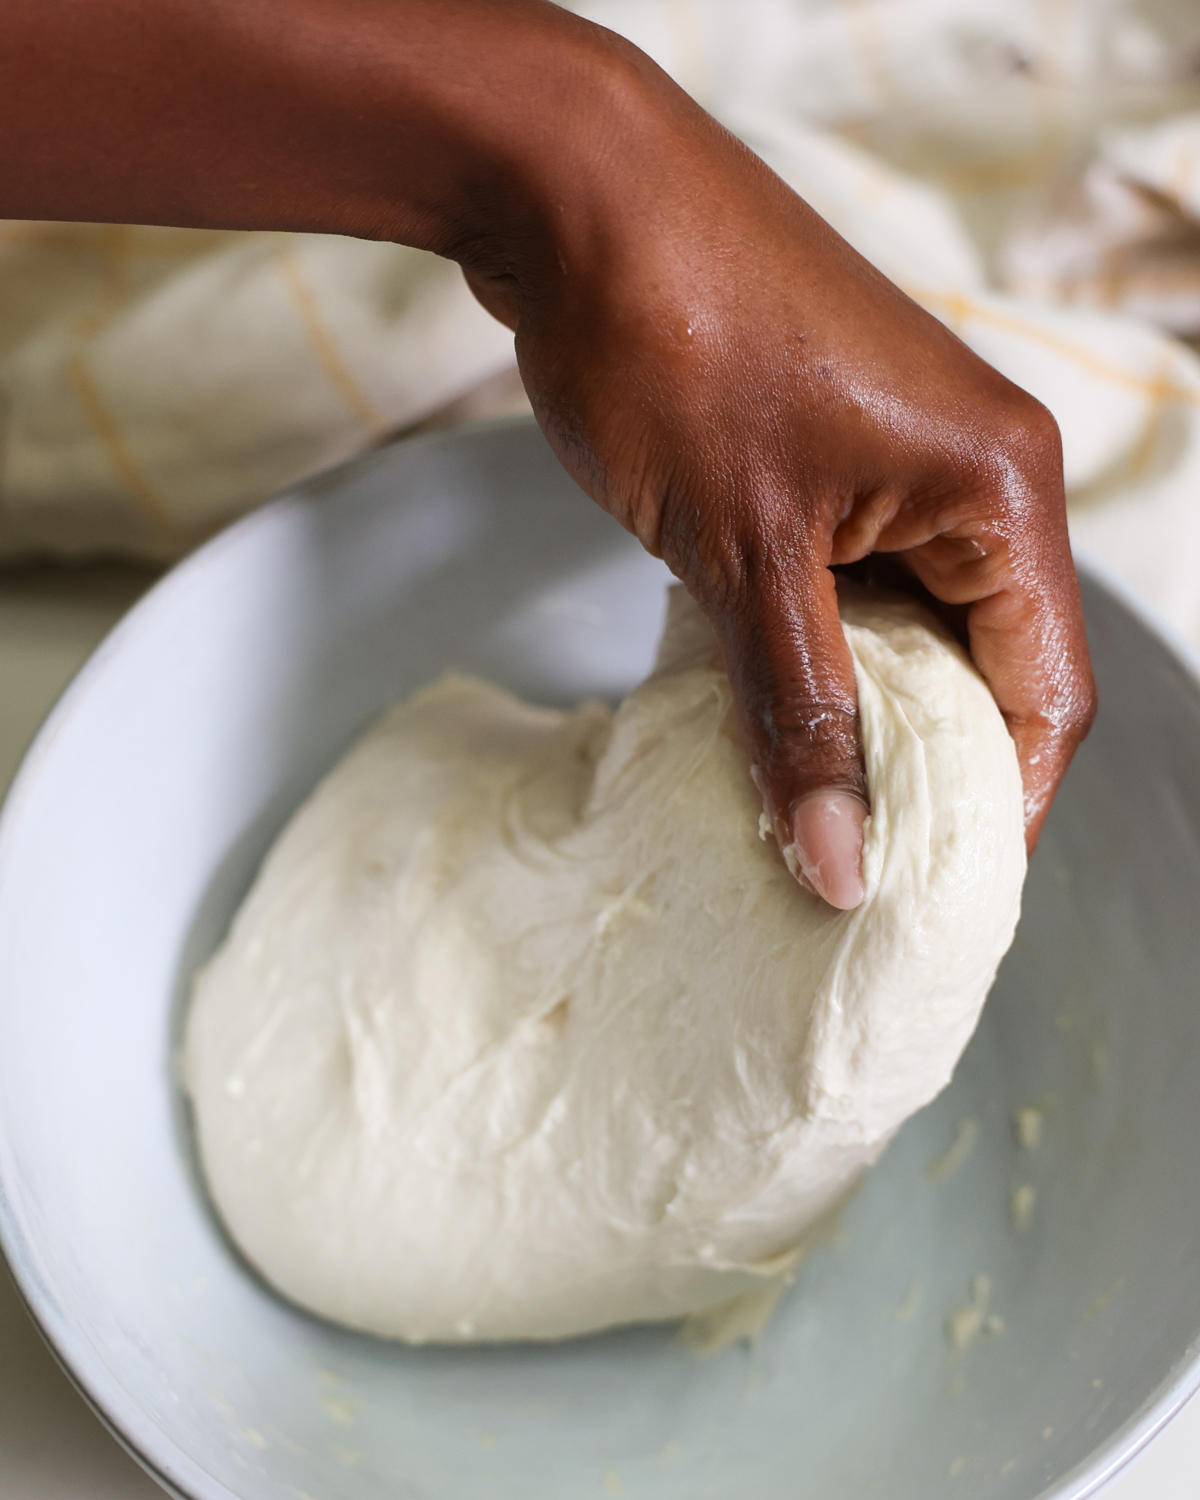
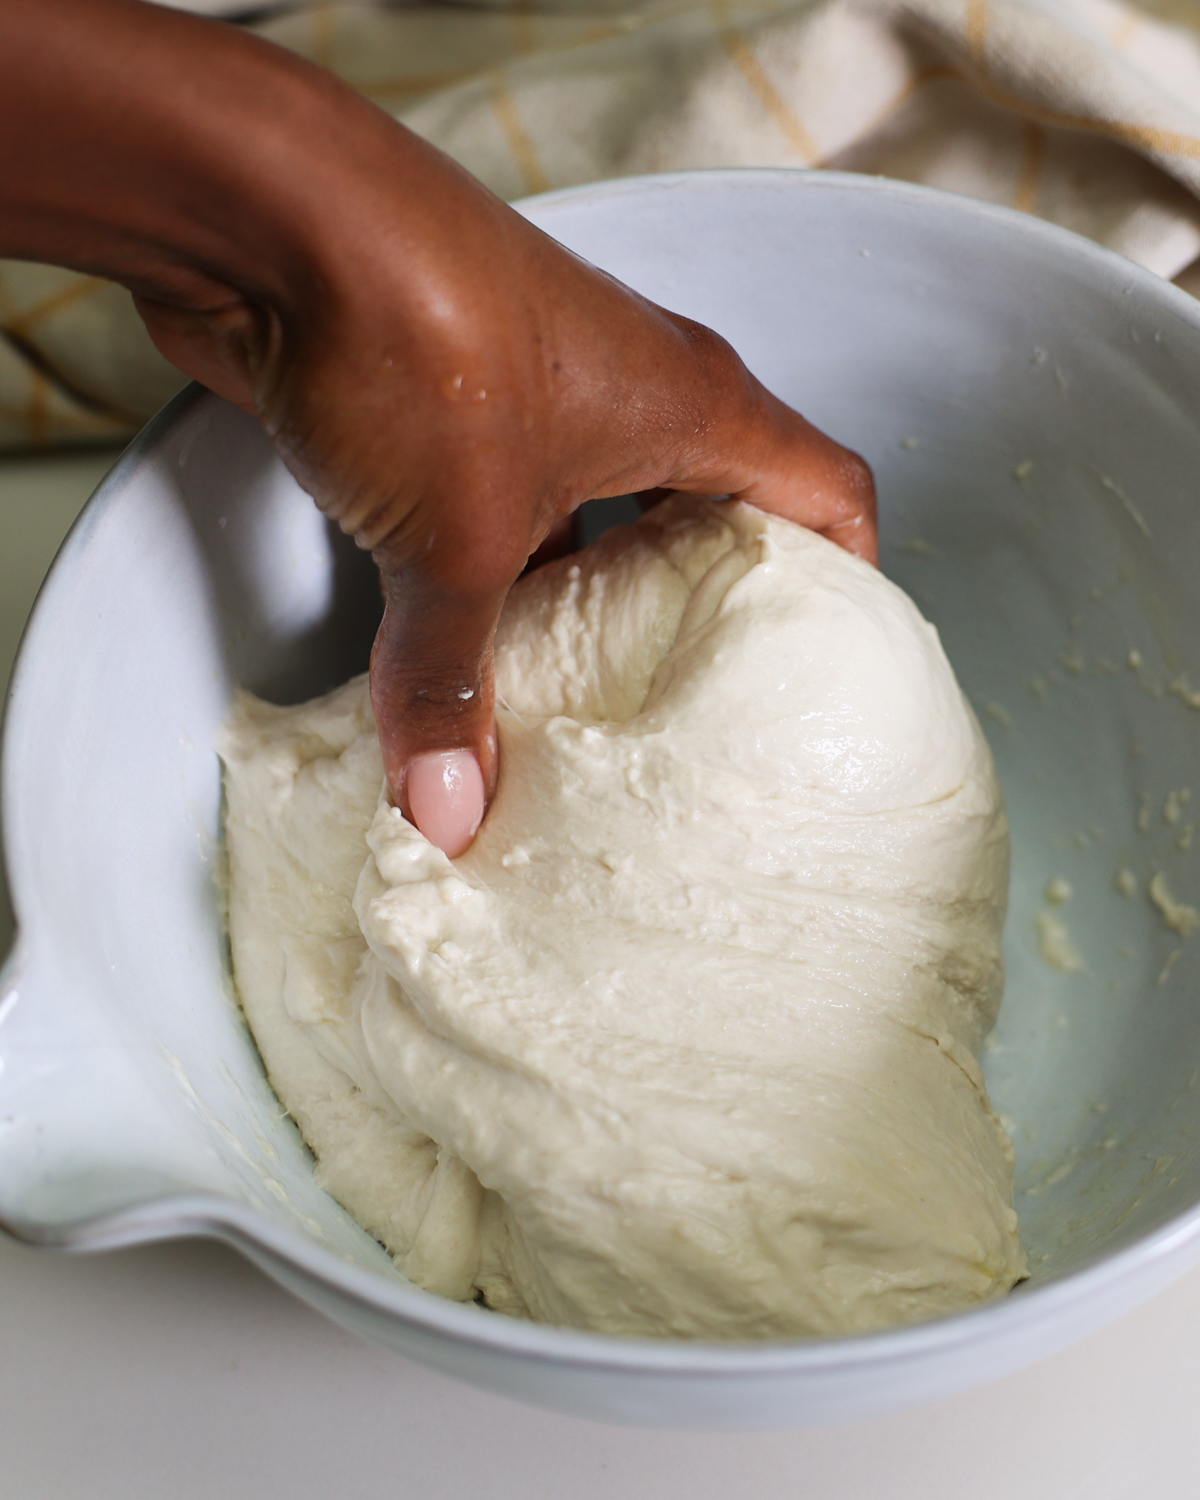
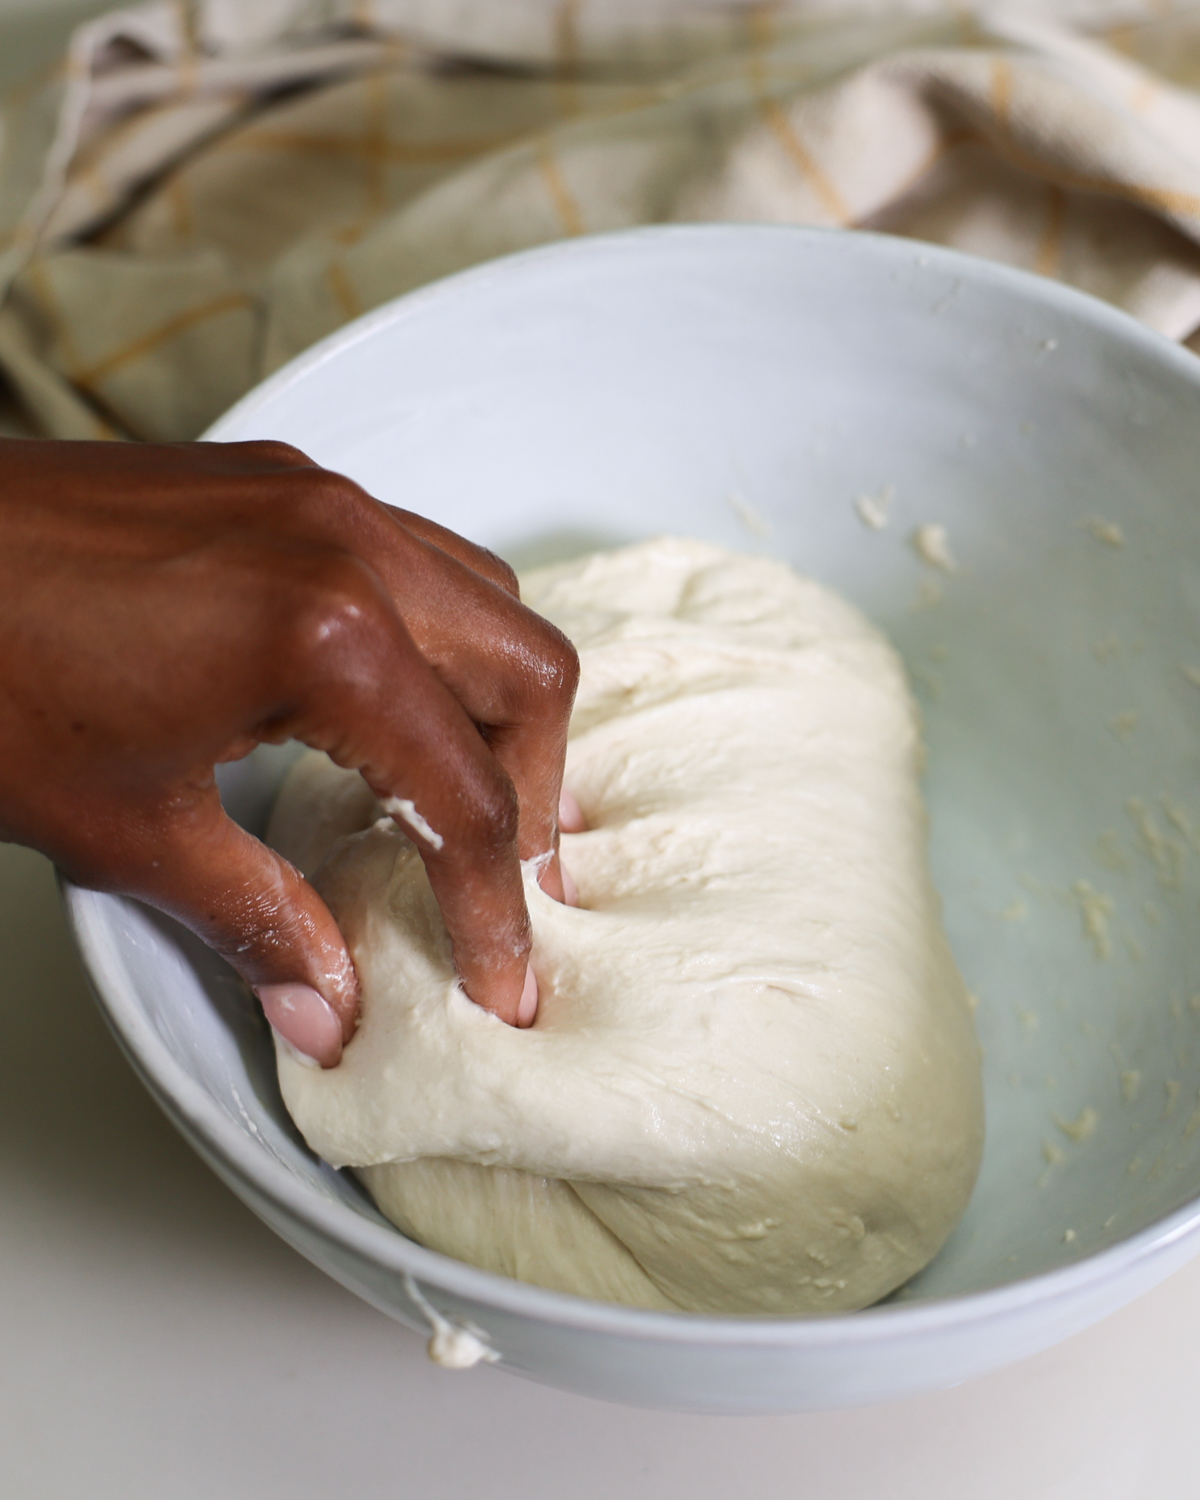
Stretch and Fold the Dough
- Stretch and fold. Dampen your hands with water to stretch before stretching and folding the dough 8 times. Stretch and fold each quarter of the dough over the rest to complete 8 folds, 2 full rotations. Let rest for 30 minutes.
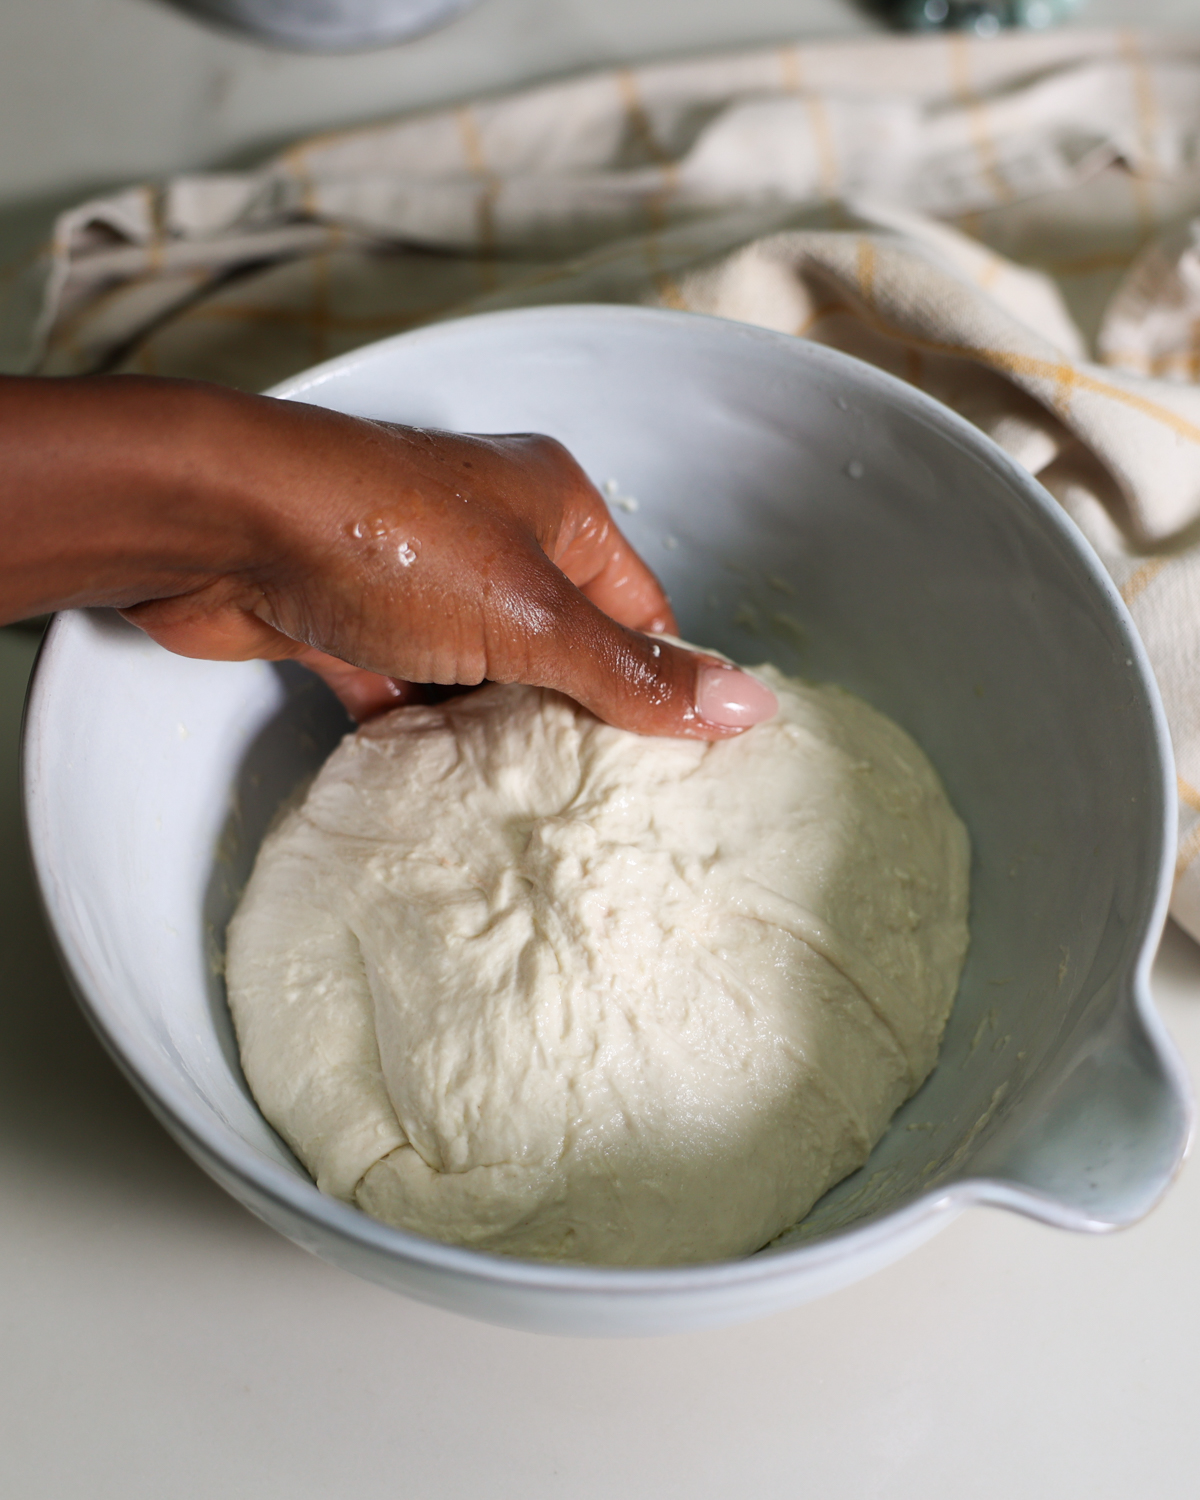
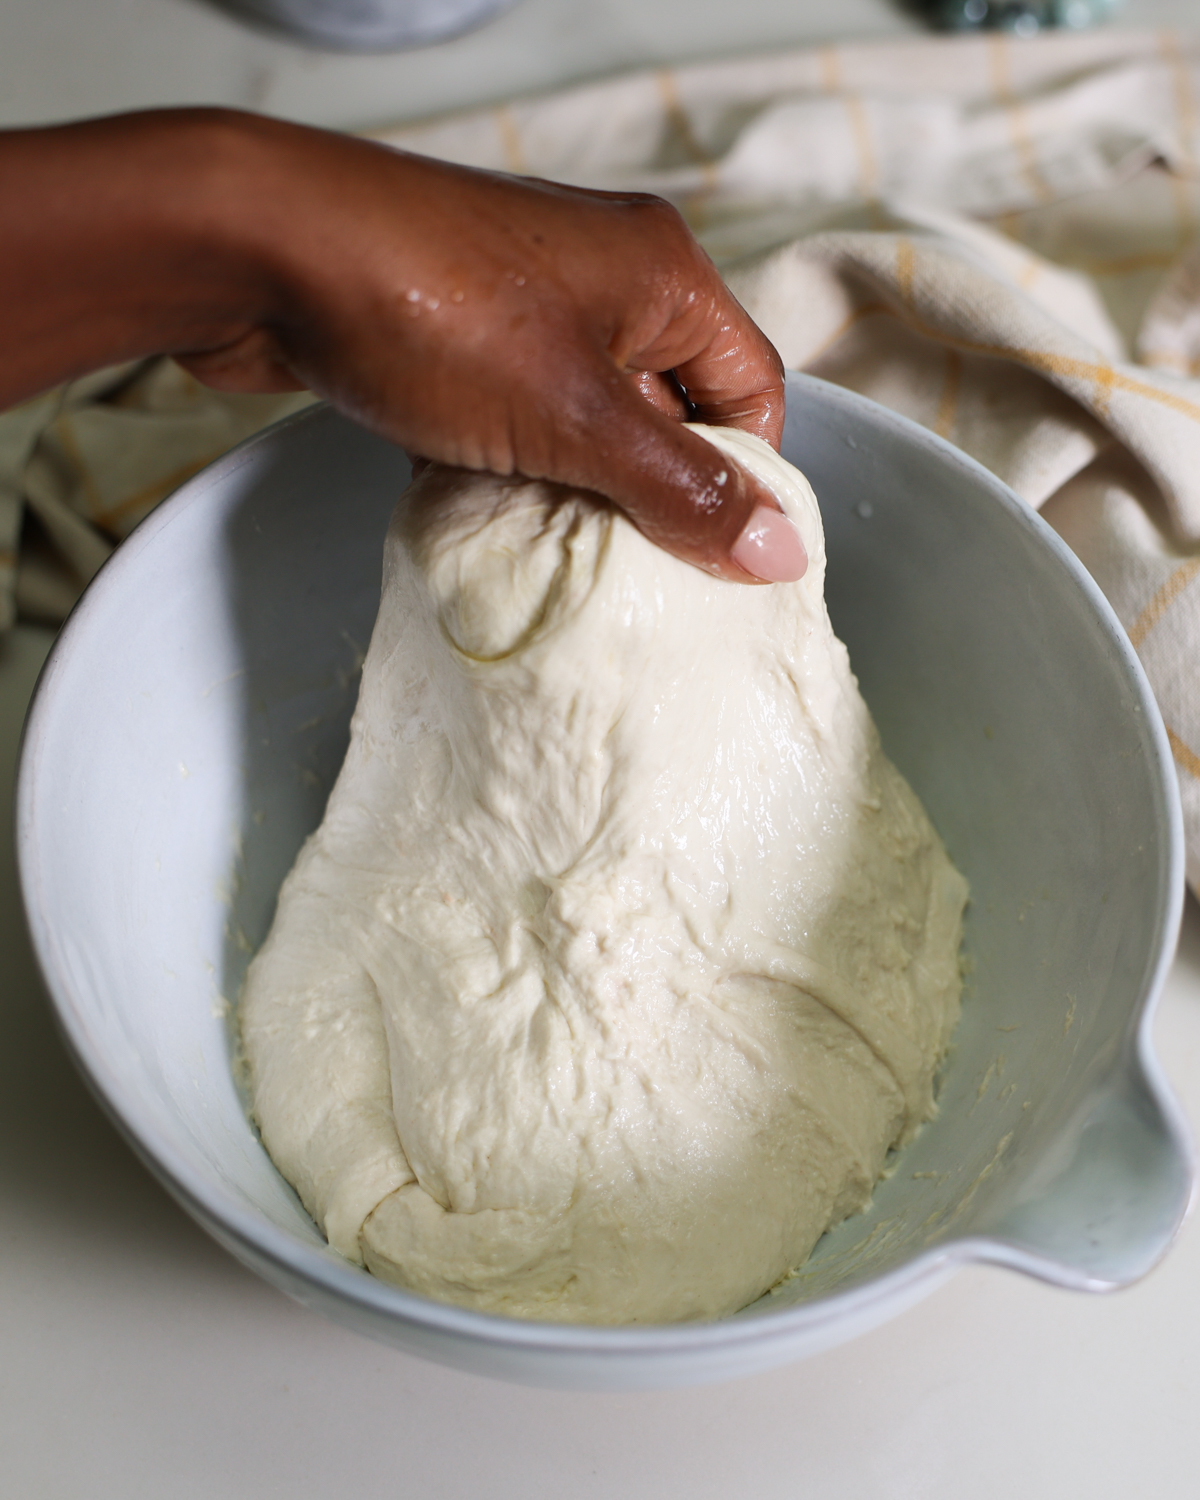
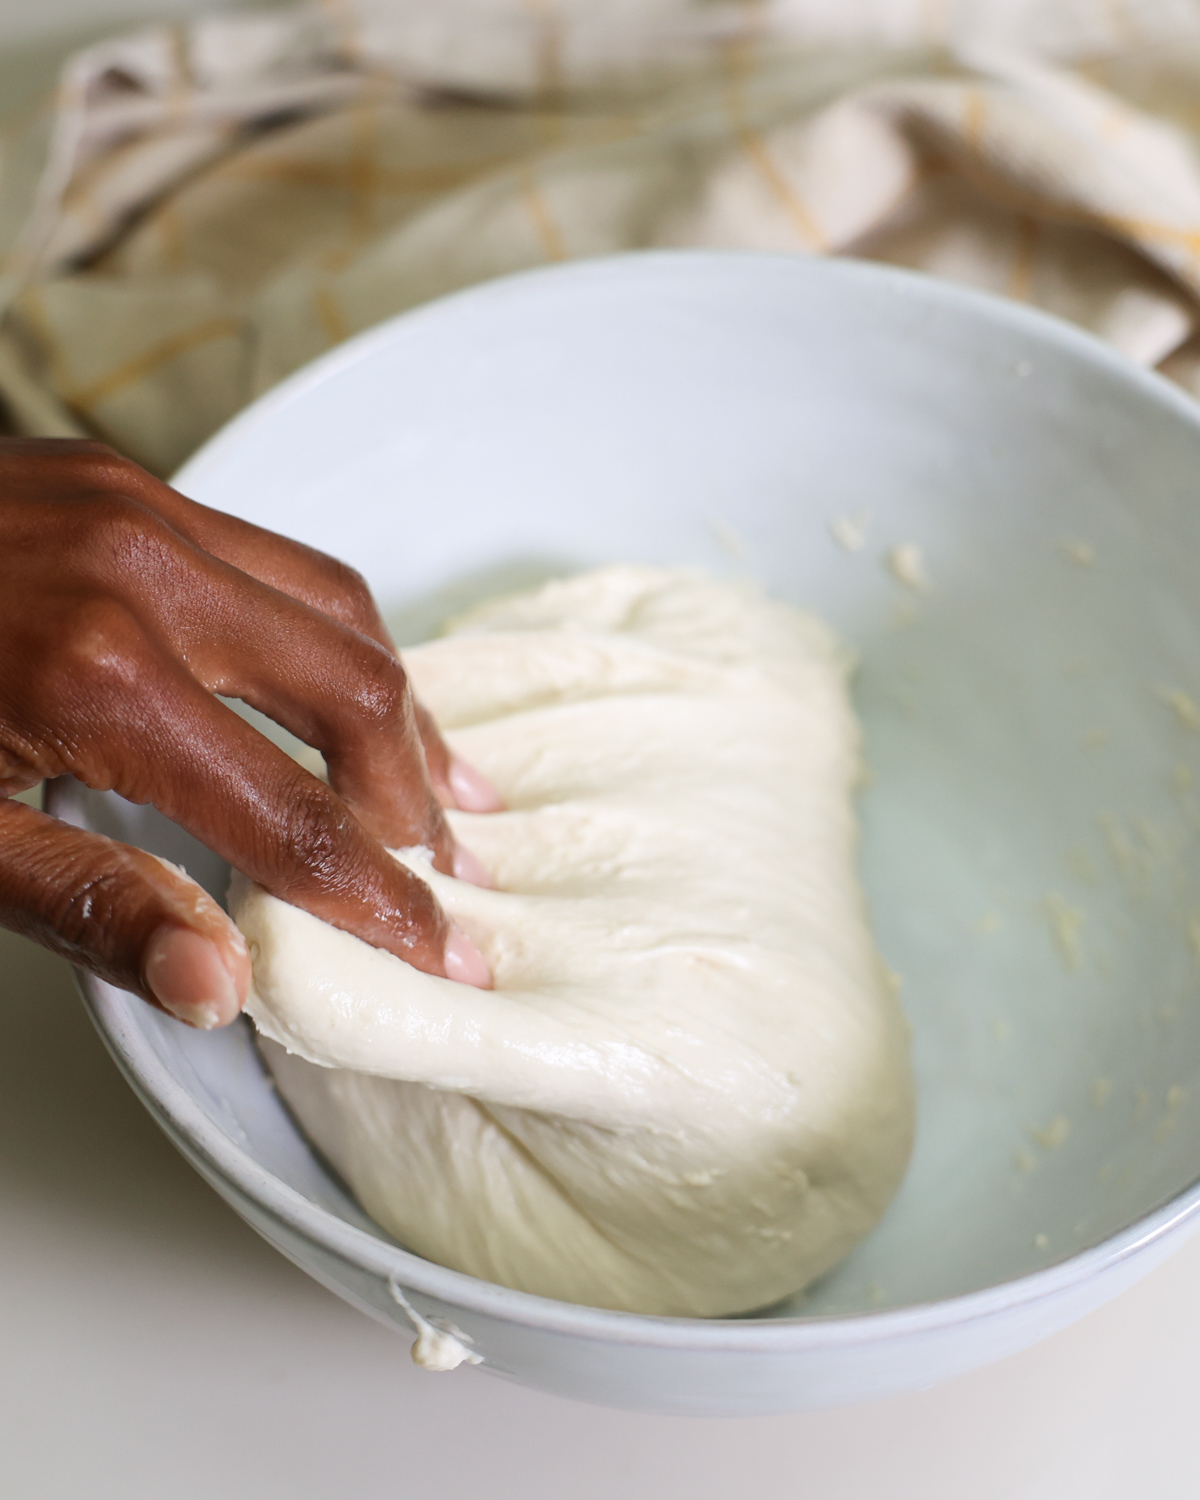
- Repeat. Stretch and fold the dough 3 more times, letting it rest for 30 minutes before each sequence.
Ferment and Rise
- Rest. Cover the dough with a kitchen towel and leave it on your counter at room temperature for 8-12 hours.

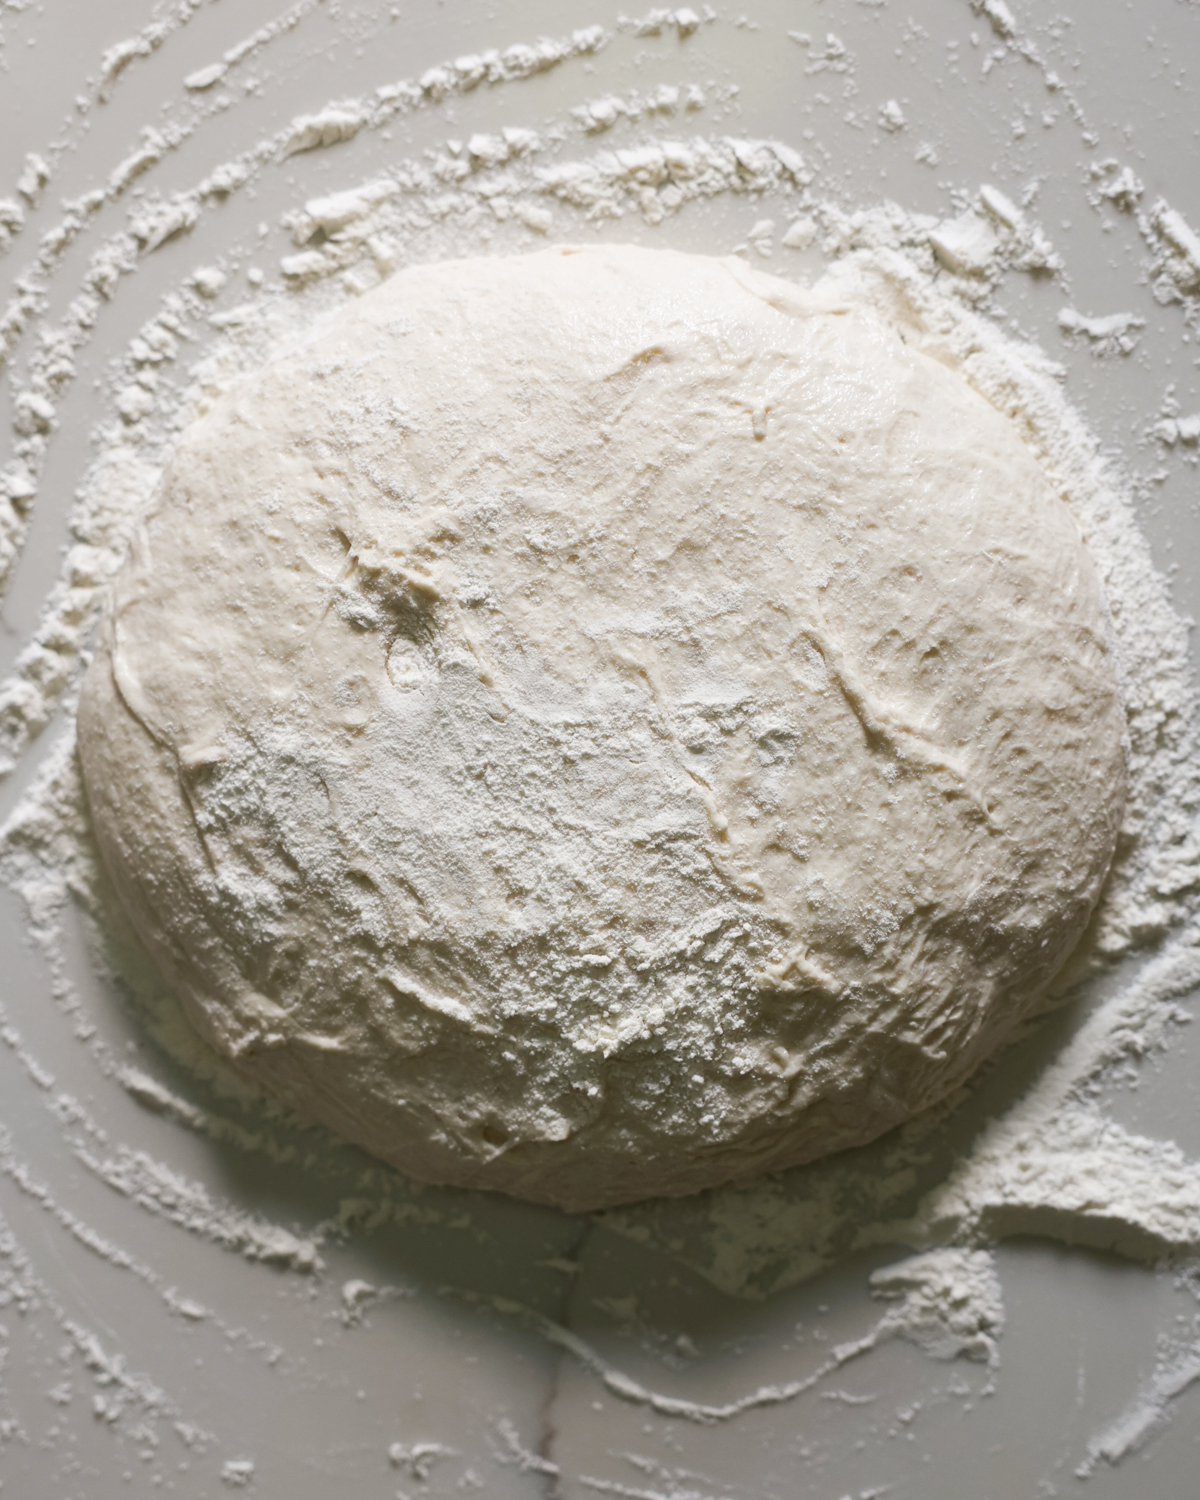
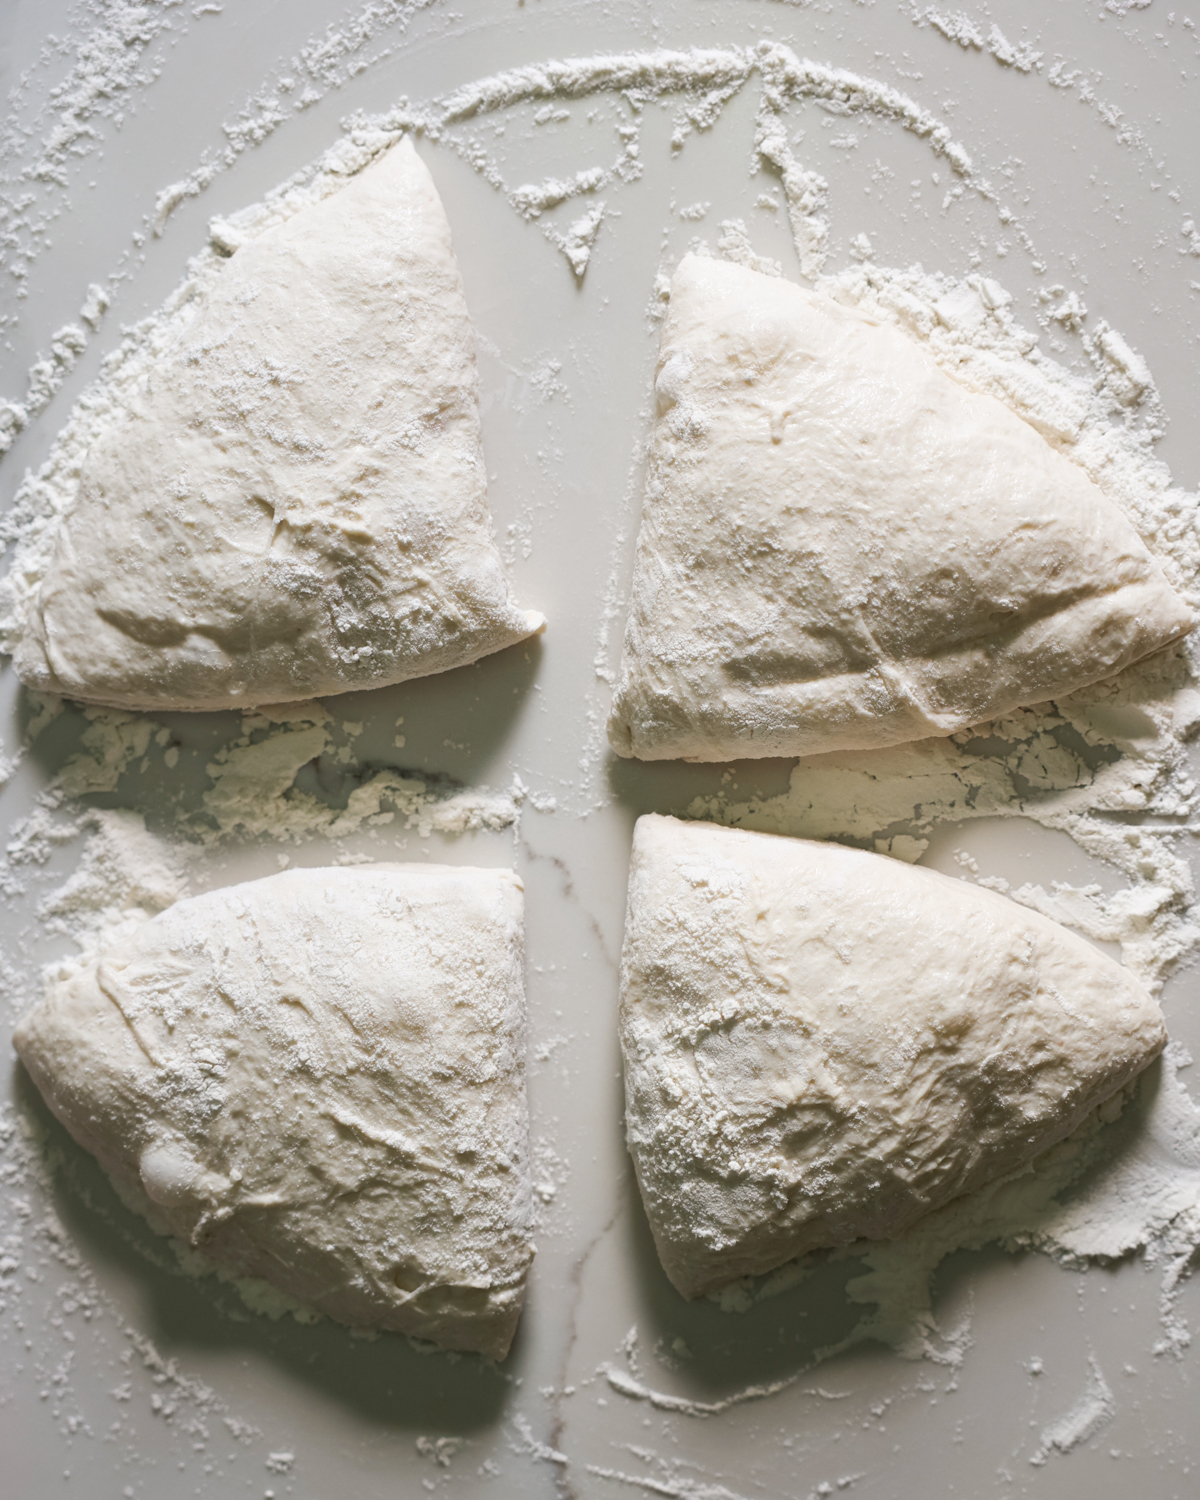
Portion
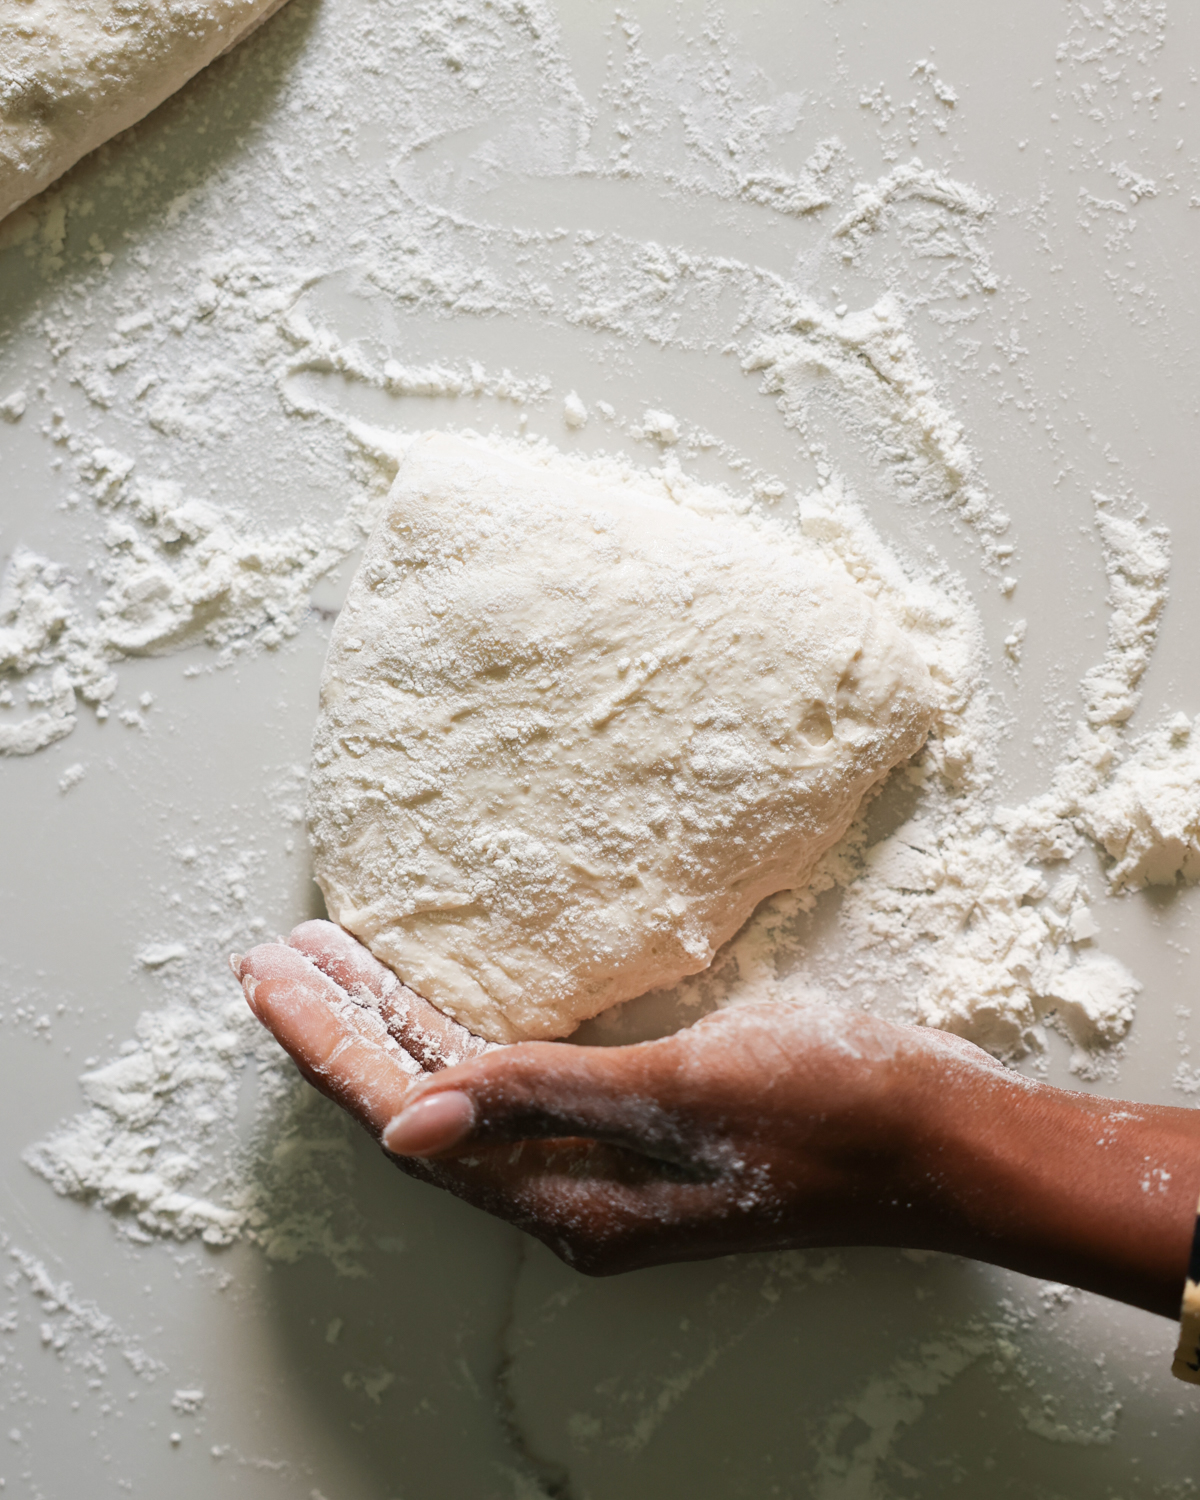
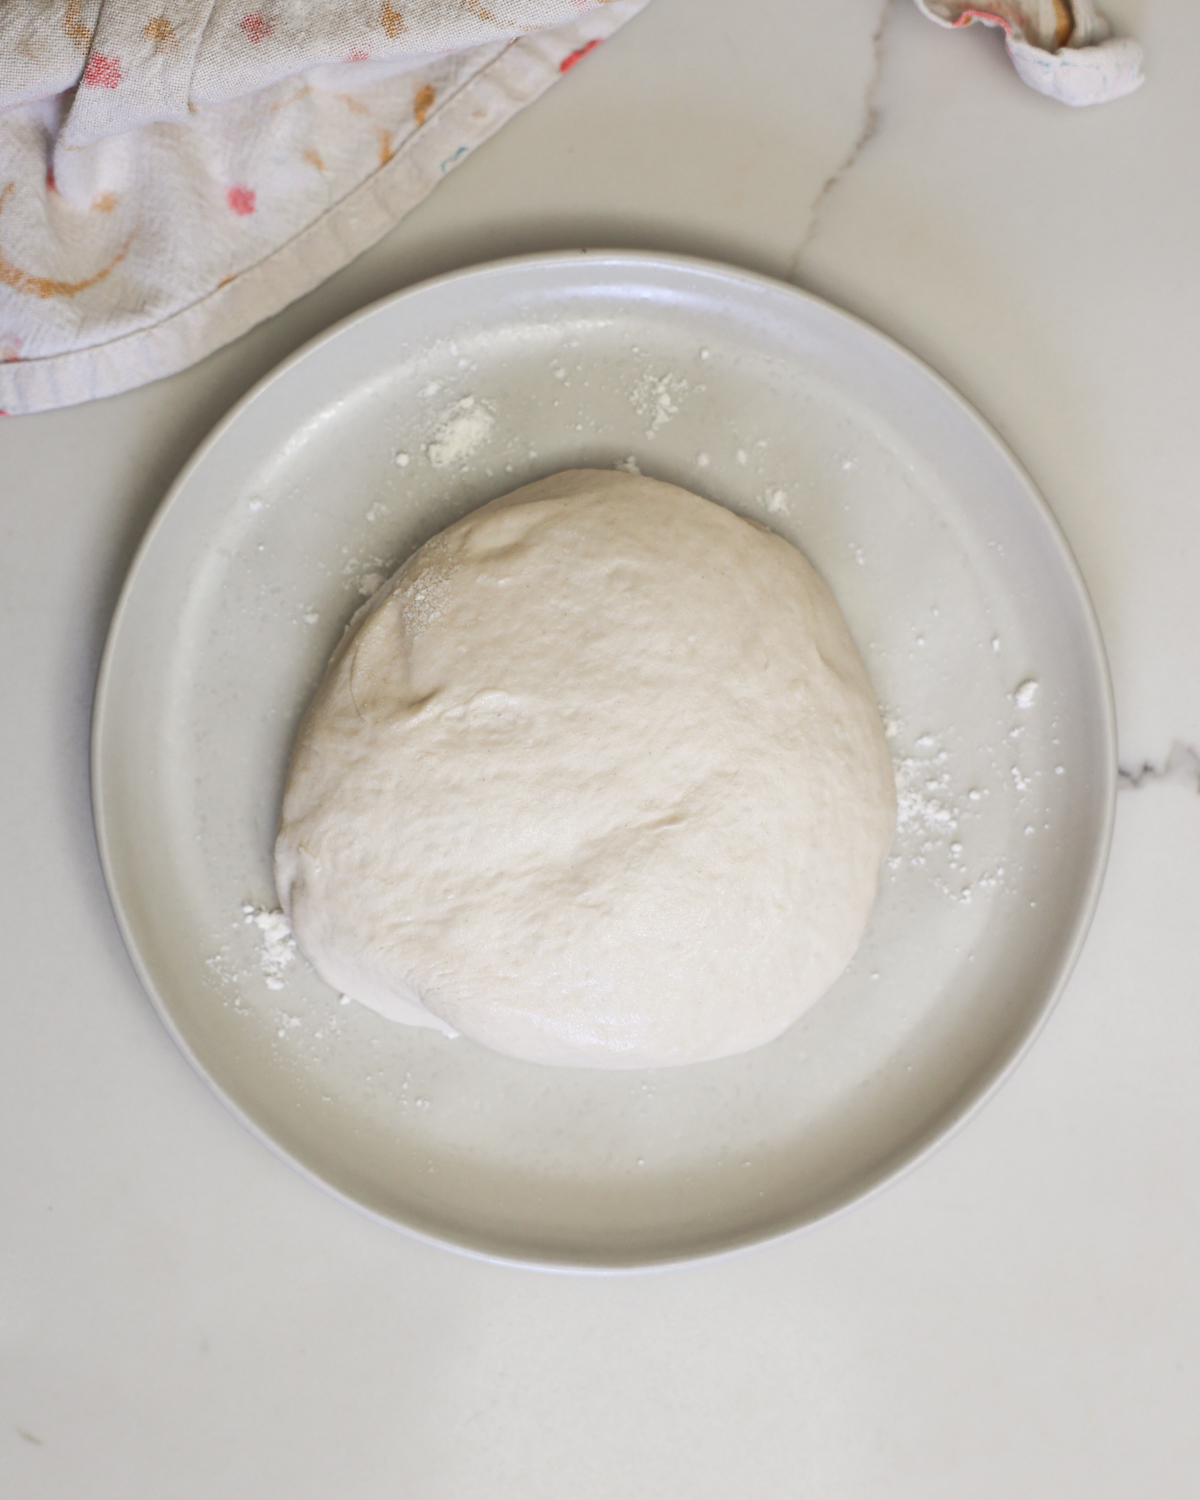
- Quarter the dough. Flour your hands well and transfer the risen dough to a generously floured work space. Using a bench scraper or Chef’s knife, cut the dough into 4 equal portions.
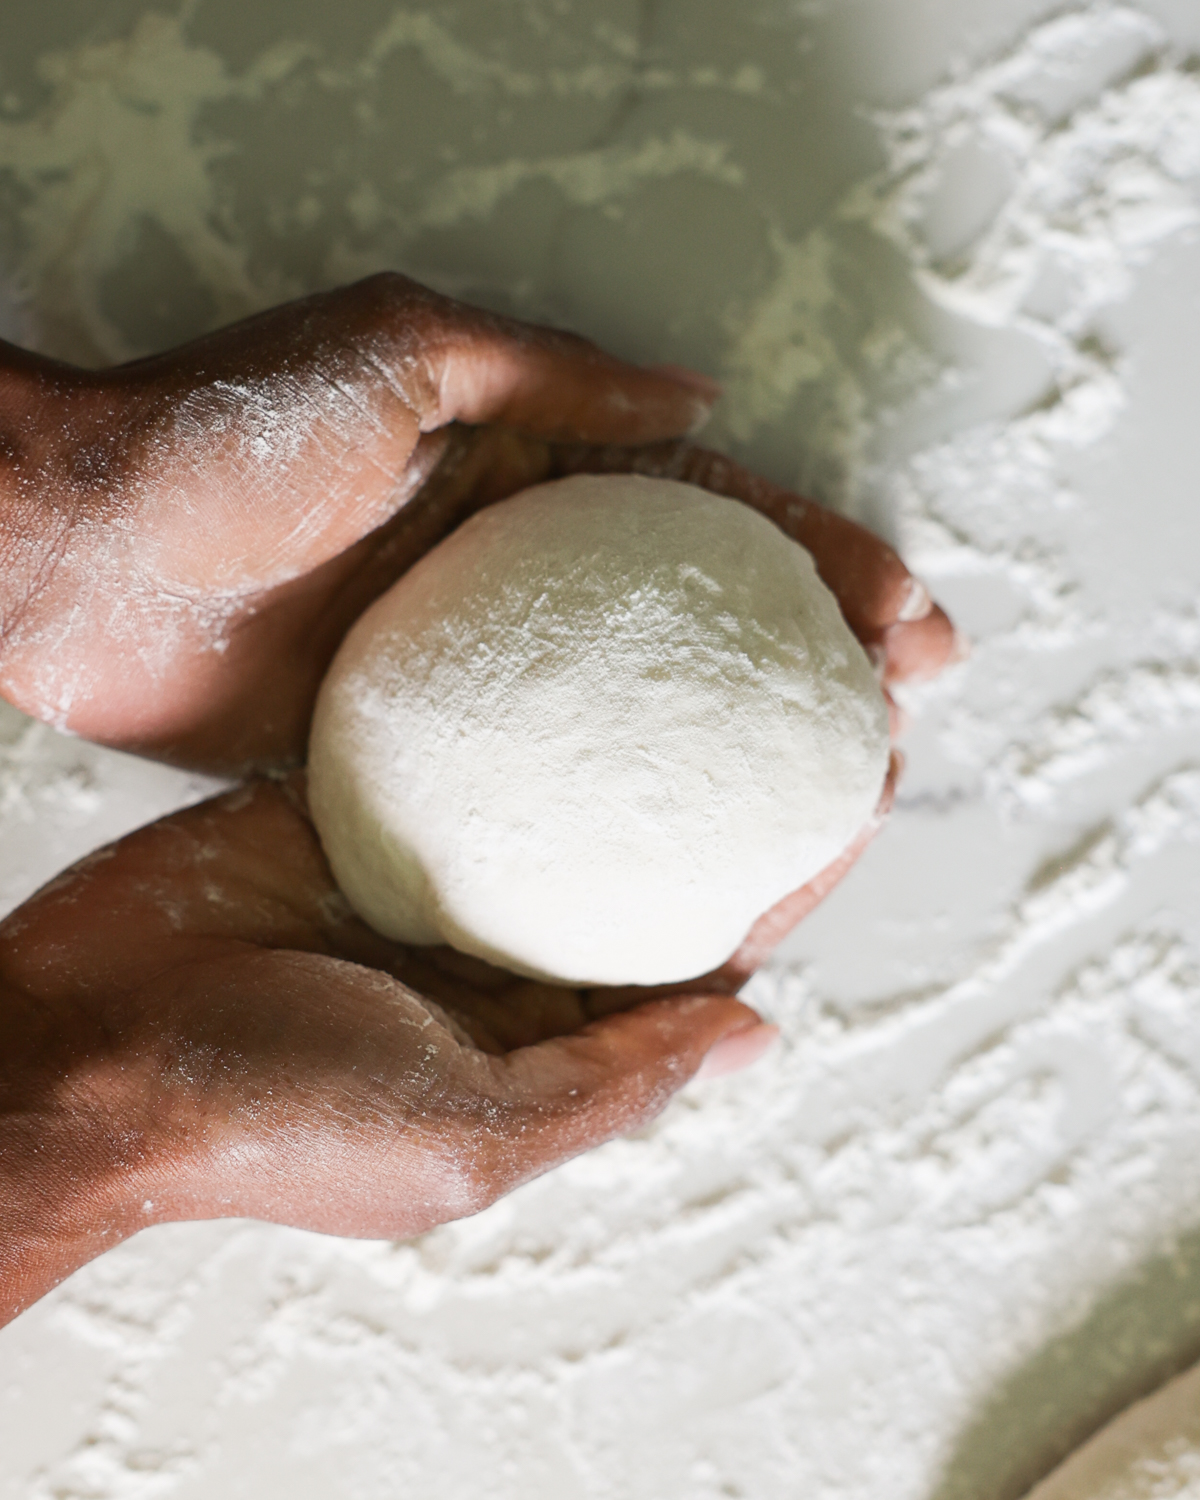
- Shape into tight balls. Fold the bottom of the dough under as you turn the ball into a circular motion.
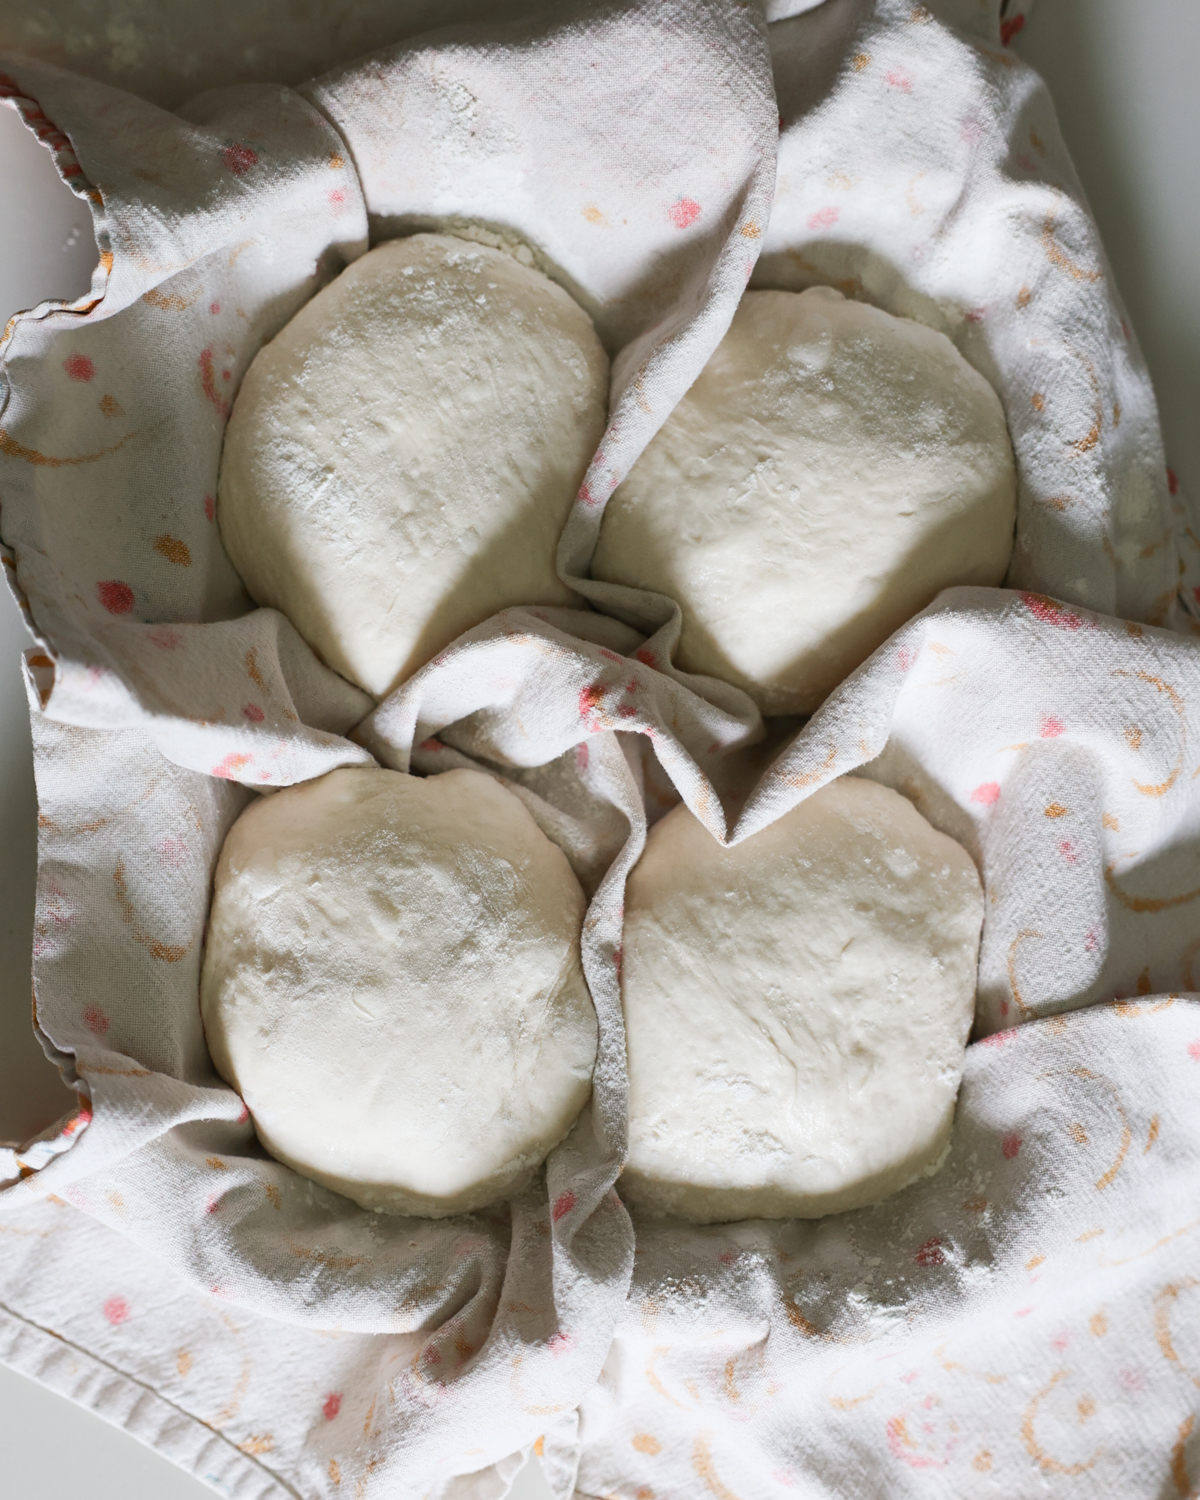
- Prepare baking sheets. Line a baking pan with a sheet of parchment or a cotton tea towel. Sprinkle it generously with flour. Gently gather a small portion of the towel going down the center of the pan in both directions, creating 4 dough wells and small barriers between them.
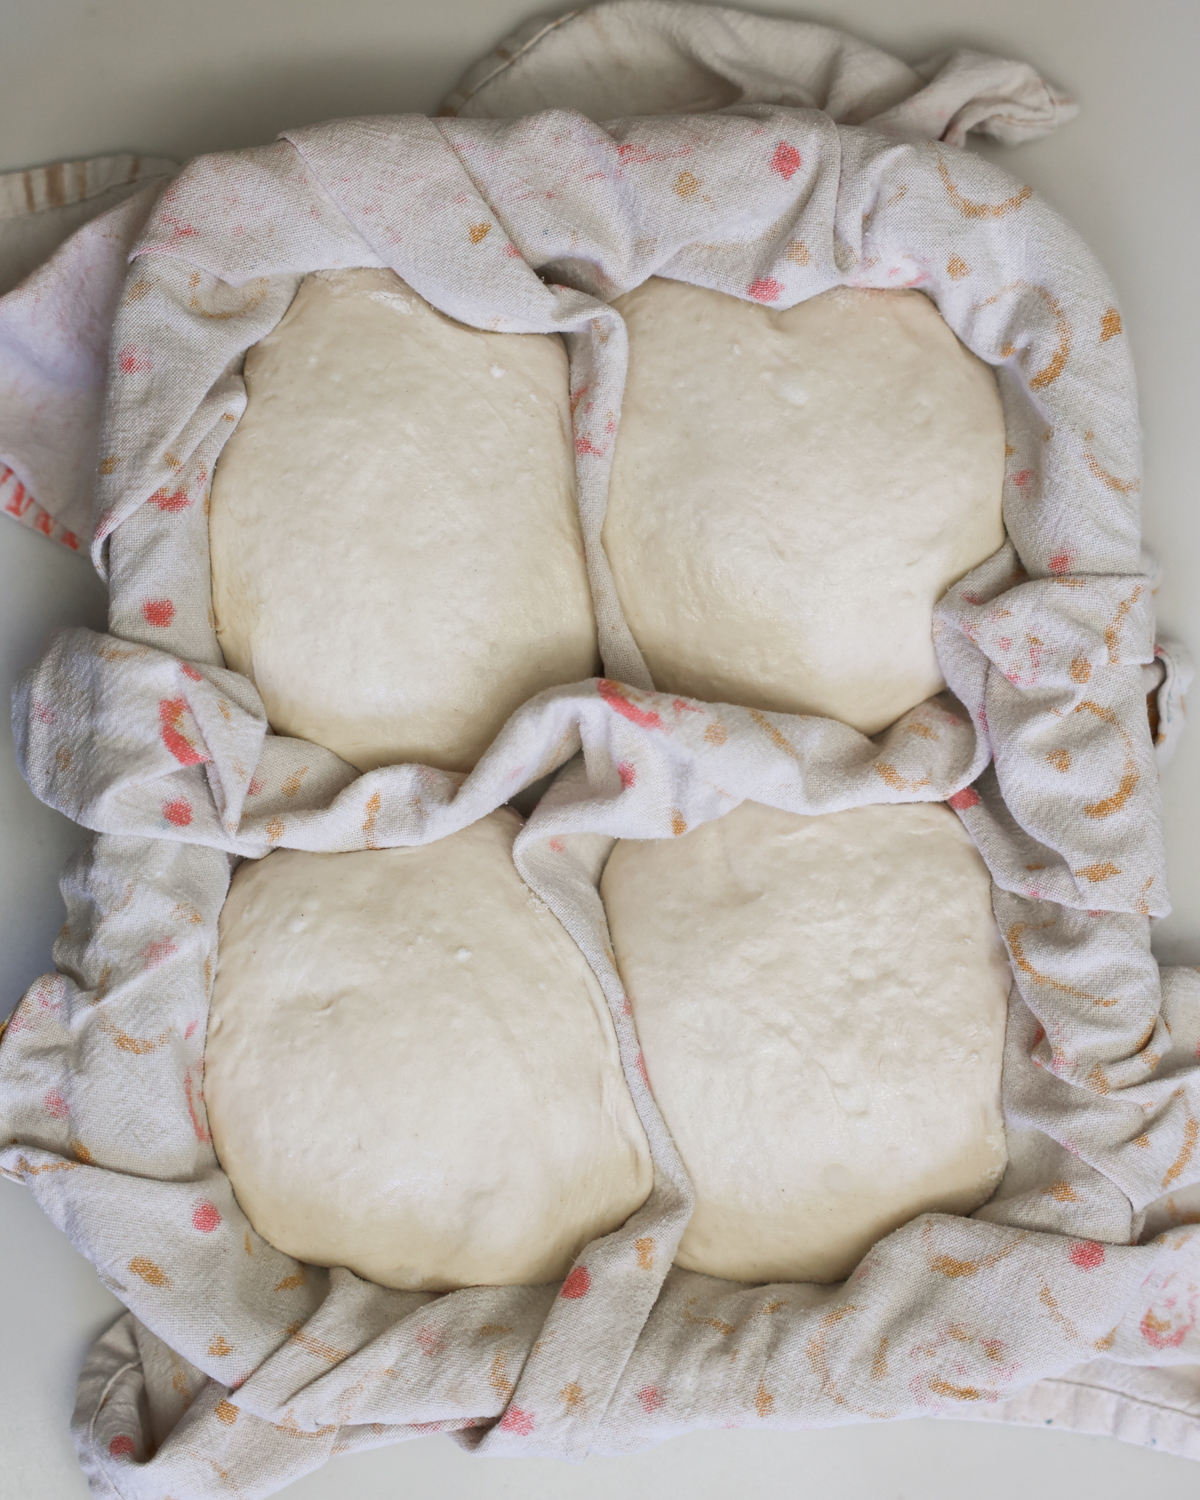
- Rest dough balls. Transfer the dough balls to the dough wells. Cover the baking sheet with a plastic bag, such as a clean grocery bag, and twist it to close. Refrigerate the dough for at least 6 hours but up to 3 days.

Shape & Bake Pizza Crust
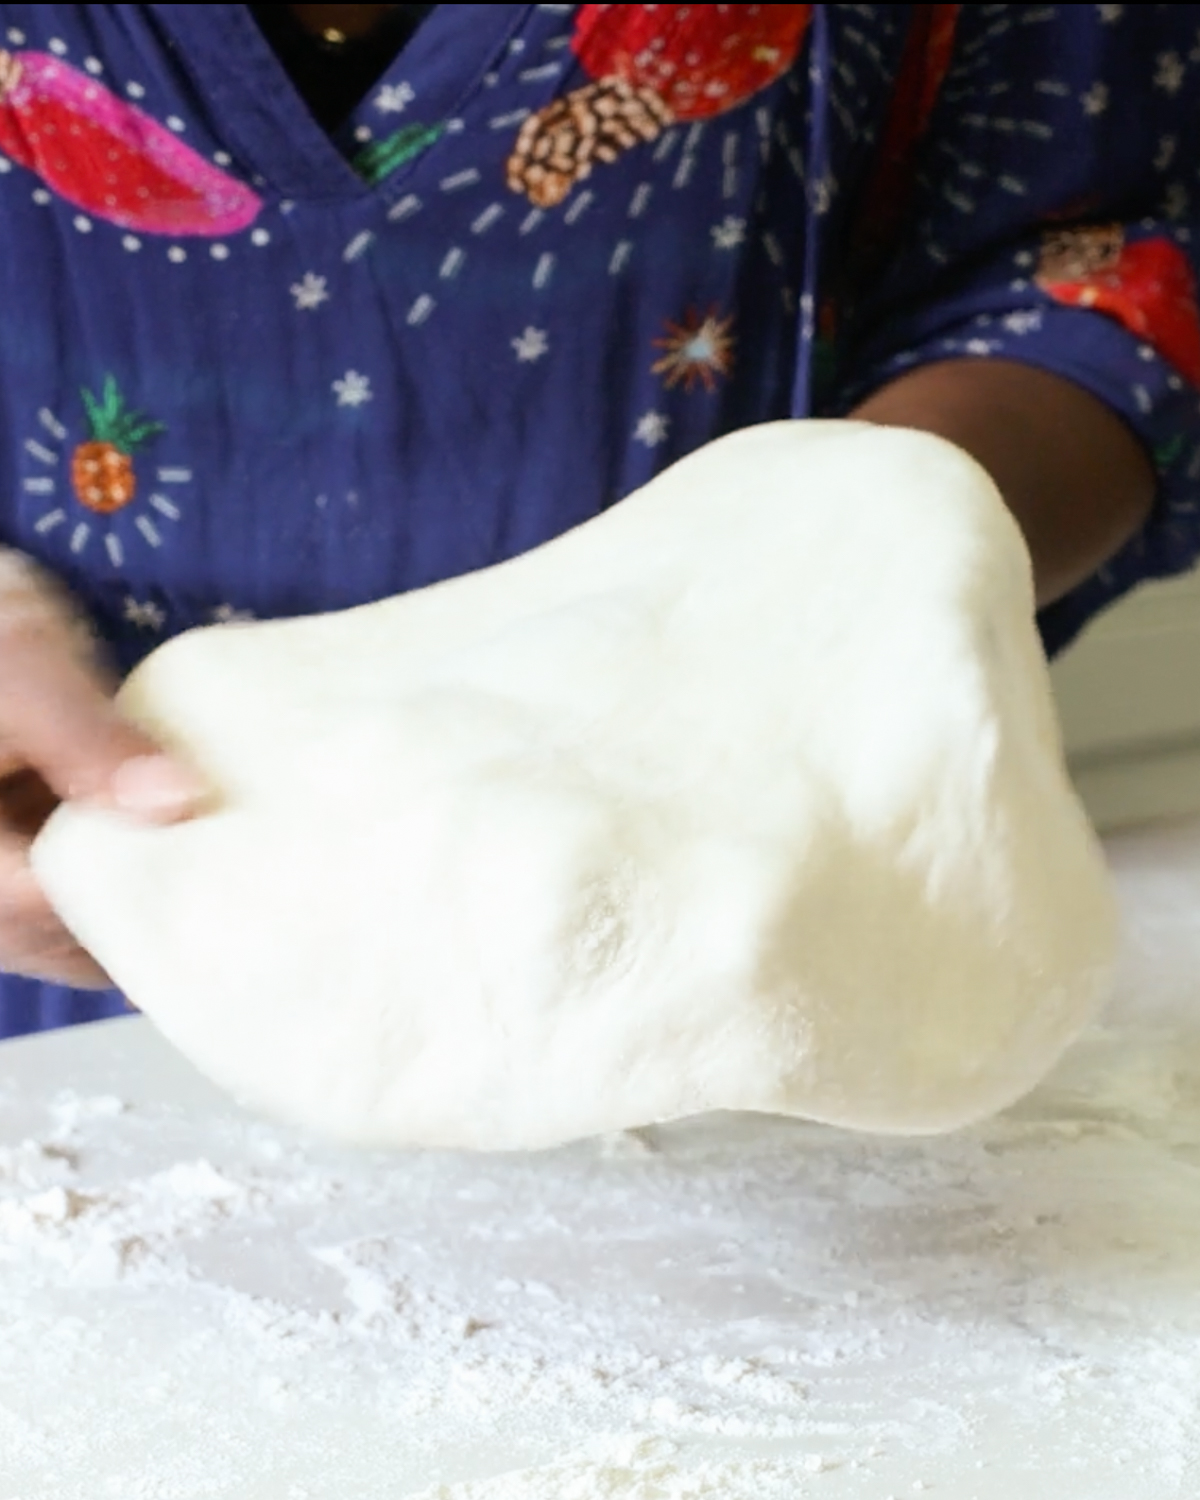
- Bring dough to room temperature. Flour the work surface generously. Place the dough on the counter, cover it with a tea towel, and let it come to room temperature for 30-60 minutes.
- Preheat oven. Place a pizza stone (my favorite), large cast iron pan, or pizza steel in the oven and preheat it to 550°F.
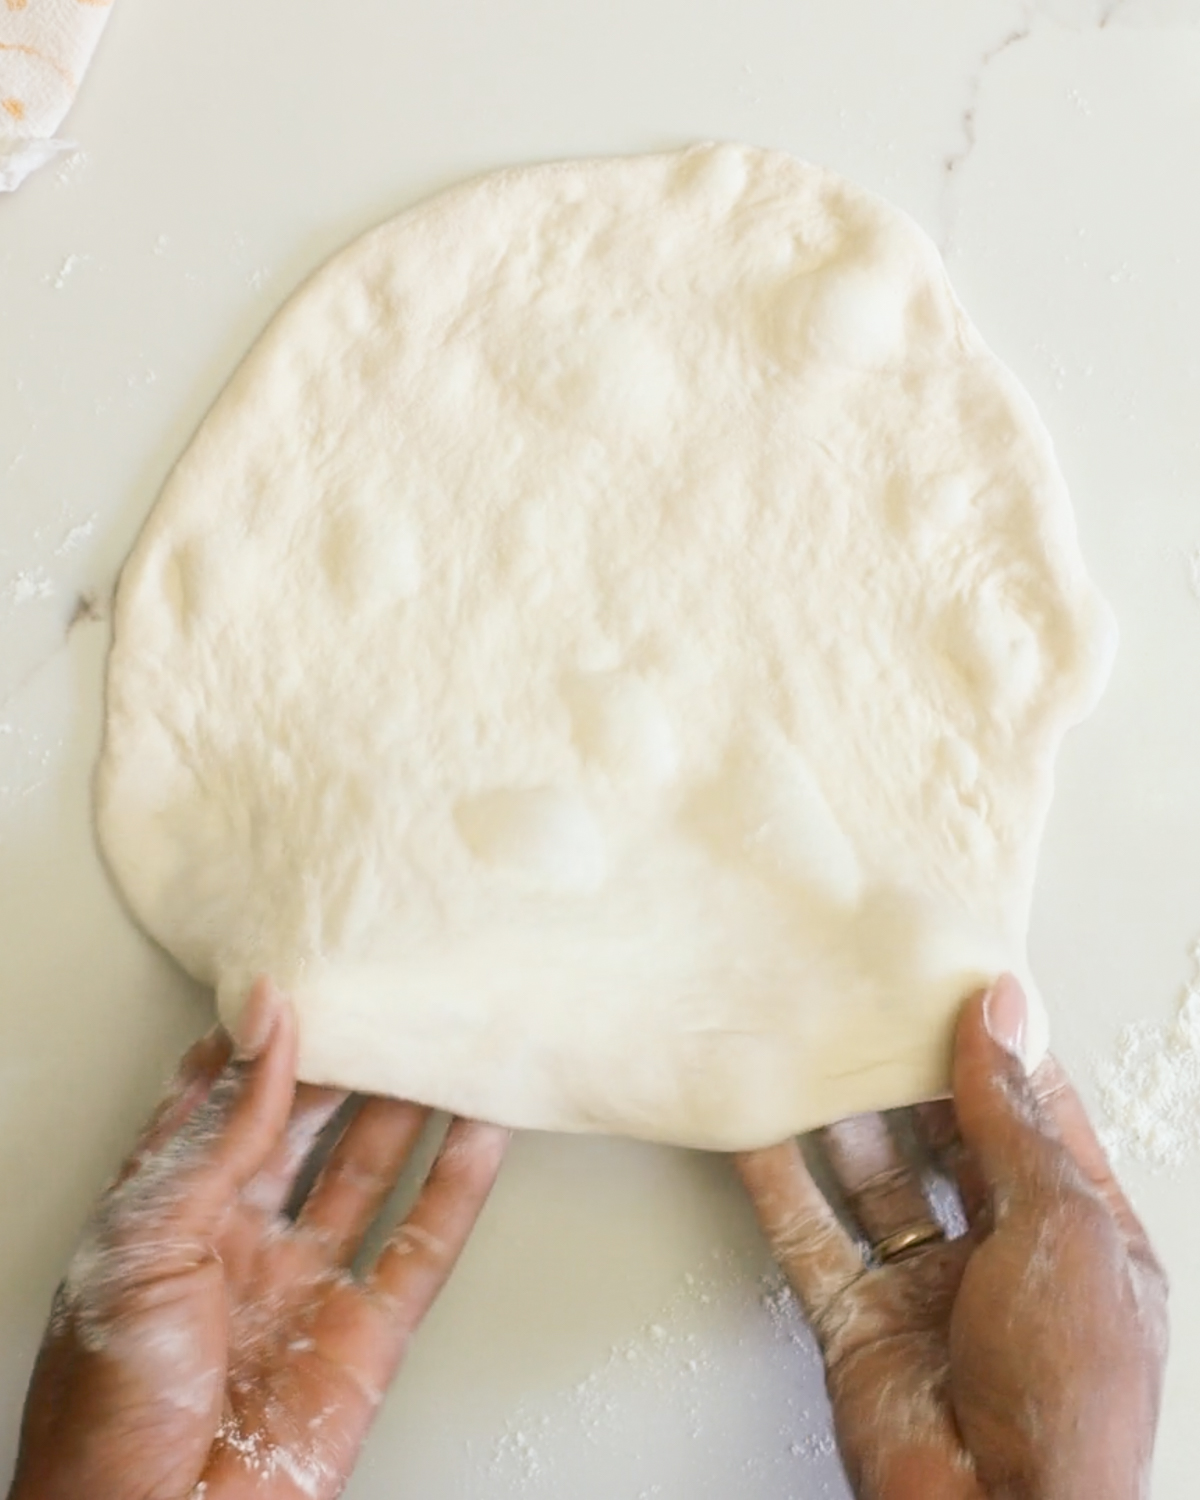
- Shape pizza crust. Gently shape each ball of dough into a roughly 10-inch round pizza crust.
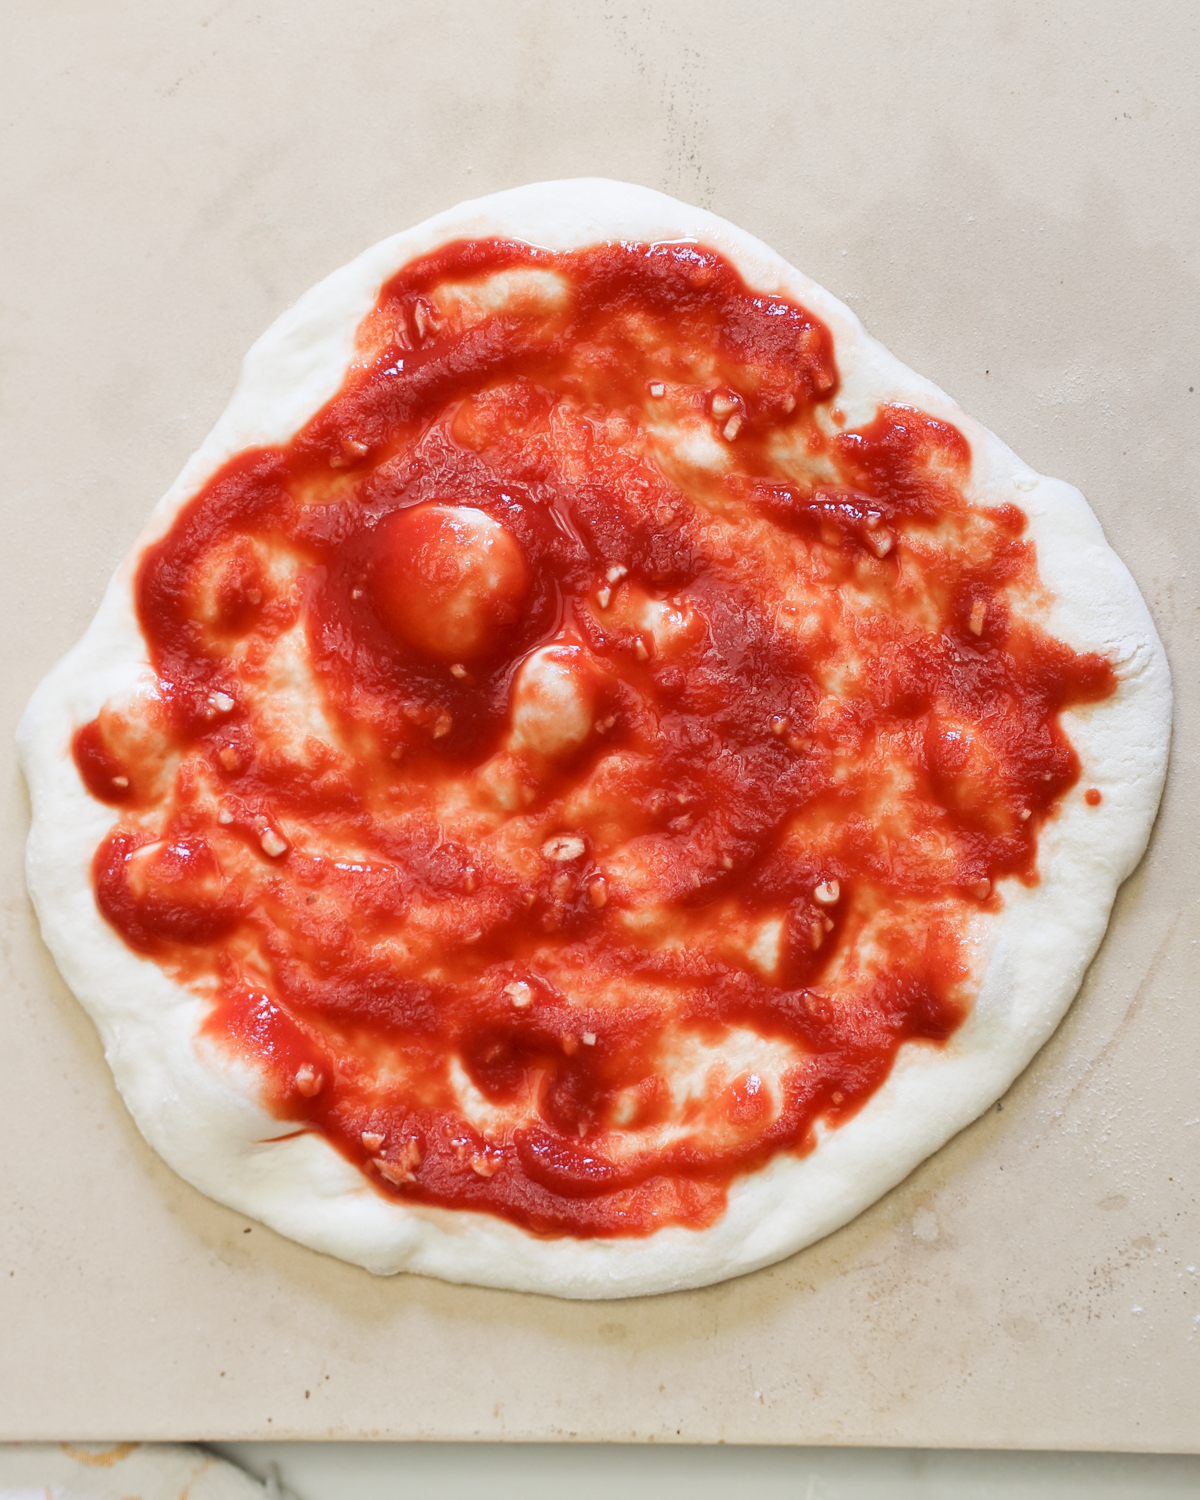
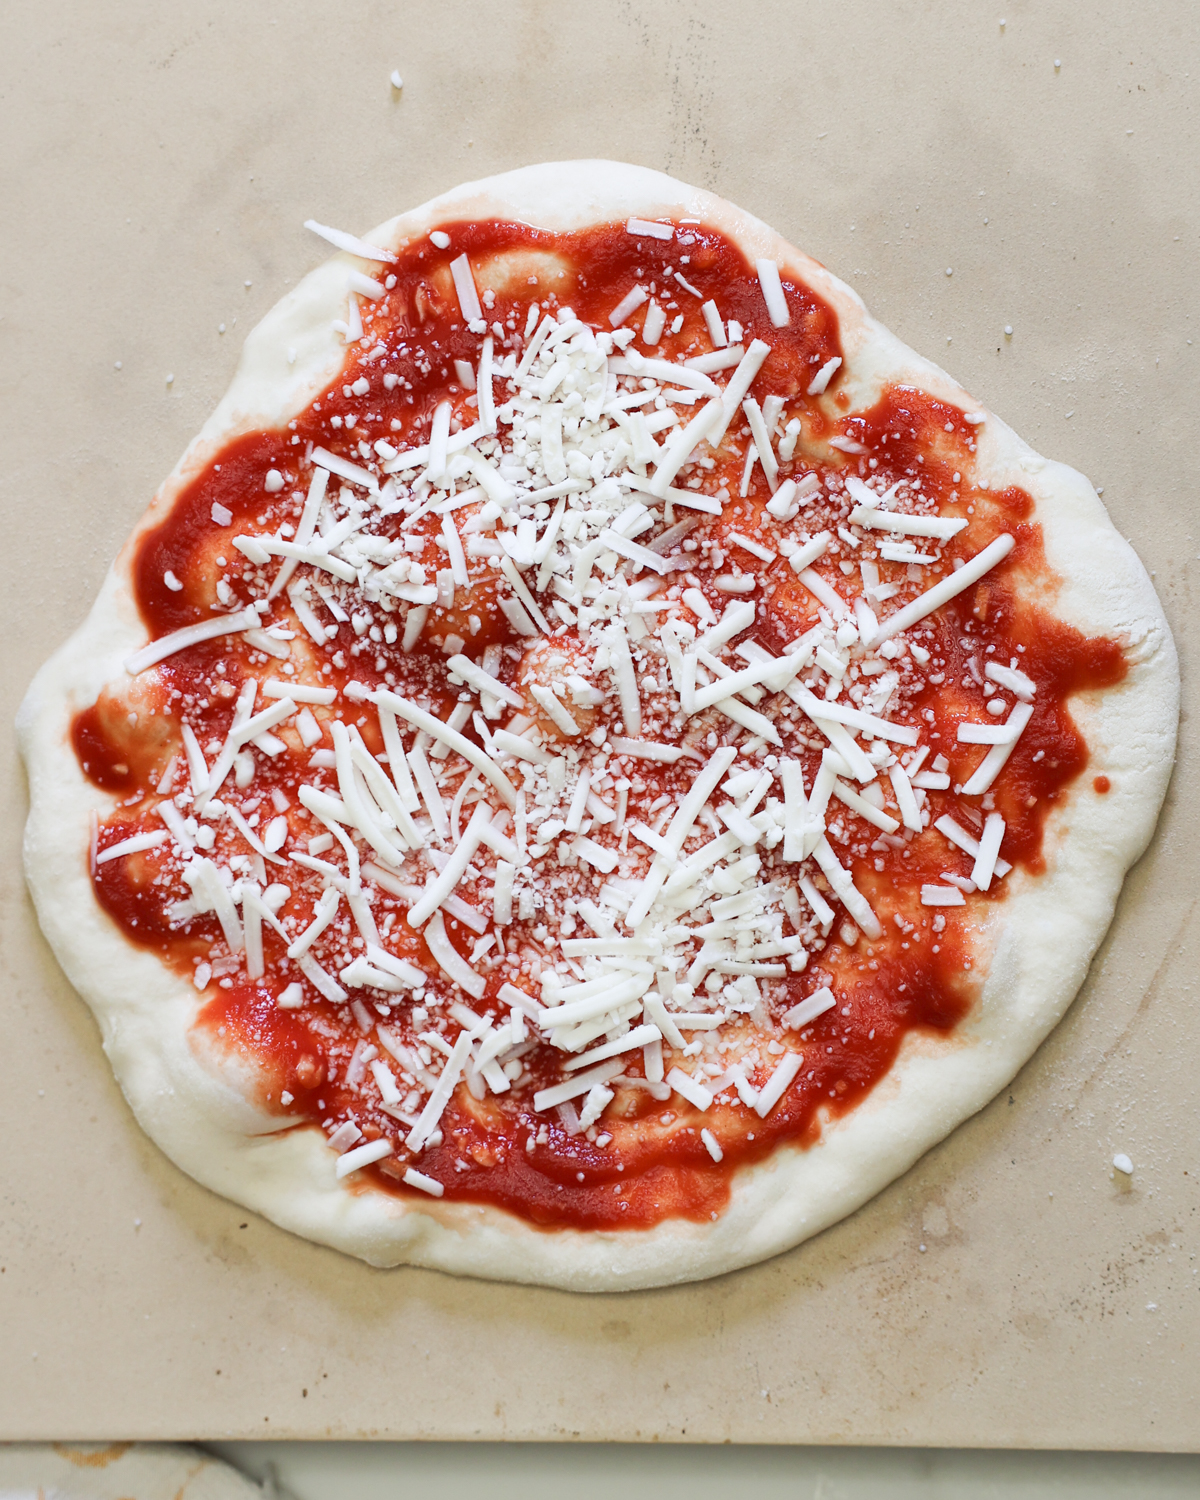
- Top the pizzas. Transfer the shaped dough to a piece of parchment paper. Or carefully transfer it straight to the hot pizza stone without parchment. Top it with the marinara and cheese toppings or the potato and kale toppings.
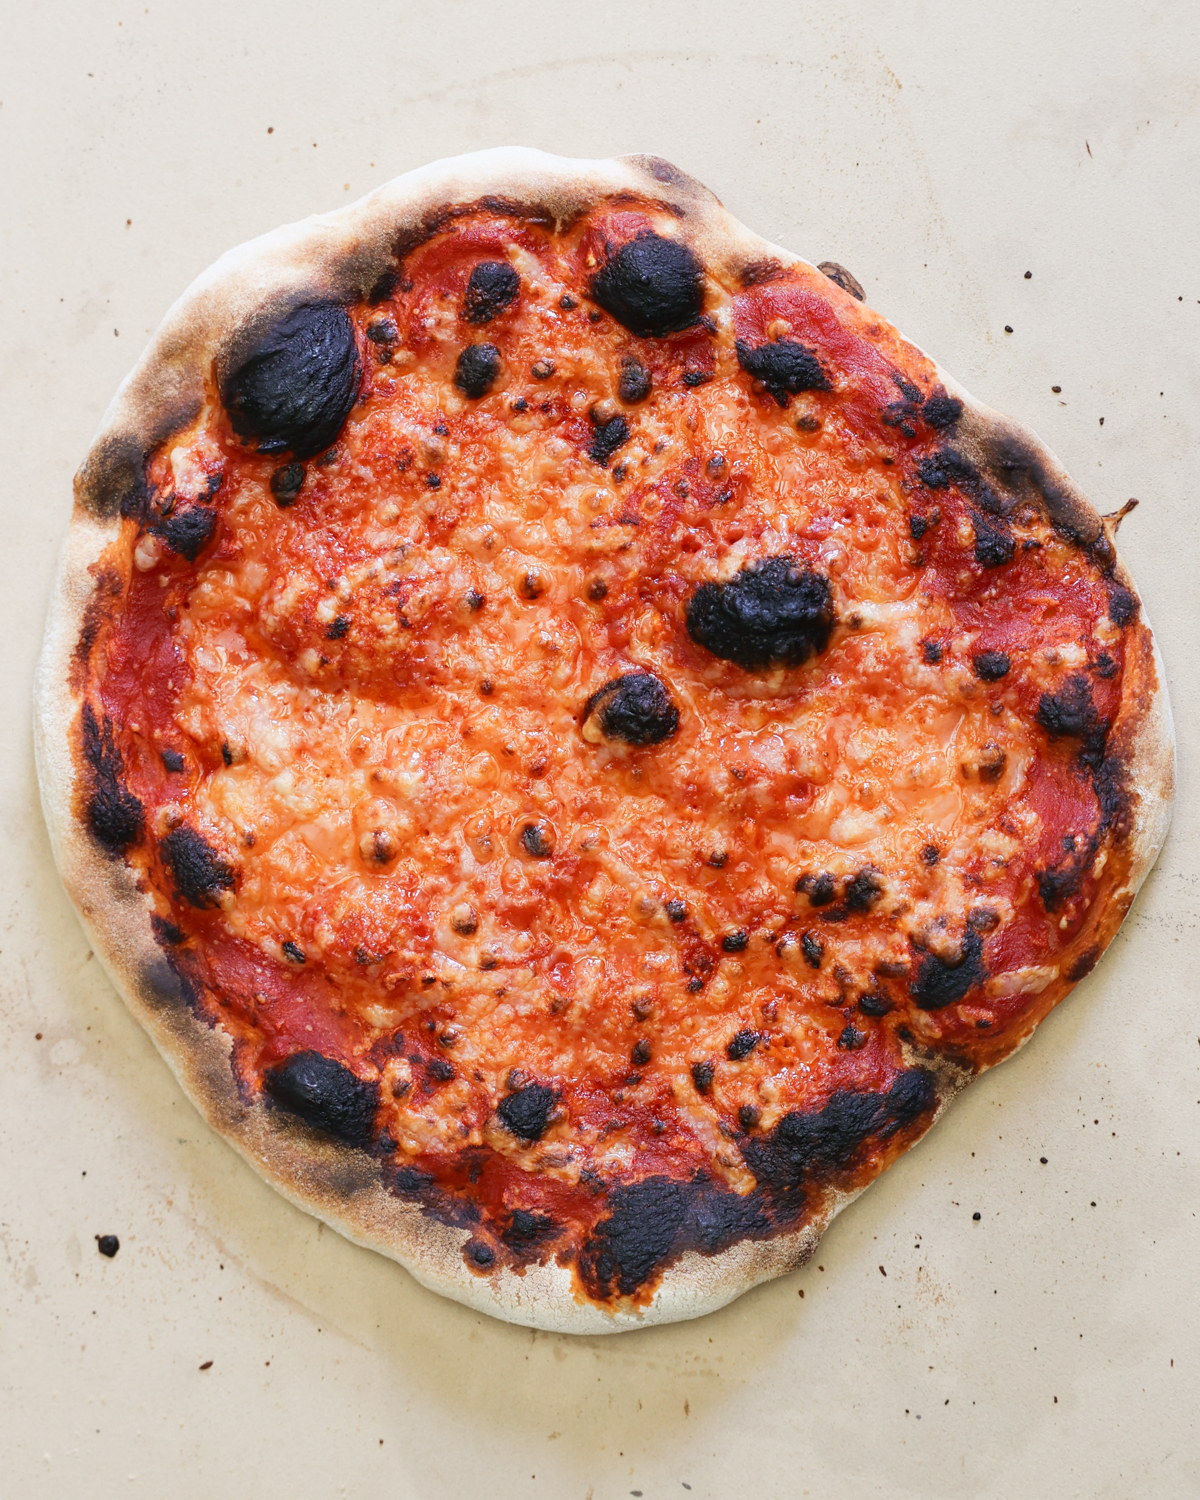
- Bake. Keep the pizzas on the parchment paper and carefully transfer them to the hot baking vessels. Bake for 6 minutes or until the crust is golden and the cheese has melted.
- Garnish, cool, and serve. Remove the pizza from the oven and place it on a cutting board or cooling rack. Top it with fresh basil, extra virgin olive oil, or other delicate toppings like red pepper flakes. Enjoy the sourdough pizza crust recipe hot, or let it cool for a few minutes before slicing and serving.

More Recipe Pro-Tips
- Wet your hands before stretching and folding. The dough will be wet and sticky. I find the best way to prevent it from sticking to my hands is to dampen them slightly before stretching and folding.
- Mind the room temperature. Warmer kitchens (70-75°F) will ferment and raise the dough within 8-12 hours. Cooler kitchens may take up to 12 hours. You will know the dough is ready to portion when it has risen 50-100%.
- When shaping, stretch the dough minimally. Overworking the dough when shaping can overwork the gluten and make it dense and tough. Gently stretch and shape it with your hands. If it gets tough to shape or bounces back after stretching, let it rest at room temperature for 10-15 minutes before resuming.
- Top and bake the pizzas on parchment paper. This will make the assembled pizzas easier to move onto the baking vessels.
- Preheat the baking vessel. Add the pizza stone, cast iron skillet, or pizza steel to the oven before preheating to ensure a crisp crust and even bake.
- Adjust the toppings. Use my suggested toppings, or try your own, such as fresh or roasted vegetables, other cheeses, pesto, and more. If you are not vegan, you can also make this recipe with shredded or fresh mozzarella cheese. Be careful not to add too many toppings, or the crust may not cook through without the toppings burning.
- Baking multiple pizzas at once. If your oven can accommodate multiple baking vessels, you can bake multiple pizzas simultaneously.
Stovetop (Cast Iron) Sourdough Pizza Directions
For an extra crispy crust, start the pizza on the stovetop! Here’s how to do it:
- Preheat an empty oven to 550°F.
- Shape the pizza as directed, but do not move it to a piece of parchment paper or top it.
- Preheat a cast iron skillet on the stovetop over medium-high heat.
- Add the pizza crust to the skillet. Quickly top it with toppings and cook for 3 minutes or until the bottom is golden-brown and just starting to blister.
- Transfer the cast iron skillet to the oven and bake the pizza for 3-4 minutes or until the toppings are melted and the top of the crust is lightly golden brown.
- Remove the pizza from the oven, garnish with olive oil or basil, and let cool for a few minutes, or enjoy immediately!
Outdoor Oven Pizza Sourdough Pizza Baking Instructions
Craving Italian Neapolitan-style pizza? You can also make this homemade sourdough pizza dough recipe in an outdoor pizza oven:
- Preheat the pizza oven to 700°F.
- Shape the pizza as directed and sprinkle it with fine cornmeal or semolina flour.
- Turn the sourdough pizza dough (cornmeal or flour side down) on a pizza peel.
- Top the pizza with your desired toppings.
- Bake the pizza for 3 minutes or until your desired degree of doneness.
- Remove the pizza from the oven, garnish with olive oil or basil, and enjoy!
Notes on Freezing the Dough
Though some sourdough pizza makers advise against freezing the dough for more than a week, I have not had any issues doing so. If you are concerned about the dough losing its rise in the freezer, you can parbake the crust in a 550°F oven for 1-2 minutes before cooling and freezing.
- Defrost frozen unbaked pizza dough overnight in the refrigerator before warming it on the counter for 30-60 minutes before shaping and baking as directed.
- Defrost frozen parbaked crusts overnight in the refrigerator before topping and baking at 550°F for 3-4 minutes or until the cheese is melted and the crust is golden brown.
Frequently Asked Questions
No, you do not need to knead this pizza dough. Unlike traditional pizza dough, sourdough develops gluten from a long and slow fermentation. Kneading can ruin this process, making the crust heavy and dense. Instead of kneading, stretch and fold the dough as directed and let it rest and rise for the recommended time.
According to research, sourdough has many potential health benefits, including being higher in antioxidants and easier to digest than traditional white bread, making it potentially a healthier option (source).
More Italian-Inspired Vegan Recipes
Potato Kale Pizza (or Butternut Squash)
Prevent your screen from going dark
Mix the Dough
In a bowl, combine the water, starter, and salt and stir to break up and partially dissolve.
Add the flour and stir until combined. If desired, you can use your hands to stir and combine the dough. It will be extremely sticky.
Transfer the dough to a greased bowl, cover it with a kitchen towel, and let it rest at room temperature for 30 minutes.
Stretch & Fold the Dough
Lightly dampen your hands with water. Stretch and fold the dough about 8 times.
Let the dough rest for 30 minutes, then stretch and fold the dough. Repeat the sequence 2 more times (4 times in total).
Ferment & Rise
Cover the dough with a kitchen towel and leave it on your counter at room temperature, about 70-75°F, for 8-12 hours. Note: you can still ferment at a cooler temperature, but the process will take longer, closer to 12 hours. The dough should rise 50-100% (or double)
Portion It
Flour your hands very well and transfer the risen dough to a heavily floured workspace.
Use a bench scraper or a knife to cut the dough into 4 equal portions.
Shape the dough into tight balls. To do this, fold the bottom of the dough under as you turn the dough in a circular motion to create a smooth ball.
Line a baking pan with parchment or a cotton tea towel, and sprinkle a bit of flour on the surface. Gently gather a small portion of the towel going down the center of the baking pan in both directions, creating 4 dough wells and small barriers between them.
Transfer the dough balls to the tea towel’s dough wells. Cover the dough with a plastic bag like a clean grocery bag and twist it to close.
Refrigerate the dough for at least 6 hours but up to 3 days. After this, you can freeze the dough if you don’t want to use it right away.
Shape & Bake Pizza Crust
Take as many dough balls out of the refrigerator as you would like to bake and set them on a floured workspace. Cover them with a tea towel and let them come to room temperature for 30 minutes to 1 hour. This helps them to be easier to work with and shape.
Preheat the oven to 550°F (may be labeled as High Broil on some ovens), and place a pizza stone, large cast iron pan, or pizza steel in the oven while it heats.
Shape the dough into a round pizza crust, about 10″.
Transfer the crust to parchment paper, then top it with your desired toppings (note: do not add the basil or oil garnish until after baking).
Keeping the pizza on the parchment paper, carefully transfer it to the hot baking vessel. Bake for 6 minutes or until the crust is golden and the cheese has melted. You can bake more than one pizza at a time, given that you have enough baking pans and room in your oven.
Remove from the oven and place it on a cutting board or cooling rack. Top it with fresh basil, extra virgin olive oil, or other delicate toppings. Enjoy hot or let the pizza cool for a few minutes before slicing and serving!
- Wet your hands before stretching and folding. The dough will be wet and sticky. I find the best way to prevent it from sticking to my hands is to dampen them slightly before stretching and folding.
- Mind the room temperature. Warmer kitchens (70-75°F) will ferment and raise the dough within 8-12 hours. Cooler kitchens may take up to 12 hours. You will know the dough is ready to portion when it has risen 50-100%.
- When shaping, stretch the dough minimally. Overworking the dough when shaping can overwork the gluten and make it dense and tough. Gently stretch and shape it with your hands. If it gets tough to shape or bounces back after stretching, let it rest at room temperature for 10-15 minutes before resuming.
- Top and bake the pizzas on parchment paper. This will make the assembled pizzas easier to move onto the baking vessels.
- Preheat the baking vessel. Add the pizza stone, cast iron skillet, or pizza steel to the oven before preheating to ensure a crisp crust and even bake.
- Adjust the toppings. Use my suggested toppings, or try your own, such as fresh or roasted vegetables, other cheeses, pesto, and more. If you are not vegan, you can also make this recipe with shredded or fresh mozzarella cheese. Be careful not to add too many toppings, or the crust may not cook through without the toppings burning.
- Baking multiple pizzas at once. If your oven can accommodate multiple baking vessels, you can bake multiple pizzas simultaneously.
Calories: 293kcal | Carbohydrates: 55g | Protein: 8g | Fat: 4g | Saturated Fat: 1g | Polyunsaturated Fat: 0.3g | Monounsaturated Fat: 0.3g | Sodium: 773mg | Potassium: 158mg | Fiber: 3g | Sugar: 1g | Vitamin A: 133IU | Vitamin C: 2mg | Calcium: 25mg | Iron: 3mg