
Brownies are the thing that can make a good day better and a bad day great.
If you’re the type of person trying to do better about what you eat then these sweet potato brownies can hit all the spots. They have the classic fudgy and love of chocolate feelings that our classic vegan brownies have, but with better ingredients.
As always, there’s no dairy or eggs, and it’s optional to include any gluten-based all purpose flour which could make these gluten-free as well.
Either way, they are delicious and we know you’ll love them!
Why You’ll Love These
- Healthier – notice I didn’t say “healthy” but healthier. These are healthier than our traditional brownies, similar to our black bean brownies, because we’re using maple syrup over refined sugars, limited to no all-purpose flour, and adding in some hidden veggies over eggs which are great for cholesterol.
- Make Ahead – You can make these 3-4 days in advance of whatever you need them for and they still hold their fudgy texture.
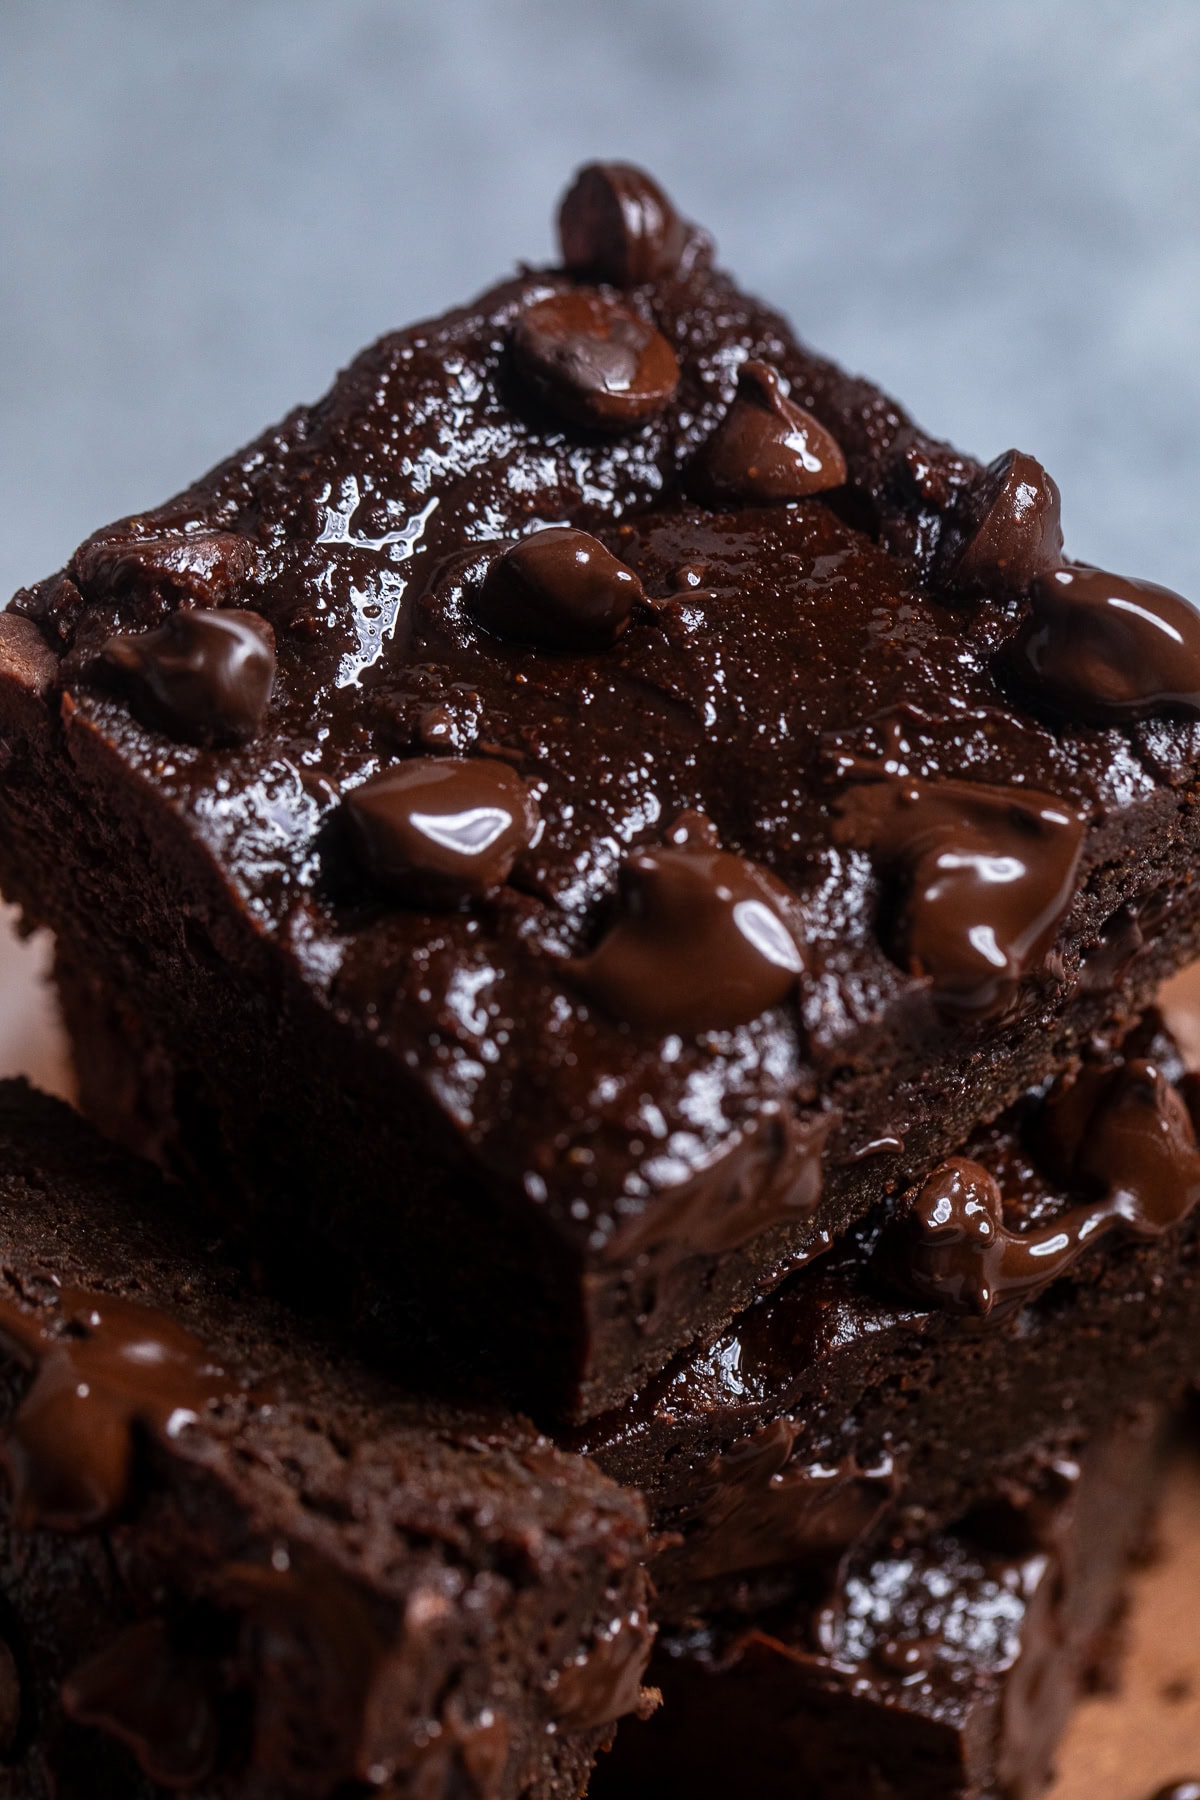
- Fudgy – Speaking of fudgy, these get an amazing texture from the moisture that the sweet potatoes give!
Jump to:
Ingredients and Substitutions
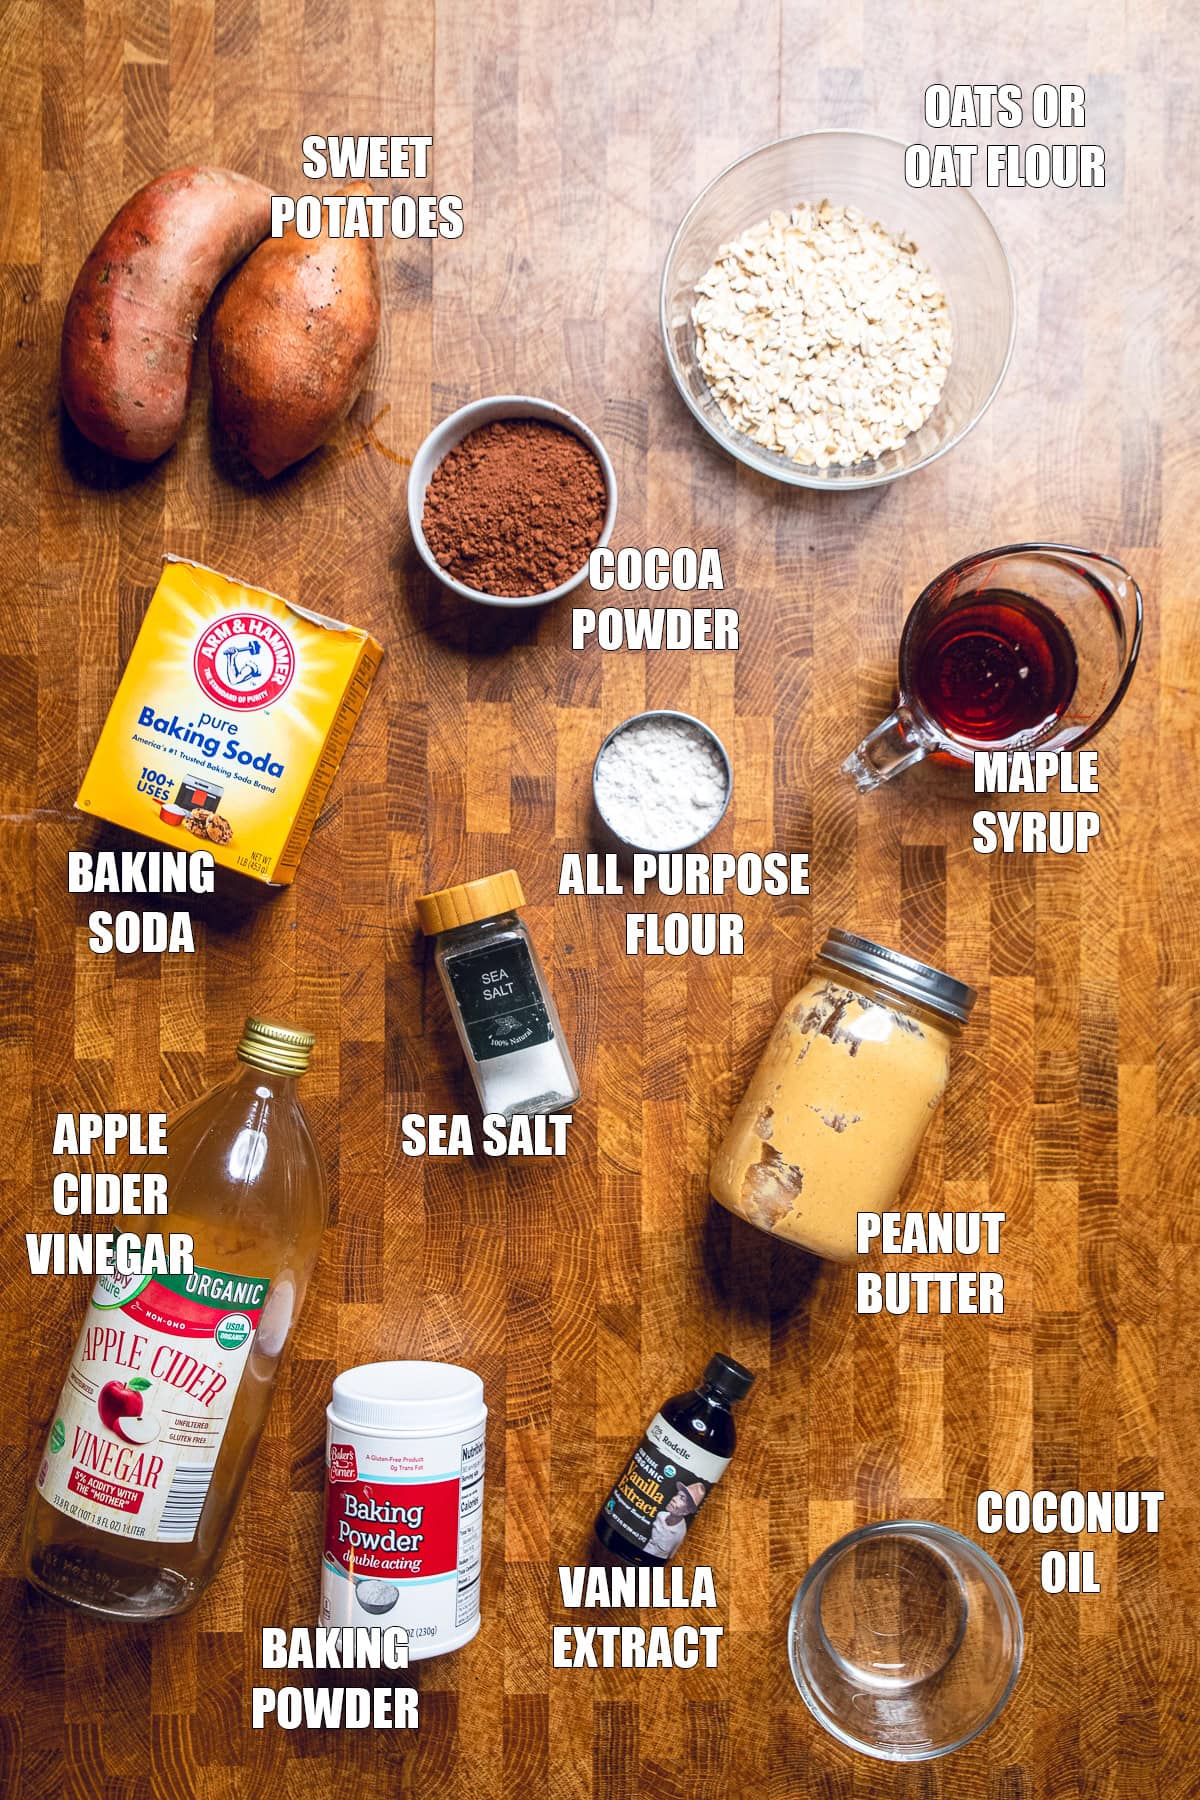
Below are notes about the ingredients before we get into the full recipe located lower in this post on how to make these sweet potato cocoa brownies:
Sweet Potatoes
The star of the brownies, after the chocolate of course! Sweet potatoes have starch and moisture that helps to mimic what we get from eggs, flour, and usually a lot more oil than we are using here which help keep the structure that we’re used to in brownies. Roasting them brings out more sweetness than you would get with boiling.
Substitutes: You could also boil or use canned, but note we do not recommend this as the sweetness levels are not the same.
Chocolate
I prefer using dutch processed cocoa, especially when making “healthier” brownies. The acidity inside is more neutralized which results in a smoother and more mellow chocolate flavor.
We’re also using vegan chocolate chips. You can use dark or semi-sweet chocolate depending on what you prefer sweetness wise.
Additionally, we’re adding in espresso powder, which is optional, to enhances the chocolate flavor even more. Tip: if you don’t regularly use espresso powder, you can freeze it to extend the shelf-life so you always have it on hand!
Maple syrup
Widely consider a “better alternative” than processed refined sugar, we are using it in our brownies, not only for a unique flavor, but also because maple syrup plays really well with the roasted sweet potato flavor.
Substitute: You could also use date syrup, coconut sugar, or cane sugar.
Bonus: Learn more about why your sugar may not be vegan
Flour
We are using oat flour here. Oat flour helps to absorb the excess moisture and provide structure while still allowing our brownies to be gluten free.
Tip: If you can have gluten, swapping 2 tablespoons of the oat flour for all-purpose flour can provide more stability!
Almond Butter
We are using almond butter for flavor, but also to add fat into the recipe without so much oil.
Substitute: You can sub with any nut butter like cashew or peanut butter, but you can also use sunflower butter or tahini as well. Note that subs like sunflower butter and peanut butter have unique tastes that will alter the ending flavor of the brownies.
Oil
While we are using almond butter for some of the oil, we are still adding two tablespoons. Oil helps with the texture and richness. Without some, your brownies end up more crumbly. Any neutral oil will work, we recommend avocado, coconut, or vegetable oil for this recipe.
Substitute: You can replace the oil with all almond butter just noting the ending texture will be slightly different.
Vegan Brownies Recipe Tips
If you want the absolute best sweet potato brownies, then you’ll want to follow these tips:
- Follow the measurements and instructions pretty please. Baking is a science, especially when making recipes without flour, eggs, and dairy. Every step has a purpose to ensure that at the end you have a delicious vegan brownie recipe.
- We highly recommend sifting the dry ingredients into the bowl. This loosens the ingredients and make sure there are no clumps.
- Make sure to line with parchment paper and grease your pans. No one likes brownies that can’t come out of the pan. It’s one of the most frustrating things and doing these two things will helps.
- Make sure that you evenly distribute the batter so your brownies cook evenly.
- This batter is not as thick as dough, but it is thicker and not runny – see video below for texture before pouring into pan. Do not try to adjust ingredients.
- Don’t over bake them.
- When the brownies are cooked, remove from oven and allow to cool completely before cutting. Cutting too soon does not give the brownies time to set up and can alter the final texture.
What to Serve with the Sweet Potato Chocolate Brownies?
So you made and love these vegan brownies (we know you snuck a piece), but you also need to know what to serve with it! Here’s some ideas:
Other Chocolate Vegan Desserts to Try:
🥳 Get the Full Recipe

Sweet Potato Brownie Recipe
These sweet potato brownies are secretly healthy, but no one will ever know! They are dairy free, egg free, refined sugar free, and gluten free while still being fudgy and oh so chocolatey decadent – an instant hit!
Prevent your screen from going dark
Instructions
-
Preheat oven to 425˚F (220˚C). Poke sweet potatoes with a fork all over, then place on a parchment lined baking sheet. Bake for 40-50 minutes or until fork tender. Prep an 8×8 pan with parchment paper and grease the sides. Set pan aside. When potatoes finish, drop temperature down to 350˚F (175˚C).
-
Once potatoes are done cooking and cool to touch, remove the skin, and mash very well.. Place 1 ½ cups of the mashed sweet potato inside of a large bowl along with ½ cup maple syrup, 3 tablespoon each neutral oil and almond butter, 1 ½ tsps vanilla, ¾ teaspoon apple cider vinegar, and ¼ heaping teaspoon salt. Whisk together well.
-
In a separate bowl, sift together ¾ cup each cocoa powder and oat flour, 3 tablespoon all-purpose flour (or 3 tablespoon more oat flour to keep gluten free), 1 ½ teaspoon baking powder, and ¼ teaspoon each baking soda and ¼ heaping teaspoon (if adding) espresso powder. Whisk together.
-
Add dry ingredient to the wet ingredients and fold gently until well combined and no dry spots remain. Add ½ cup chocolate chips and fold. Pour into the prepared baking pan and spread out into an even layer. If desired, add more chocolate chips on top.
-
Bake for 25-30 minutes. Remove and let completely cool. For easier time to cut, let cool to touch, then place in the fridge for 60 minutes before cutting.
Notes
Oat Flour : If you don’t have any, you can pulse or grind rolled (old-fashioned) oats until pulverized.
Video
This website uses affiliate links which may earn commission for purchases made at no additional cost to you.
Nutrition
Serving1brownieCalories260kcalCarbohydrates37gProtein5gFat13gSaturated Fat3gPolyunsaturated Fat2gMonounsaturated Fat5gTrans Fat0.02gSodium59mgPotassium373mgFiber5gSugar17gVitamin A3145IUVitamin C1mgCalcium102mgIron3mg

Did you make and love this recipe?
Click the 5 stars in the recipe card above or below in the comment section! This is a great way to support us so we can continue to bring great recipes!
Frequently Asked Questions:
Yes! Omit the optional all-purpose flour and only use oat flour. For the almond butter, use a safe alternative for you like sunflower butter. Also make sure to use safe for you chocolate chips.
These amazing vegan brownies will last for 3-5 days if stored in an air tight container. They do not need to be refrigerated.
Yes. These vegan brownies may be frozen. We recommend a freezer safe container and to consume within 3 months of first freezing them.
Yes, you can double this recipe if you need more and you have two separate baking dishes. We do not recommend doubling it and placing in the same pan.
We really love the Enjoy Life brand because they are free from so many allergens.
You want your brownies to cool completely for the optimal texture. Ideally, this is going to take 2-3 hours before you can cut into them for the best texture from the outside edges to the center. We do also recommend once cooled, to place these in the fridge for 30-60 minutes before cutting for the best cutting results, but this is optional.