
all cleanup always leaves me with the same choice: cut everything down now, or pause long enough to see what the garden is trying to give back.
Those dry, slightly scruffy flower heads may not look like much, but many are packed with seeds for next year. A few minutes with a pair of snips and a paper bag can give you enough marigolds, cosmos, zinnias, sunflowers, and cottage garden flowers to fill beds without buying another packet.
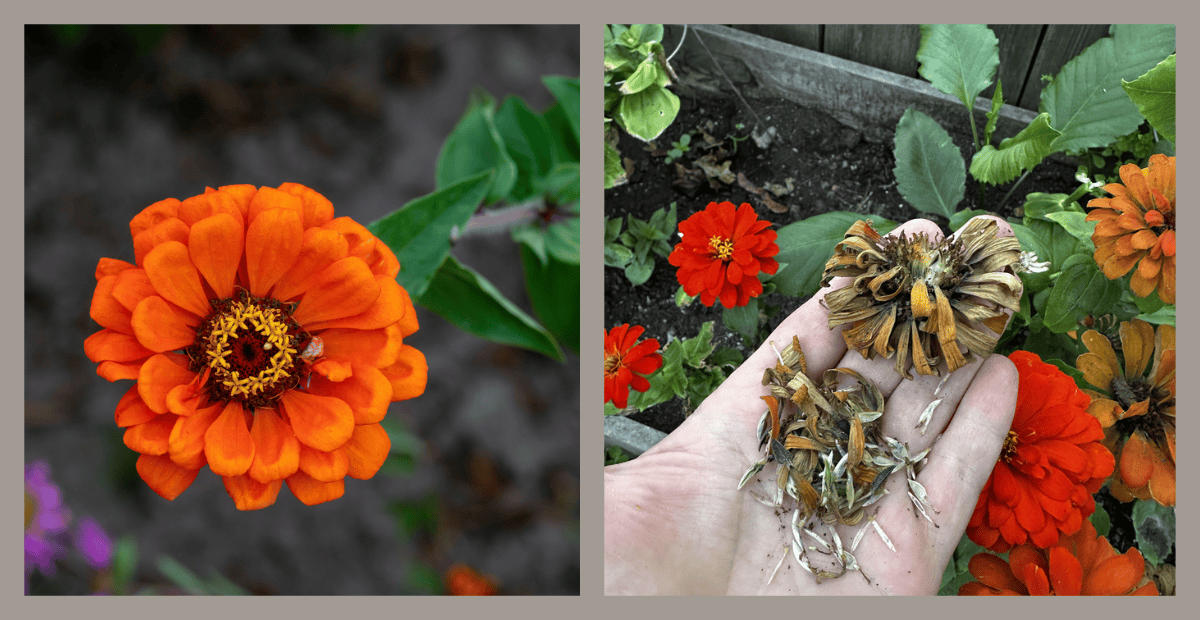
The exact collection window depends on the plant and your climate. According to the Royal Horticultural Society’s seed collection guide, seeds commonly ripen from late summer through late fall. The condition of the seed head matters more than the date on the calendar.
Here are 15 flower seeds worth looking for before fall rain, wind, birds, or garden cleanup gets to them first.
🐝 Fan Favorite
“Feed the Bees” Garden Sign
Give your wildflower patch a pop of color and let your neighbors know there’s purpose in your plants.
Delivered in 5–7 days
- Hand-illustrated design
- Recycled aluminum — won’t fade, rust, or crack
- Plants 1 real tree in the Monarch Corridor
🦋 Every sign funds a tree planted in the North American Monarch Corridor — at no extra cost to you.
Quickly Find Seeds To Save
How to Know When Flower Seeds Are Ready
Most flower seeds are ready when the plant looks as though it has finished its job for the season.
Look for:
- Petals that have fallen or dried
- Seed heads changing from green to tan, brown, or black
- Papery or brittle pods
- Browning stems beneath the flower head
- Firm seeds that release easily
- Pods that rattle when shaken
Avoid collecting seed heads that are green, soft, milky, or damp. Immature seeds may never germinate, while damp seeds can mold in storage.
Timing can move quickly. Some seed heads remain closed for weeks, while others seem to scatter their seeds the moment you stop watching. I like to carry a few paper bags through the garden during fall cleanup so I can collect anything that looks ready.
A Quick Note About Hybrids
Seeds from hybrid flowers may germinate, but the new plants may not look like the parent.
You might save seeds from a deep-red zinnia and end up with pink, orange, or single-flowered plants the following year. That can be a fun surprise in a chaos garden, but it is less helpful when you are trying to preserve one particular variety.
For more predictable results, Penn State Extension recommends saving seeds from open-pollinated or heirloom plants. Even open-pollinated flowers can cross with compatible varieties growing nearby, so a little variation is always possible.
Choose the Best Plants
Do not save seeds simply because a plant produced them. Select seeds from your healthiest, strongest, and best-performing flowers.
Skip plants with:
- Powdery mildew or other serious disease
- Heavy insect damage
- Weak stems
- Poor flowering
- Unusual growth that is not typical of the variety
- Mold growing on the seed head
Illinois Extension recommends choosing healthy, disease-free plants and identifies zinnias, marigolds, sunflowers, cosmos, nasturtiums, bachelor’s buttons, and calendula as good choices for beginners.
1. Marigold
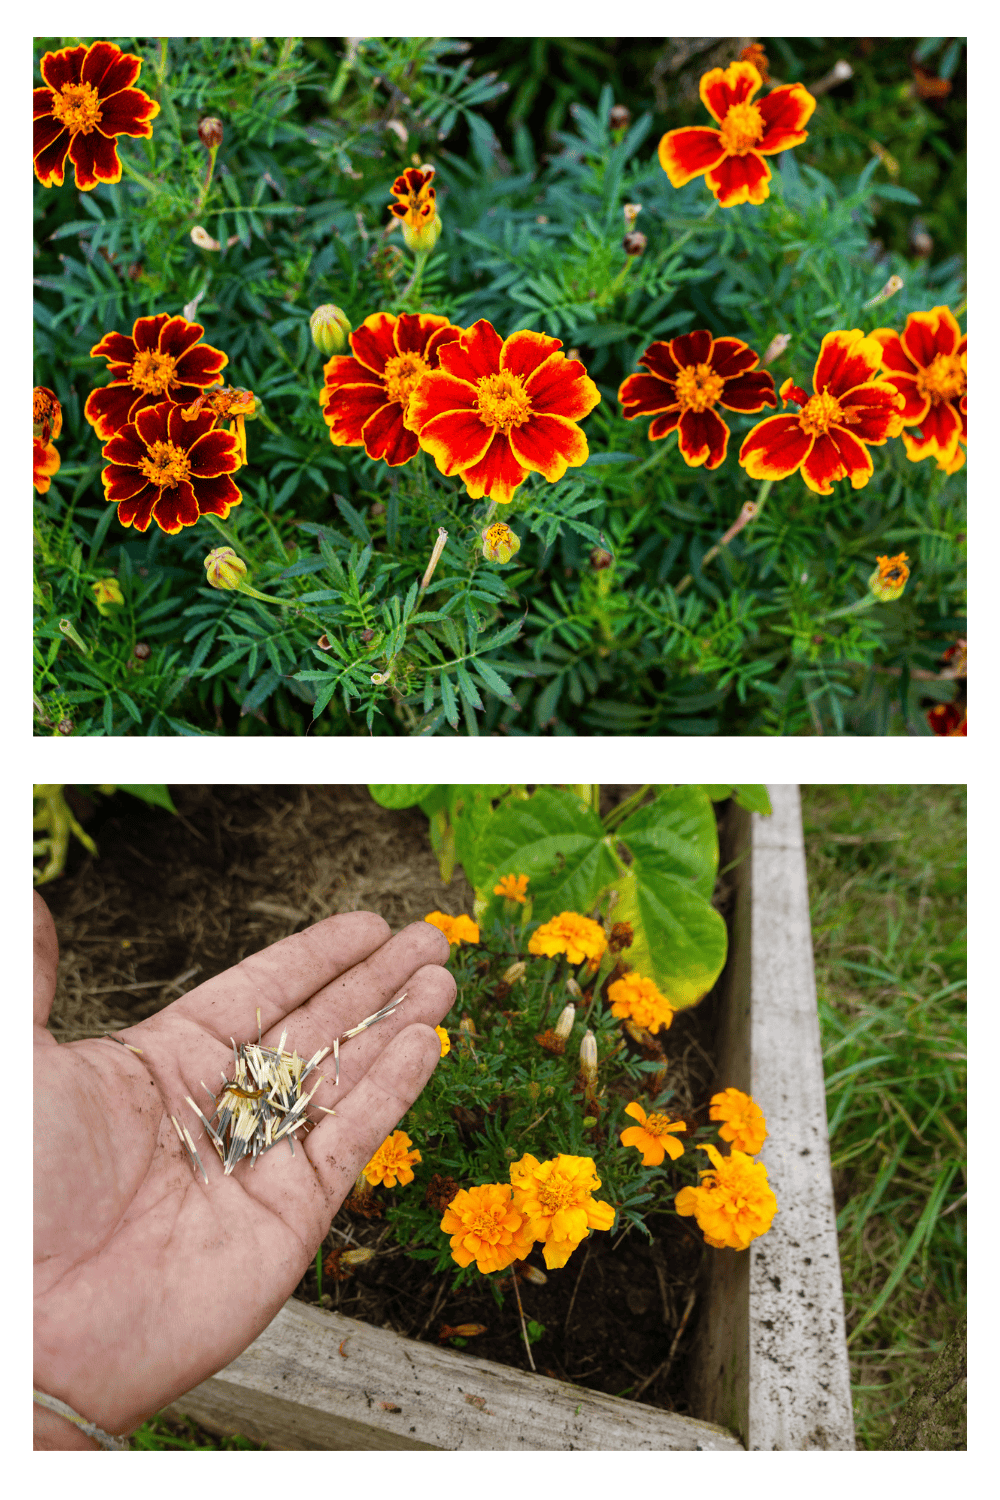
Marigold seeds are some of the easiest to collect, which makes them a great place to begin.
Stop deadheading a few of your best flowers and allow the heads to remain on the plant. Once the petals and green base have turned completely brown and feel dry, pull off the entire flower head.
Break it apart over a plate or piece of white paper. The seeds are long and slender, normally with a dark lower portion and a lighter, brush-like tip. They will be tucked into the base of the dried petals.
Separate the seeds from the petals and spread them out to finish drying. If you grow several marigold colors, label them separately. Cross-pollination may still give you a few surprises, but sorting by color will improve your chances of getting something similar next season.
Marigolds are also a natural fit for a more relaxed planting style. If you enjoy letting plants move around and reseed, see my guide to self-seeding annual flowers for a chaos garden.
2. Zinnia
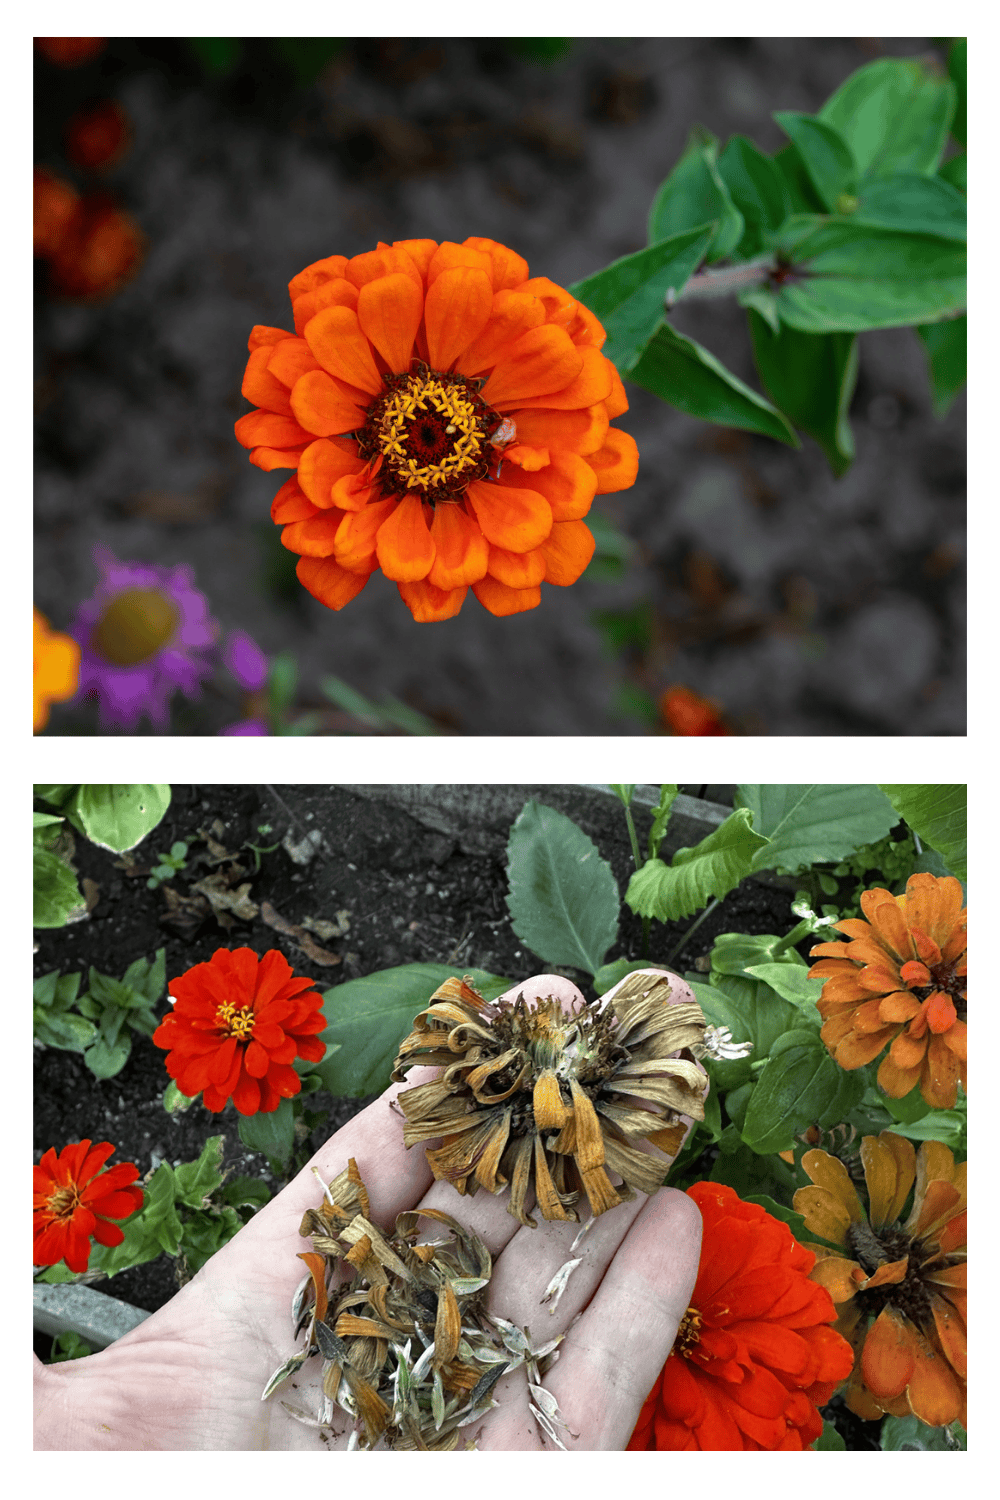
Zinnias produce plenty of seeds, but not everything inside a dry flower head will be viable.
Allow selected blooms to stay on the plant until the petals, central disk, and short section of stem beneath the flower are brown and crisp. If the head still feels flexible or damp, leave it a little longer.
Pull the head apart over a tray. You may find arrowhead-shaped seeds attached to the bases of dried petals, along with seeds from the central disk. Keep the seeds that feel firm and developed. Very thin, papery pieces are less likely to contain a mature embryo.
Zinnias cross easily, especially when several varieties grow together. That makes them less predictable, but it can also produce some beautiful volunteers.
If zinnias have become a staple in your beds, my complete guide to growing zinnias has more ideas for using them throughout the garden.
3. Cosmos
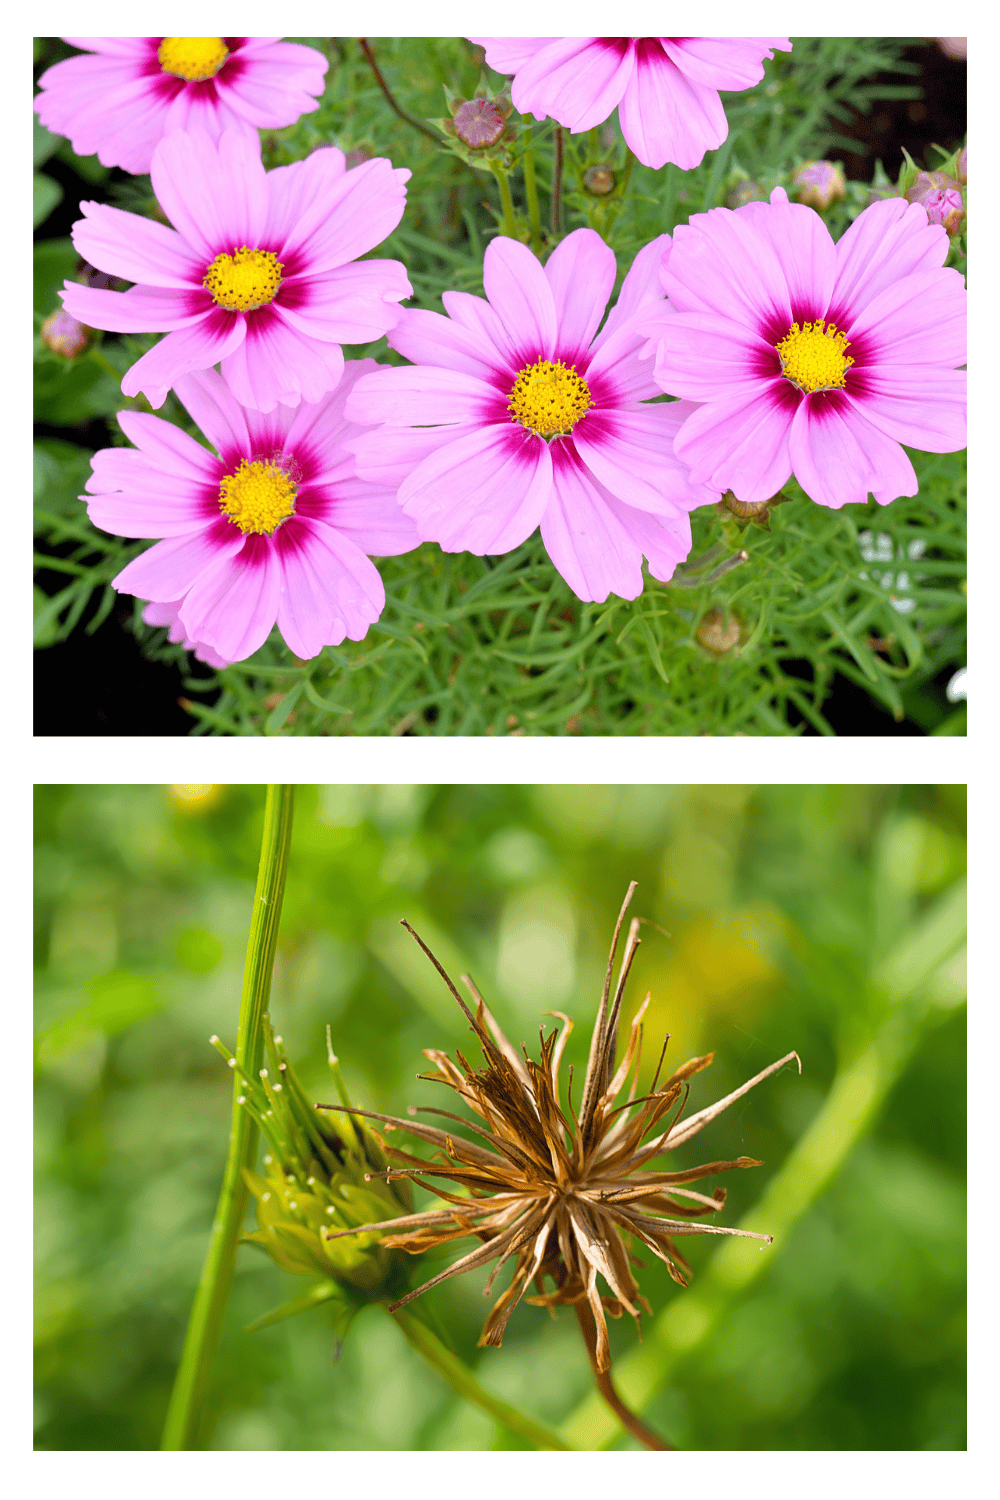
Cosmos make seed collection obvious—if you reach them before the wind does.
After the petals drop, the center develops a starburst of long, narrow seeds. Wait until those seeds turn tan, dark brown, or almost black and pull away easily.
Clip the entire head directly into a paper bag. Mature cosmos seeds can scatter with the slightest bump, so trying to carry several loose heads across the yard usually ends with next year’s cosmos growing along the path.
Let the collected heads dry for a few more days, then remove the seeds and chaff. Cosmos are generous self-seeders, so leave a few heads standing if you enjoy surprise seedlings.
They are one of my favorite flowers for filling awkward gaps because they grow quickly, tolerate lean soil, and bring a soft, airy look to crowded beds.
4. Calendula
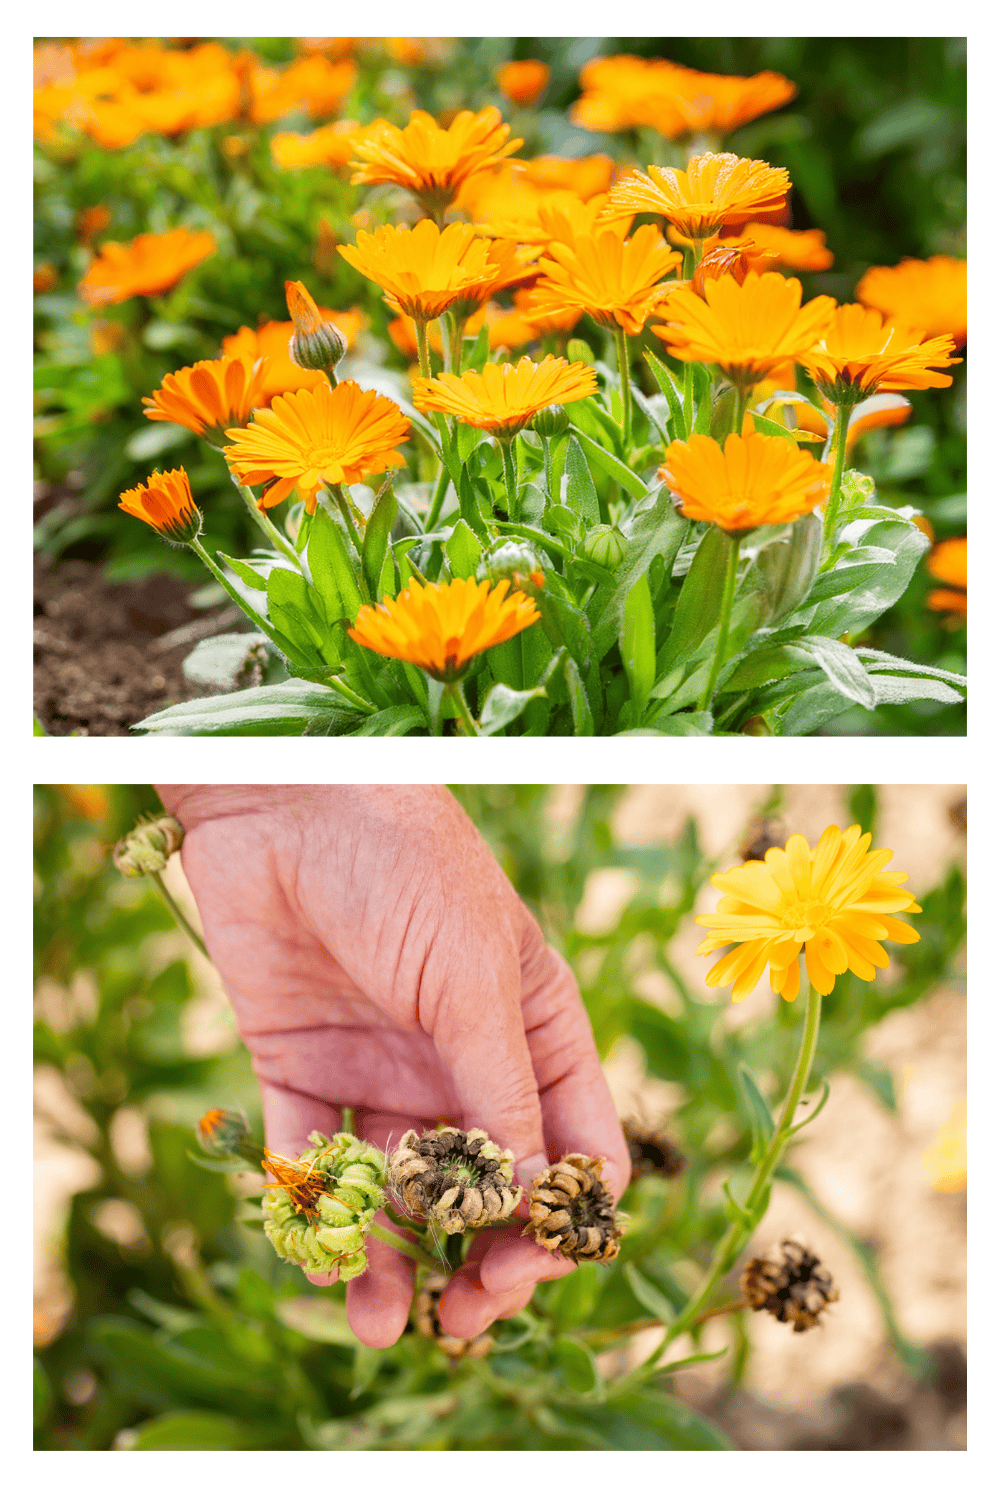
Calendula seeds look nothing like the neat, flat seeds you might expect to find inside a flower.
Each fading bloom produces a cluster of curved, ridged seeds that can resemble tiny hooks or dried worms. Seeds from the same flower may have different sizes and shapes, which is completely normal.
Wait until the flower base starts drying and the seeds become firm and tan. Collect the head before it falls apart and scatters.
Rub the dry head gently between your fingers, remove loose plant material, and spread the seeds out to dry. Calendula is generally easy to grow from saved seed and often returns on its own in suitable conditions.
In mild climates, calendula may also be sown during the cooler part of the year. It appears in my list of annuals to seed in August for October blooms, although fall planting success depends heavily on your first frost date.
5. Nigella
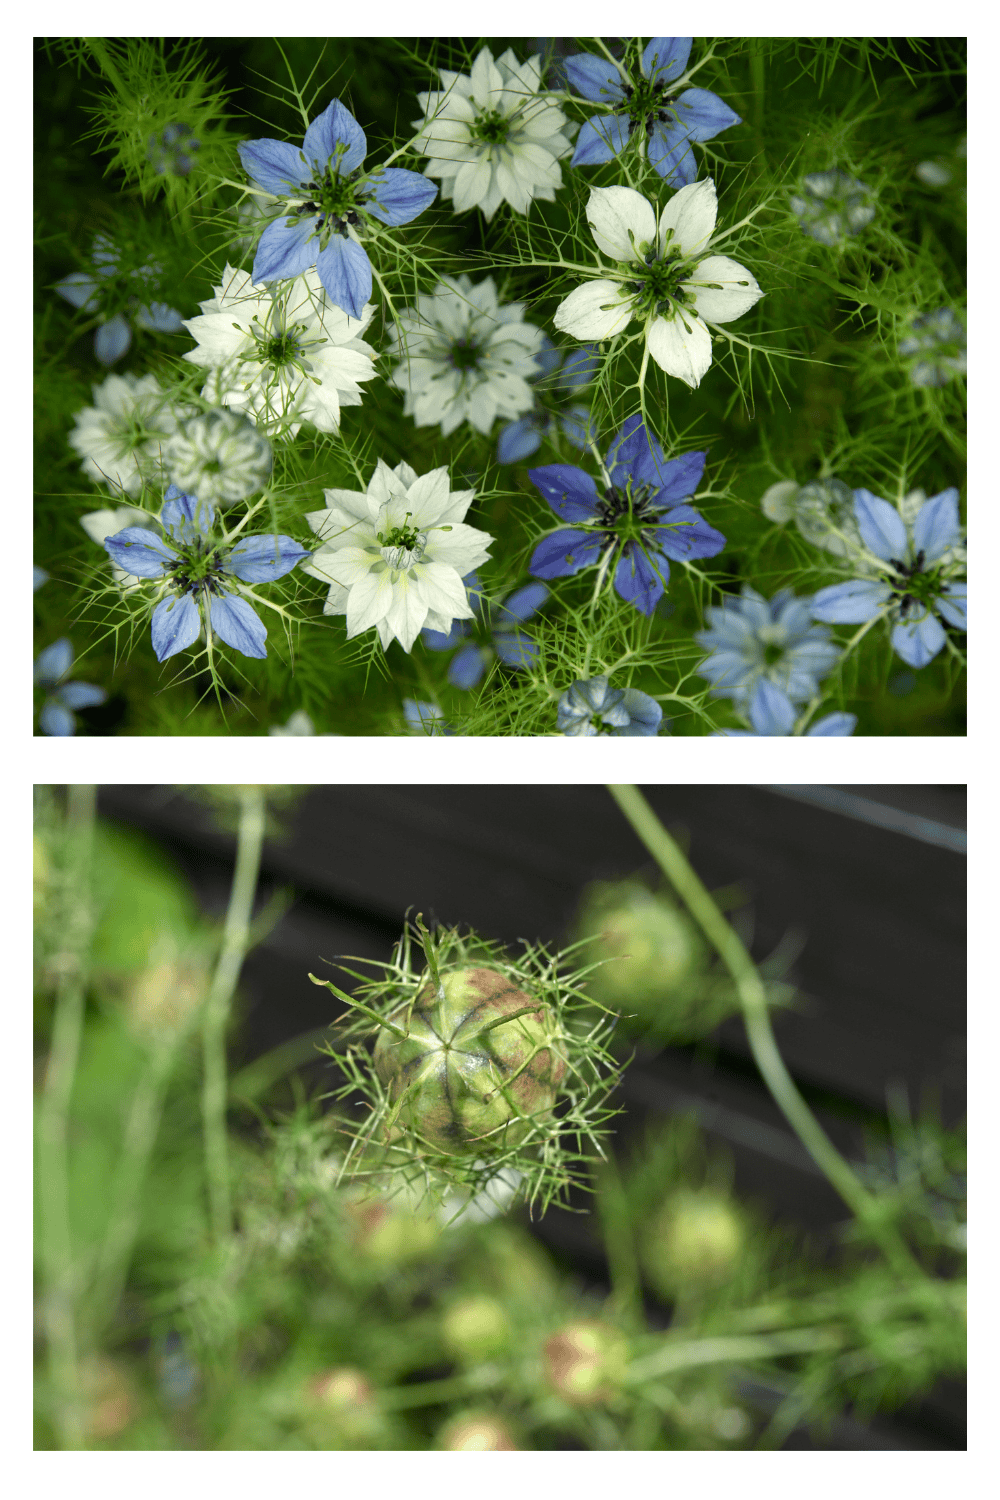
Nigella, or love-in-a-mist, produces some of the most decorative seed pods in the garden.
After the blue, pink, or white flowers fade, rounded pods form among the feathery foliage. Leave them in place until they change from green to tan or brown and feel papery.
Clip the pods into a paper bag before they split. Let them finish drying indoors, then gently crush or open each pod to release the small black seeds.
Nigella can reseed enthusiastically when it is happy. Collecting the pods gives you more control over where it grows next year, while leaving a few behind preserves the spontaneous cottage garden effect.
The dry pods are attractive enough for arrangements, so you can also place a few in a vase and collect the seeds after you are finished displaying them.
6. Poppy
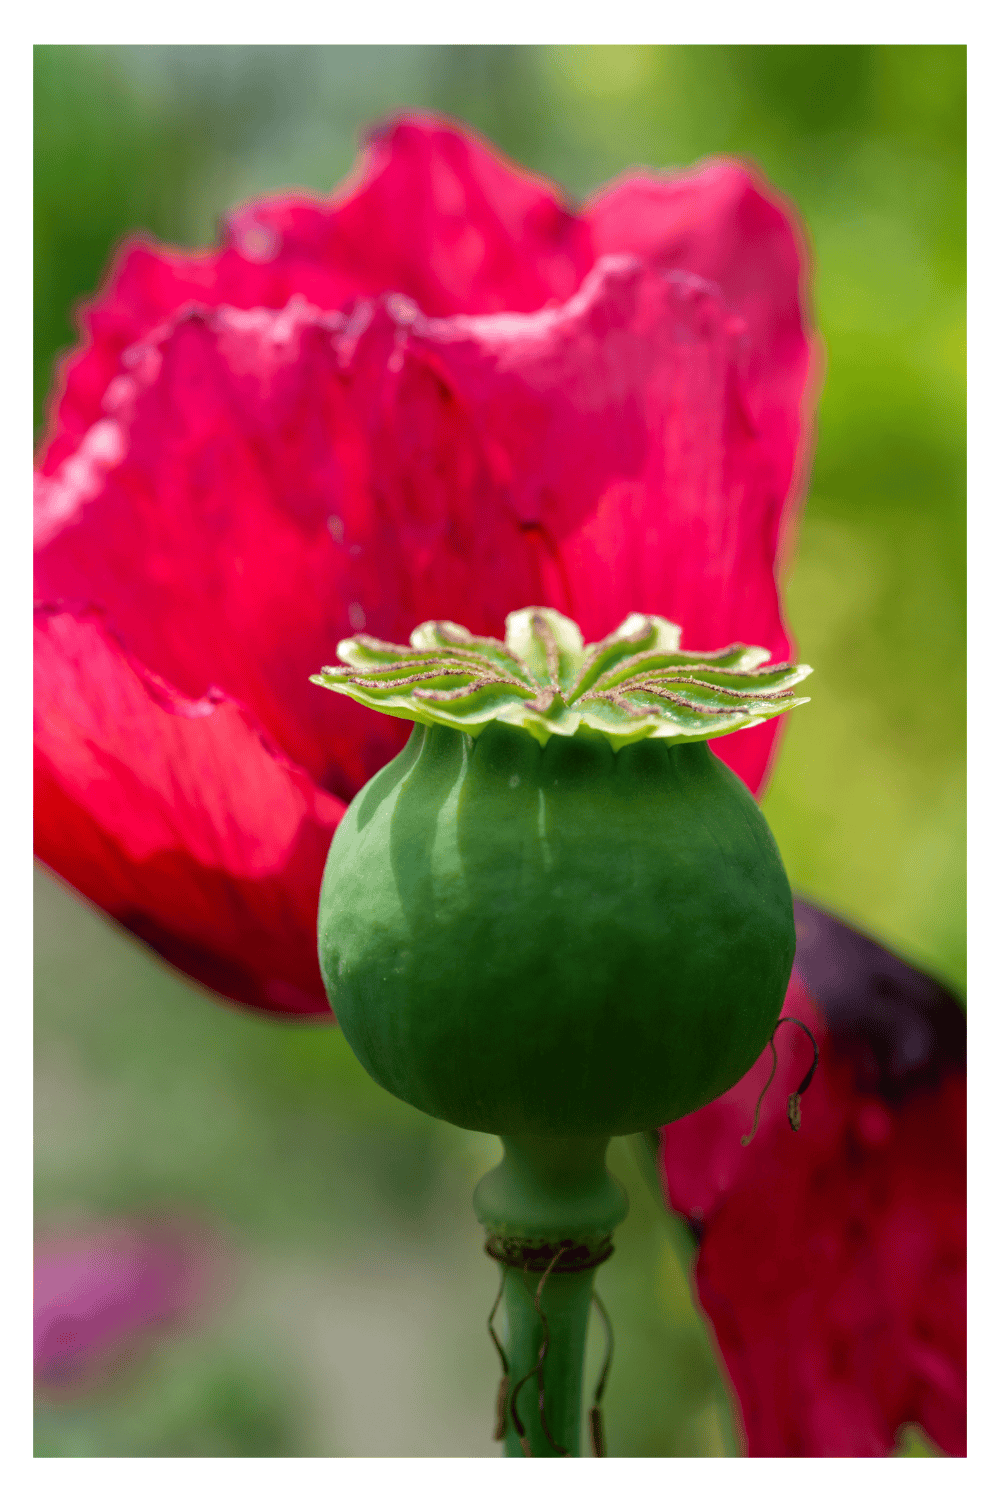
Poppy capsules are almost designed for seed saving.
Wait until the pod is dry and tan. Many mature pods will rattle when shaken, and small openings develop beneath the crown at the top.
Hold the capsule over a paper bag or envelope and tip it upside down. A gentle shake should release a stream of tiny seeds through those openings. If nothing comes out, the pod may need more drying time.
Only save seed from ornamental poppies that are legal to grow in your location. Keep different varieties separated and label them carefully because the seeds themselves can look very similar.
Poppies prefer being sown shallowly, and many perform well when exposed to natural seasonal temperature changes. Check the requirements of the particular species before deciding whether to sow in fall or wait until spring.
7. Sunflower
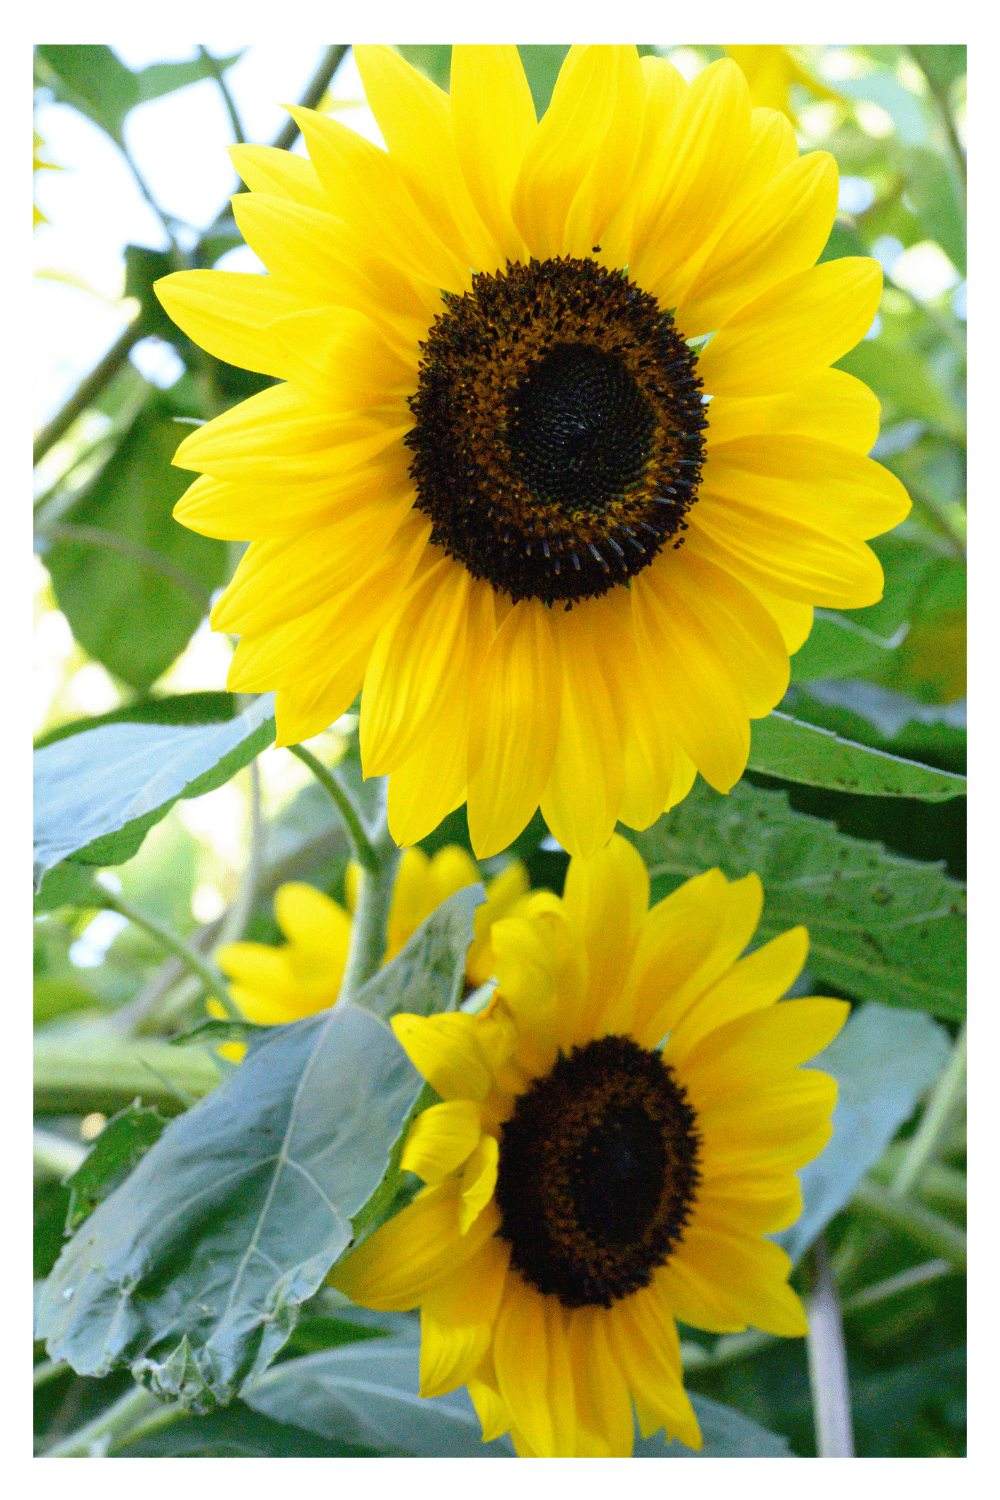
Sunflowers make seed saving a race between you and the birds.
Wait for the petals to fall and the back of the flower head to change from green to yellow and then brown. The seeds should look plump, and the small florets covering them should rub away easily.
If birds begin feeding before the head is completely dry, cover it with a breathable mesh or paper bag. Avoid sealed plastic, which can trap moisture around the developing seeds.
Cut the head with several inches of stem attached and hang or rest it somewhere dry and protected. Once the head is completely dry, rub the seeds loose with your hand or a stiff brush.
Save some for planting, but consider leaving a few heads outdoors. Sunflowers provide valuable late-season food and can keep a fall garden busy with finches and other seed-eating birds.
8. Nasturtium
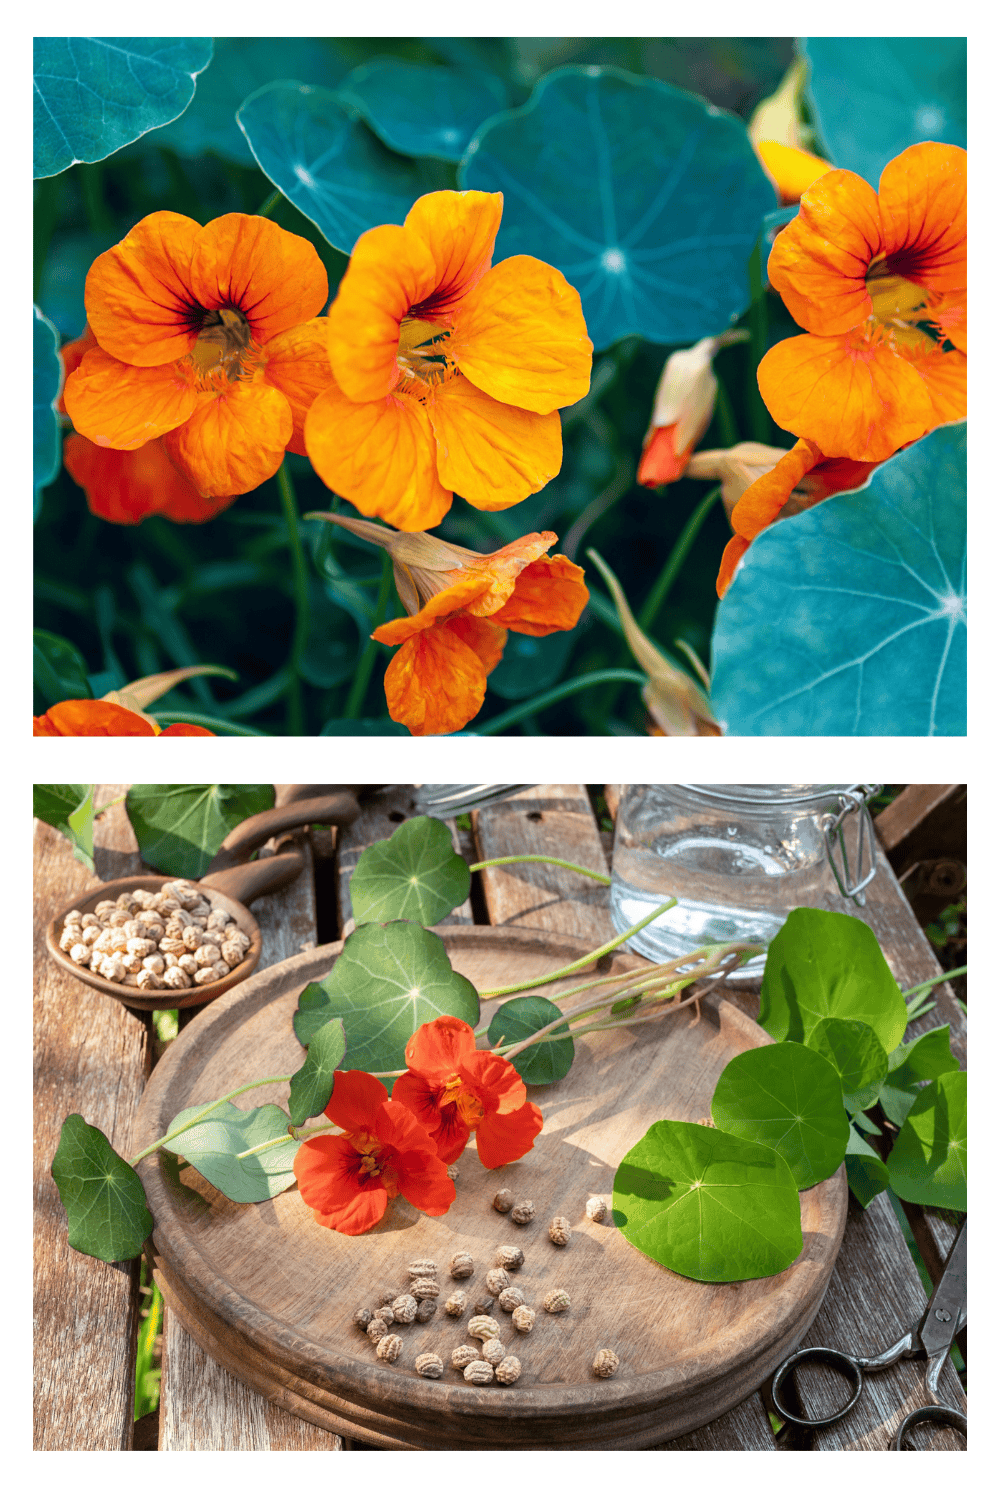
Nasturtium seeds are large, easy to handle, and a little different from the other seeds on this list.
After flowering, clusters of round, deeply ridged seeds form along the stems. Mature seeds often fall while they are still greenish or pale tan, so check the soil beneath the plant as well as the vines.
Collect full-sized seeds that feel firm. Spread them in a single layer and allow them to dry until they become hard and tan or brown.
Because nasturtium seeds are thicker than marigold or poppy seeds, give them plenty of airflow. Turning them occasionally helps moisture escape evenly.
Nasturtiums are excellent for pots, raised-bed edges, and informal planting schemes. Their trailing habit lets them spill through other flowers without taking over the entire bed.
9. Sweet Pea
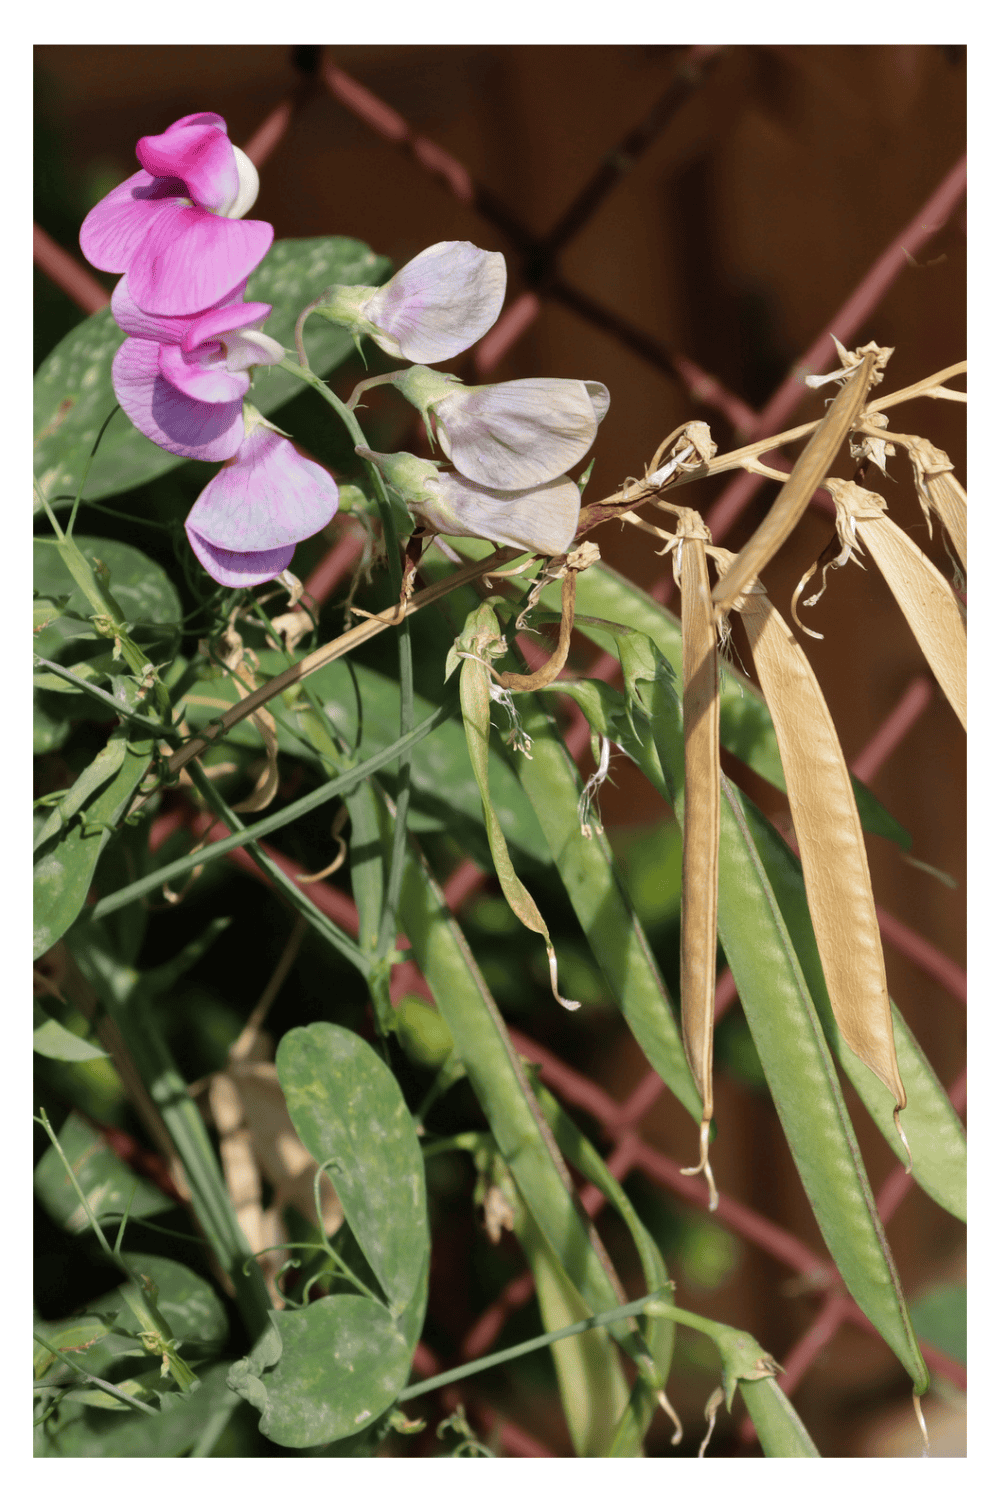
If you stop deadheading sweet peas, the vines will begin producing green pods that resemble edible garden peas. Let selected pods mature until they turn brown and feel dry.
Clip them before they become so brittle that they twist open. Place the pods in a paper bag and let them finish drying, then split them and remove the round seeds.
Label these seeds very clearly. Ornamental sweet peas are not edible peas. The North Carolina Extension Gardener Plant Toolbox identifies sweet pea seeds as poisonous, so keep them away from children, pets, and food-storage areas.
Allowing pods to develop will slow flower production, so choose only a few of your best vines for seed collection and continue deadheading the rest until you are ready for them to finish.
10. Bachelor’s Button
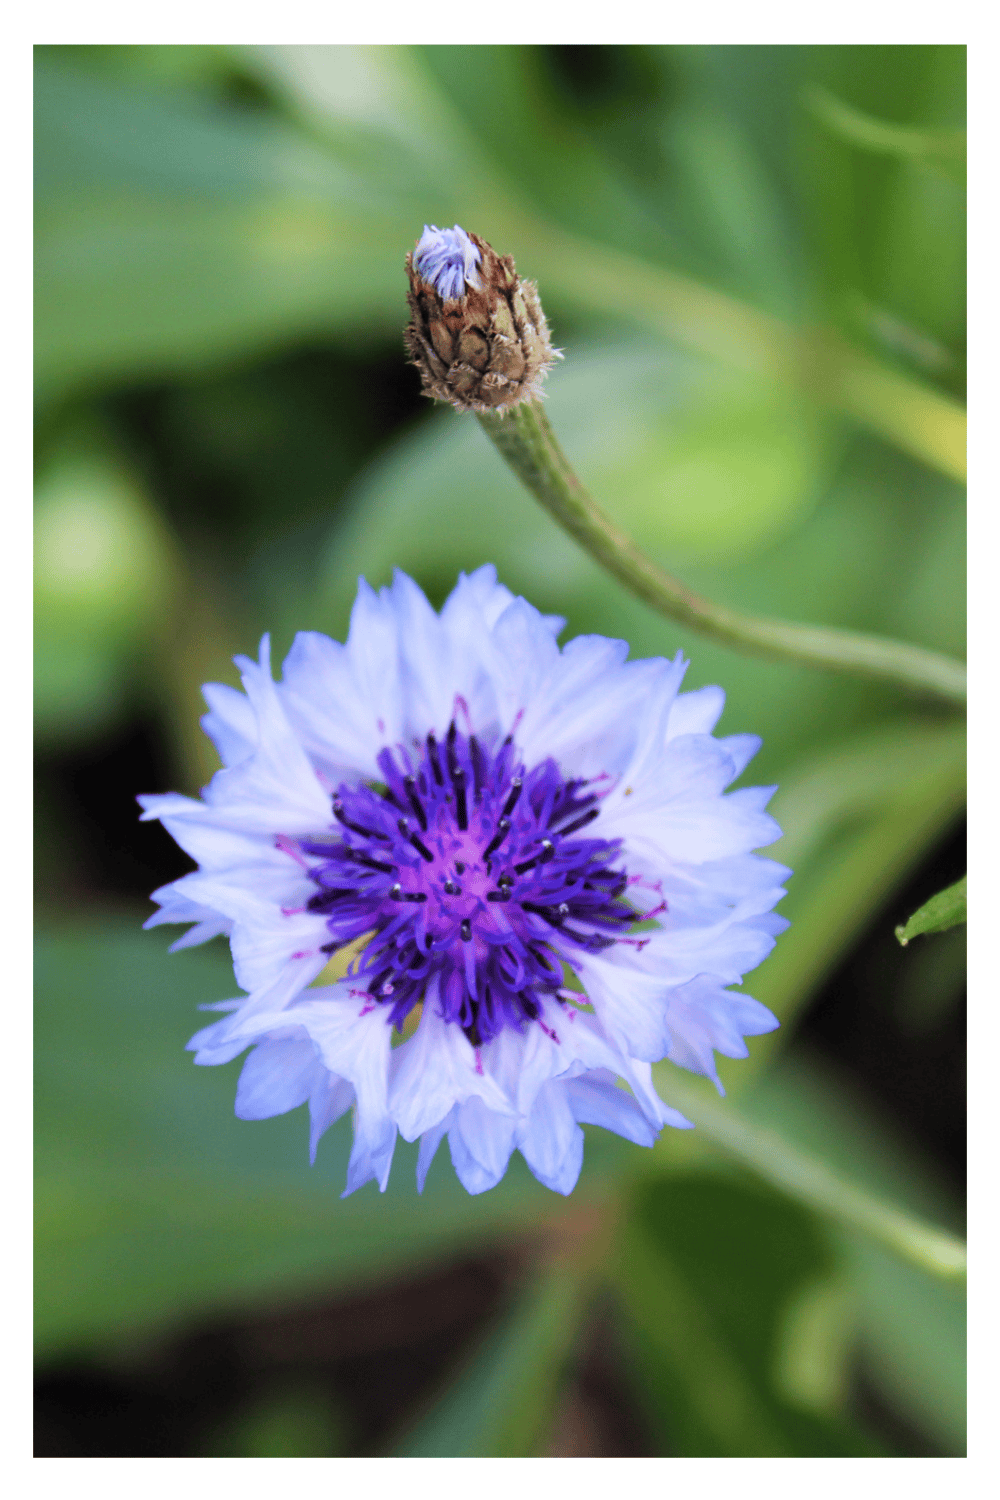
Bachelor’s buttons, also called cornflowers, produce compact seed heads that are easy to overlook.
Wait until the flower center and surrounding bracts are dry and brown. Break the head apart over a tray and look for firm seeds with a small tuft or fringe at one end.
The seeds can hide among dried petals and chaff, so using white paper underneath makes them easier to see. Gently blow or sift away the lighter debris.
Bachelor’s buttons are excellent candidates for fall or early spring sowing in many climates. They also self-seed freely when some heads are left standing.
If you are saving more than one color, collect and label them separately. The resulting plants may still cross, but sorting the seed gives you a better chance of maintaining distinct color groups.
11. Snapdragon
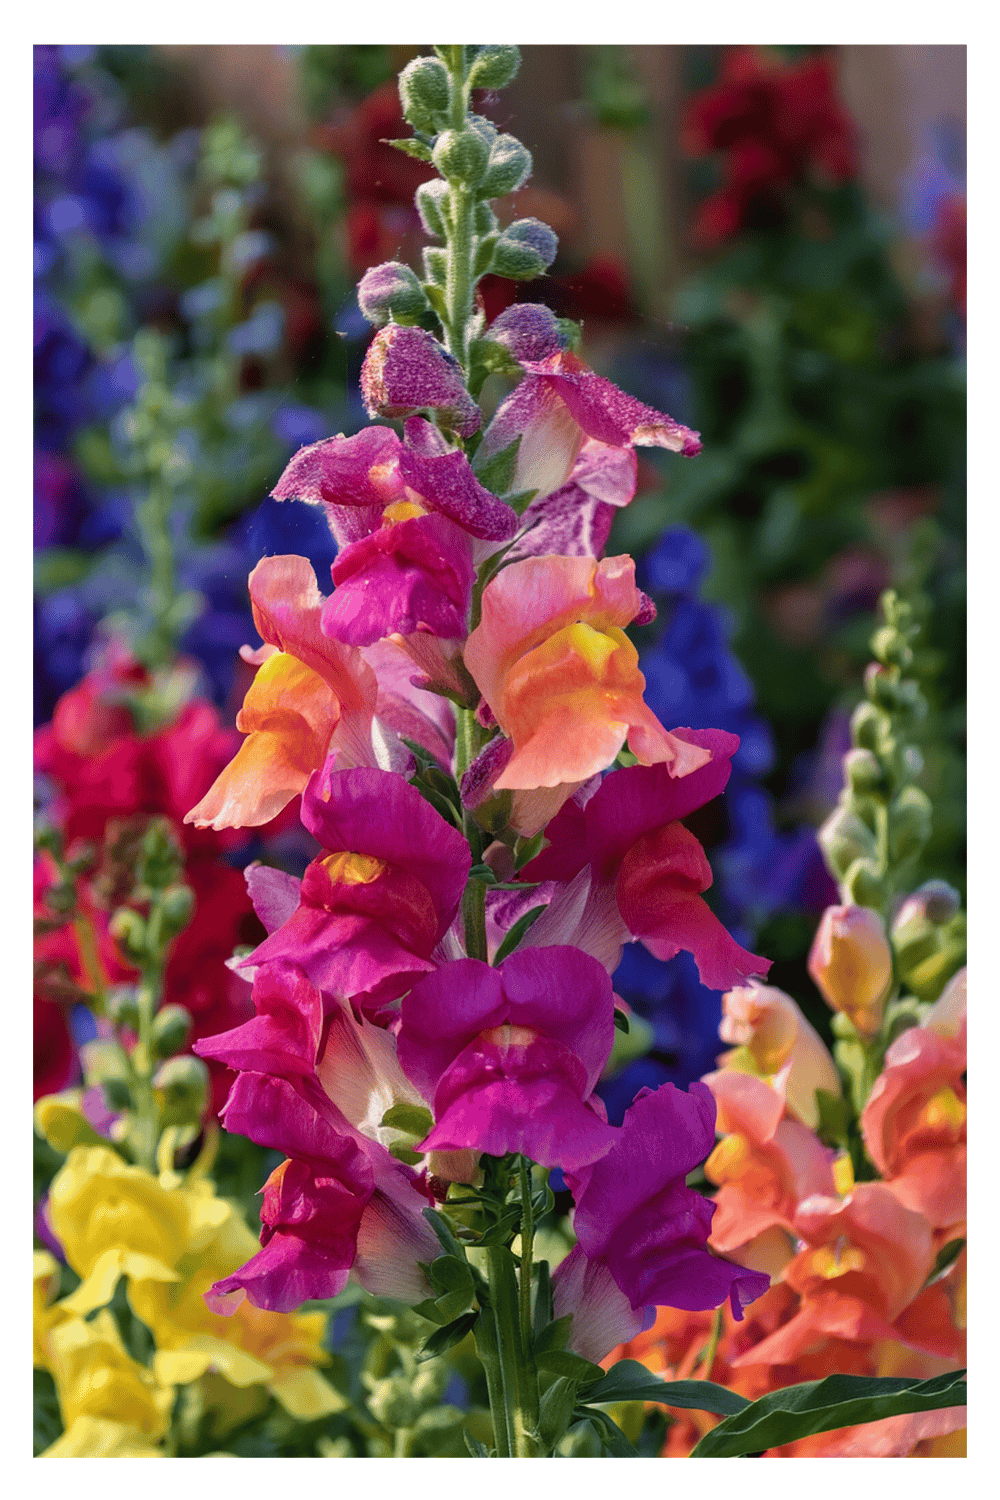
Snapdragon flowers leave behind small, rounded capsules that look a little like tiny skulls when they dry.
Wait until the capsules turn brown and the stem beneath them begins drying. Clip the stalk over a bag so the tiny seeds do not disappear into the soil.
Once dry, shake the capsules over a folded piece of white paper. The small, dark seeds should fall through the natural openings. Fold the paper down the middle and use it as a funnel to pour them into a labelled envelope.
Snapdragons may return from seed, but the seedlings can vary considerably, particularly when you grow hybrids or several colors together.
For growing and planting information, see my guide to growing snapdragon flowers in a cut flower garden.
12. Coneflower
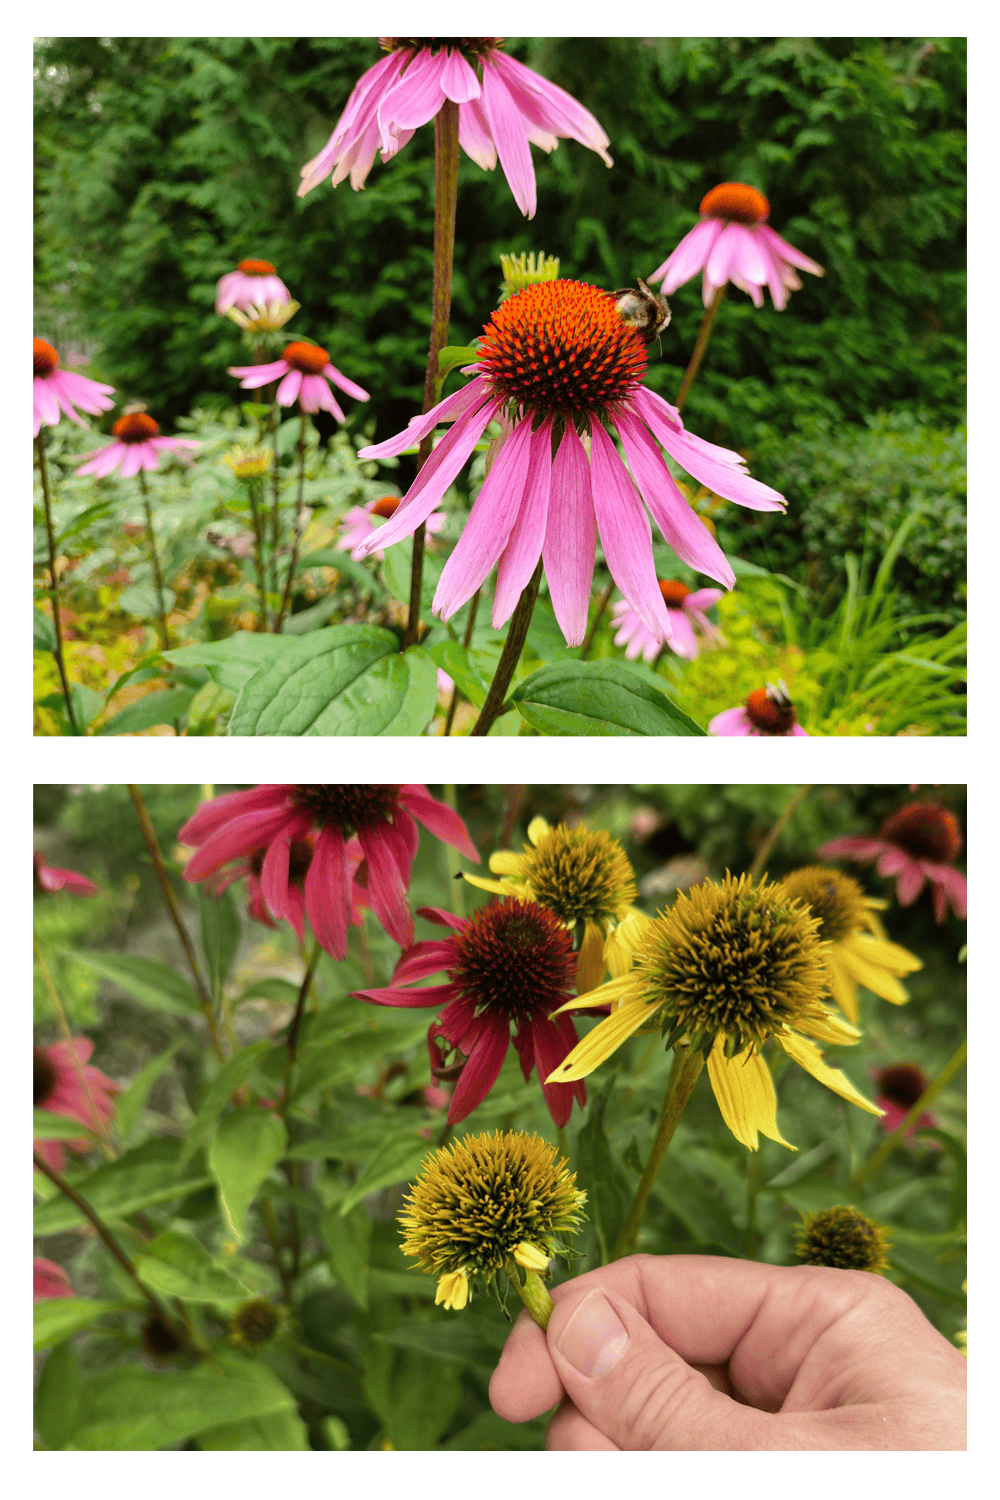
Coneflowers earn their place in the fall garden long after the petals disappear. Their dark, prickly centers add structure and provide seeds for birds.
Allow the cone and supporting stem to become brown and dry. Cut the head directly into a paper bag, preferably while wearing gloves—the dried cones can be surprisingly sharp.
After additional drying, rub or break the cone apart over a tray. Coneflower seeds can be mixed with a considerable amount of chaff, so take your time separating the heavier, developed seeds.
Do not harvest every cone. Goldfinches and other birds will continue feeding from them well into the cooler months.
Some coneflower seeds germinate better after exposure to cold, moist conditions. Winter sowing can provide this treatment naturally; the University of Minnesota Extension includes purple coneflower among its recommended winter-sown pollinator plants.
13. Black-Eyed Susan
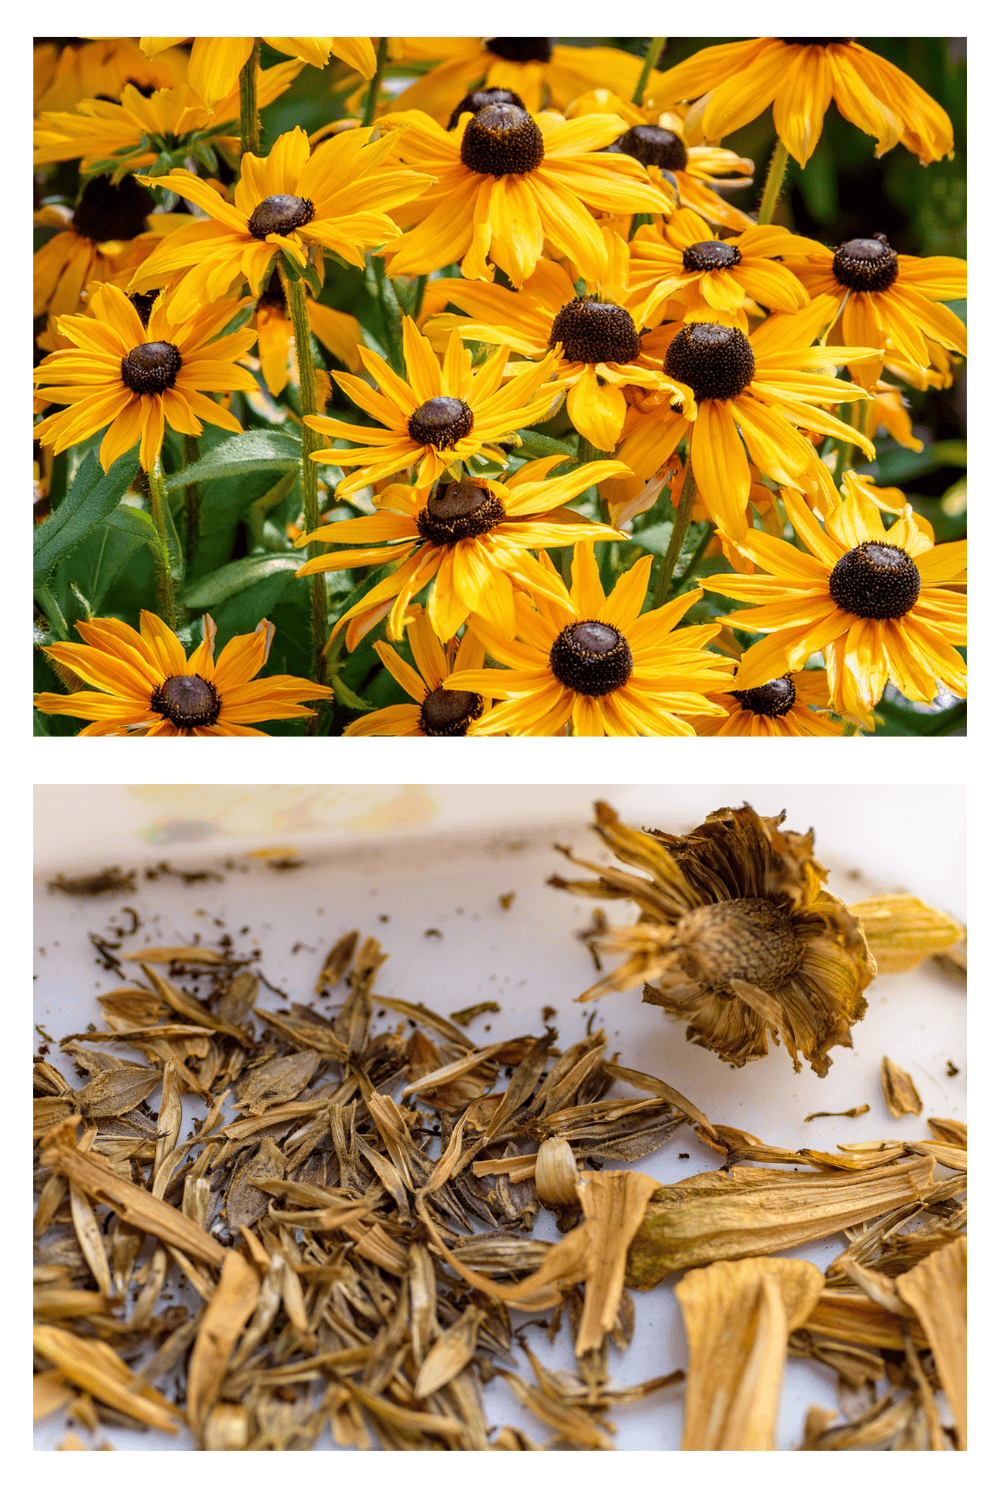
Black-eyed Susan seeds are tiny and can be difficult to distinguish from pieces of the dry cone.
Wait until the central cone and the stem beneath it are completely dry. Clip the head into a paper bag, let it dry further indoors, and then break it apart over a shallow tray.
Rub the material gently between your fingers. The small dark seeds will fall out with the chaff. A fine sieve can help, but do not worry about achieving a perfectly clean commercial-looking seed packet.
Like coneflower, some Rudbeckia species benefit from a period of cold, moist conditions before germination. Confirm the species you are growing before choosing a sowing method.
Leave several seed heads standing for birds. Black-eyed Susans also add great texture to beds that might otherwise look bare after frost.
14. Hollyhock
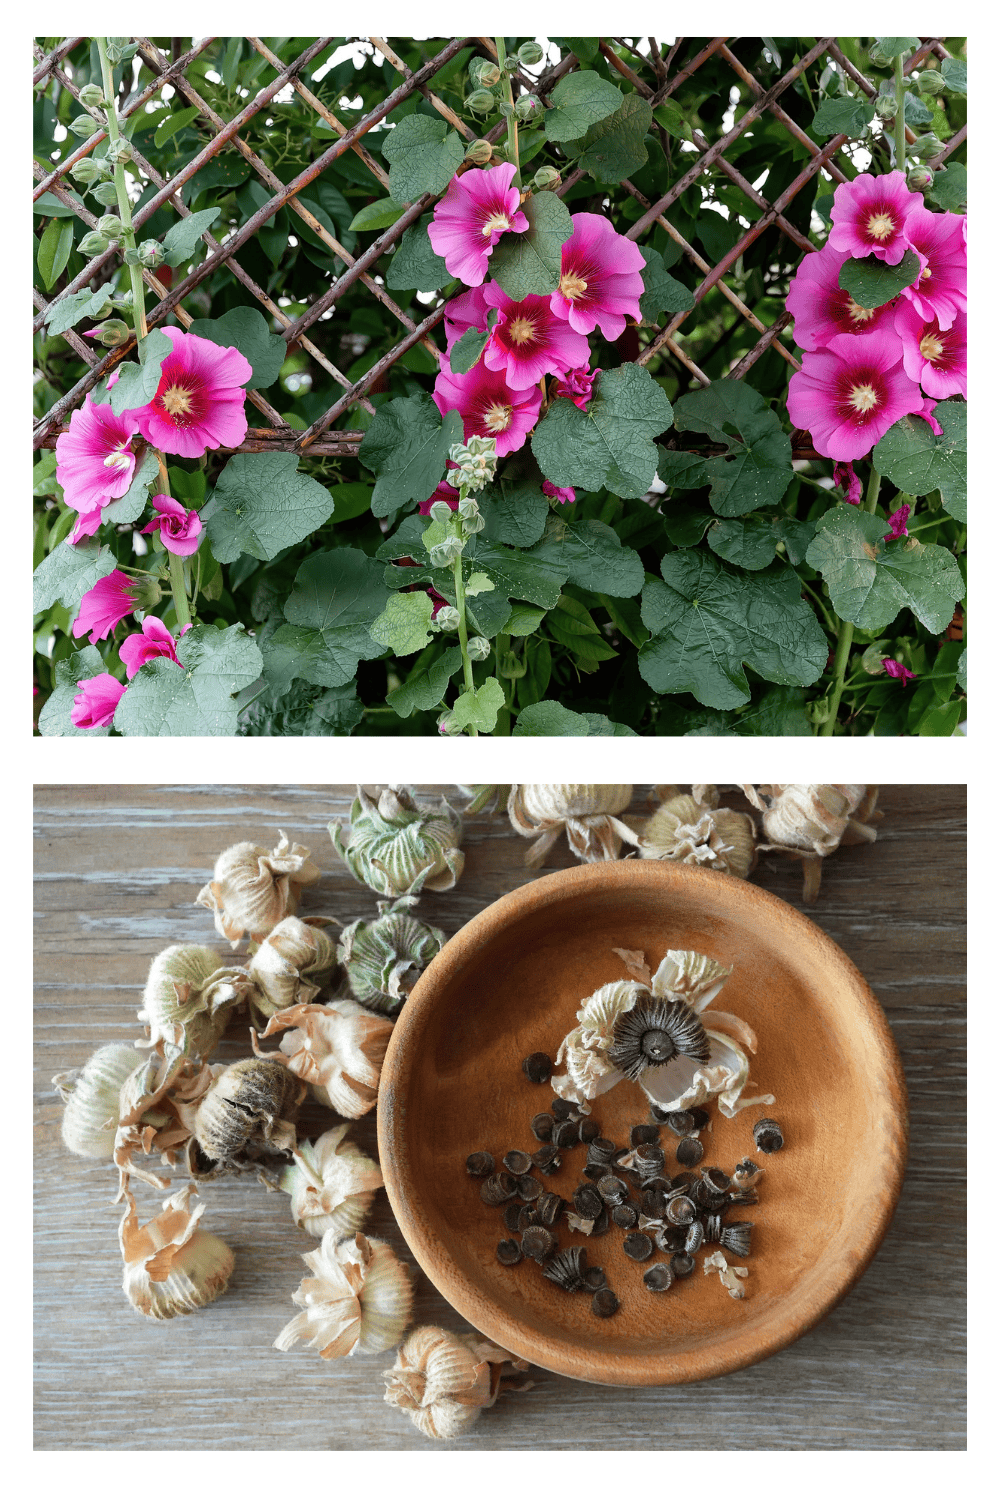
Hollyhock seeds form inside round, flattened disks arranged up the flower stalk.
Wait until the pods turn brown, dry, and papery. Pull one open and you will find flat, wedge-shaped seeds arranged in a circle, almost like slices of a tiny pie.
Remove the seeds, discard damaged material, and spread the rest out to finish drying. Hollyhocks cross easily, so seedlings collected from a mixed planting may give you new colors.
Many hollyhocks behave as biennials or short-lived perennials. Seedlings may spend their first season developing leaves before sending up their tall flower spikes the following year.
If you want to build a taller cottage garden border, see my guide to growing fuller hollyhocks with more flowers.
15. Coreopsis
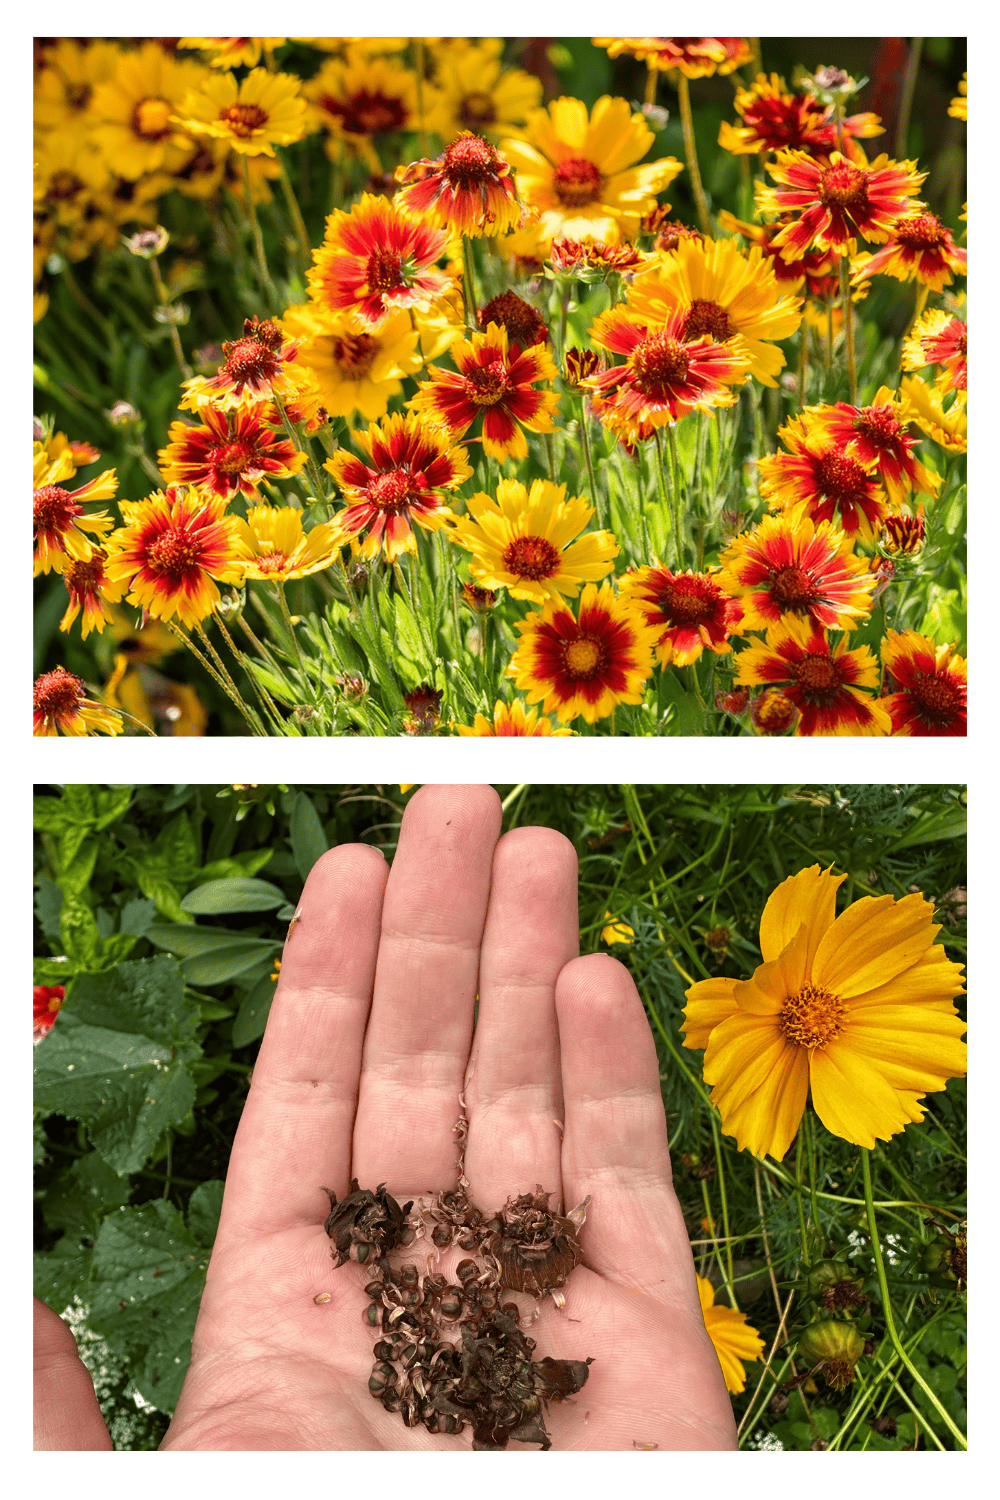
Coreopsis produces masses of small seed heads, making it possible to gather plenty of seed from only a few plants.
Allow the flower head and short section of stem beneath it to become brown and brittle. Clip the heads directly into a paper bag before the seeds scatter.
Once dry, rub the heads over a tray and remove the larger pieces of plant material. Seed shape varies among Coreopsis species, so it helps to identify your plant before deciding which pieces to keep and how to germinate them.
Some perennial types benefit from cold treatment, while annual forms may be sown without it. Keep the species or cultivar name on the packet instead of labelling everything simply “coreopsis.”
Coreopsis is also a valuable late-season flower for pollinators. You can find it alongside other useful plants in my guide to late-blooming perennials that support pollinators before winter.
How to Dry Flower Seeds Properly
Collecting seed is only half the job. The most common mistake is packaging it before all the moisture is gone.
Here is the process I use:
- Keep each plant and variety in a separate labelled paper bag.
- Spread seeds or seed heads in a single layer on a plate, tray, or sheet of paper.
- Place them somewhere dry, shaded, and well ventilated.
- Open dry pods and capsules after they become brittle.
- Remove petals, stems, insects, and as much chaff as practical.
- Discard anything that looks moldy, soft, or damaged.
- Package the seeds only when they are completely dry.
Avoid drying seeds in strong direct sunlight, which can produce excessive heat. Do not rely on one fixed drying period, either. Tiny poppy seeds may dry quickly, while thick nasturtium seeds and intact pods require more time.
How to Store Saved Flower Seeds
Place completely dry seeds inside labelled paper envelopes. Record:
- Flower name
- Species or variety
- Flower color
- Collection location
- Collection date
Place those envelopes inside an airtight jar or storage container. A silica-gel packet can help absorb residual moisture.
Store the container somewhere cool, dark, and dry. The RHS recommends storing properly dried seeds in an airtight container with a desiccant and notes that refrigeration around 41°F can extend the storage life of many seeds.
Keep the container sealed while it returns to room temperature after refrigeration. This reduces the chance of condensation forming directly on cold seeds.
Should You Sow Saved Seeds in Fall or Spring?
There is no single answer for every flower on this list.
Hardy annuals, self-seeding cottage flowers, and many native perennials can benefit from fall or winter conditions. Tender flowers such as zinnias, marigolds, cosmos, nasturtiums, and sunflowers are generally held until warm planting conditions return.
Your best sowing window depends on:
- The species
- Your USDA zone
- Your average first and last frost dates
- Whether the seed requires cold stratification
- Whether the plant tolerates freezing
- Whether you are sowing outdoors or starting indoors
When in doubt, label and store the seeds, then research that specific species before planting. Saving them correctly gives you time to make the right decision later.
Common Flower Seed-Saving Mistakes
Avoid these problems when you make your fall collection:
- Harvesting green or soft seed heads
- Collecting immediately after rain
- Waiting until every seed has scattered
- Saving seeds from diseased plants
- Sealing damp seeds in plastic
- Mixing unlabelled varieties together
- Assuming hybrids will grow true
- Leaving too much chaff in storage
- Removing every seed head needed by birds
- Treating every species as though it has the same germination needs
Final Thoughts
There is something satisfying about turning the end of one gardening season into the beginning of the next.
Instead of seeing every brown seed head as fall cleanup, start looking at it as a packet of possibilities. Marigolds, zinnias, cosmos, calendula, and nasturtiums are easy places to begin, while coneflowers, black-eyed Susans, and coreopsis can help you expand a pollinator garden without buying trays of new plants.
Take a paper bag and a marker with you the next time you walk through the garden. You may be surprised by how many of next year’s flowers are already waiting to be collected.