

The secret to a healthy, thriving worm-farm is this quick check-in. Honestly – it’s so easy, I would never have thought to write it up but time and again I am walking people through it because its the one thing missing – the thing standing in the way of success.

The secret to a healthy, thriving worm-farm is this quick check-in. Honestly – it’s so easy, I would never have thought to write it up but time and again I am walking people through it because its the one thing missing – the thing standing in the way of success.
The aim of the check-in is to be alerted to early signs of poor health. Address them before things go awry and no more worm farm problems for you!
When to check-in
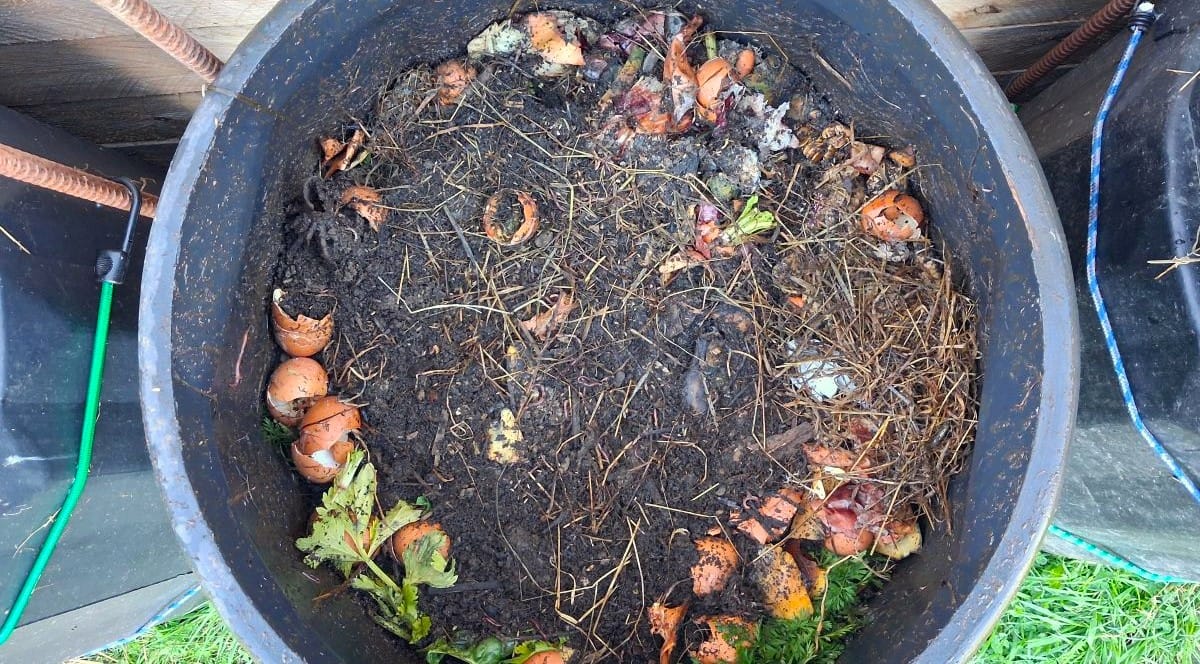
Check-in every time you add food – don’t just dump and run! Take the 2 minutes. And don’t forget to check-in when you aren’t adding food i.e. when the bin is full and being left to mature, or has slowed right down in the cold.
How to check-in
Your first clue as to the state of your worm farms health, will waft up to greet you. Do you recoil, or not?! If it stinks (it should never stink!) – my worm farm FAQ’s will help you out.
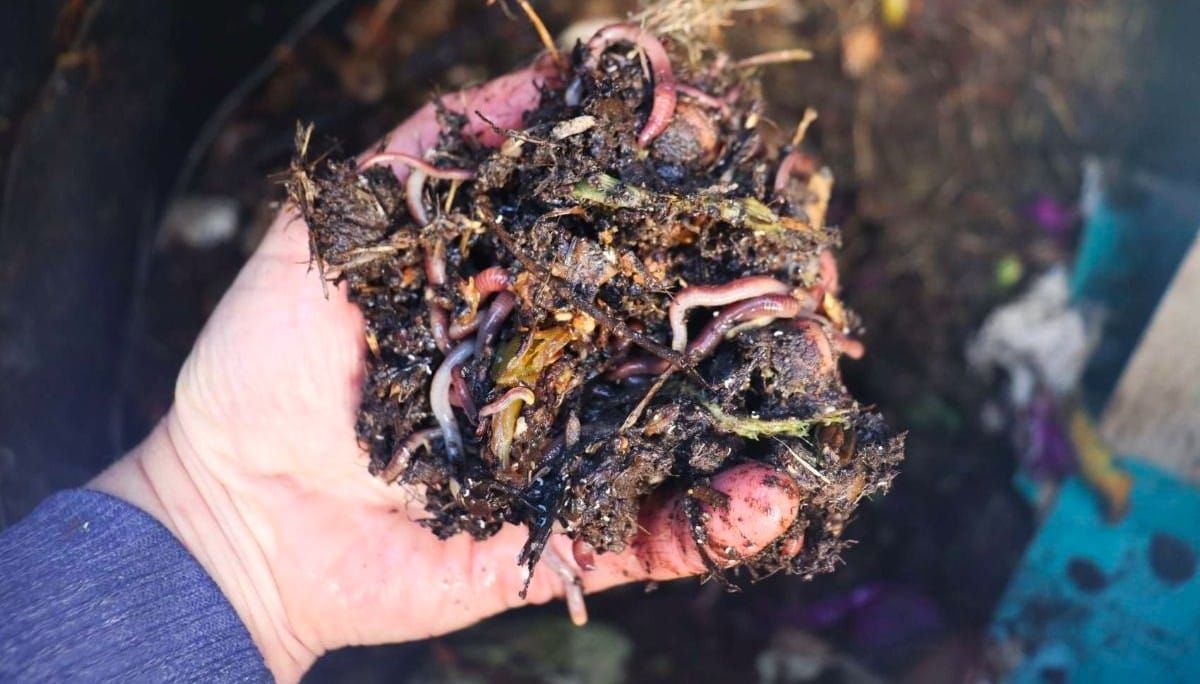
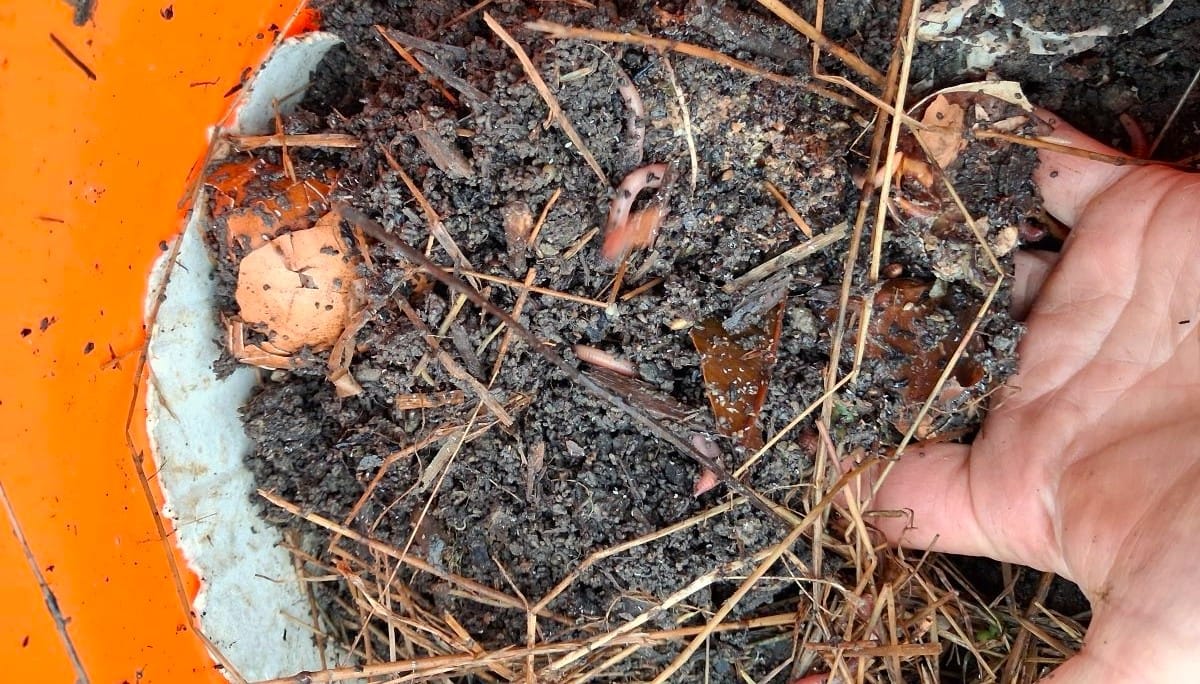
Next clue is when you lift the cover of cardboard/ hay – at this point you should feel some warmth, and see active clusters of worms working the food scraps. They will quickly disperse when the light hits them – diving into the dark.
Then feel how the farm is – don’t be squeemish! For best health, cover these 3 bases:
1.Barely moist. Meet the goldilocks point of neither wet nor dry by
- choosing a free draining location if you have an in-ground or on the ground farm.
- never watering your farm, unless in the rare event it dries out.
- adding shredded paper/ egg cartons/ cardboard to soak up excess moisture.
2.Toasty warm – neither hot nor cold.
- Locate your farm where it will be warm in cold weather, e.g. I segue worm buckets into the greenhouse over winter; and cooler in hot weather, e.g. bury buckets a little deeper or locate where it gets morning sun only. You’ll know you’ve got it right when it feels warm when you open the lid.
- Maintain lots of insulation in your cover, especially in hot or cold weather. Use several layers of cardboard, egg cartons, a generous wodge of organic hay, a folded up old blanket …..
3.Fed just right – neither under or overfed. Lots of detail about what to feed, how and when in my wormfarm FAQs.
- Little and often is best.
- As are fresh food scraps, broken up into small-ish bits.
- Don’t add more food until most of the existing food is gone. In a new farm this will take a while, and when its cold – same, same.
Keep these things sorted and worms will breed like billy-oh, food scraps will be consumed without putrefying, and wondrous, nutritious vermicasts the end result.